Author Archive

Introduction to the Visual Automation Builder

You can build an automation workflow by clicking on the Automation option from the left menu bar. Automation can be one or a collection of workflows that you can create to automatically target contacts, using a simple drag and drop workflow designer.

If you are building an automation from scratch, you can click on Blank Automation. This would take you to the workflow editor. On that screen, you can name your automation at the top, and to the left, you can find your Triggers and Actions elements.

Triggers define what starts the automation, while actions are the events that take place thereafter. Filters and rules can be added in between actions so that you redirect specific user who takes specific actions to a different path.

To start your automation, you should always begin with a trigger element. Click on your preferred trigger from the left panel and drop it onto the grid. Double click on the trigger to preview the settings and configure any filters you want to set:

After finishing setting up the Trigger, you can start adding your sequence of actions. Ex: add a confirmation email to be sent out to users who sign up to your specified list. You have to click on the Send Email under Actions and drag it to the right of your Trigger. Double click on the Action to select the proper automation message or create a new one.

In the advanced settings, you will have the option to decide what to do in case an action fails to execute within 24 hours of its schedule.

The last step would be connecting the Trigger to the Action. To do that, click on the trigger element, press on the black arrow head and drag it to the Action that should execute next.

You can also add Delays in between ActionsDelays are found within the Actions option list under Time Delay. Those as well can be configured by double clicking them and choosing the proper time to delay the next Action.

Additional action conditions are available when you double click on the connector. This will allow you to check for more specific case scenarios before executing an action.

Once you have your workflow ready, you can click on Actions in the top right and choose Save and Exit. Once you are outside the editor mode, you can activate the automation. (You could also activate the automation from inside the editor by clicking on Actions > Publish)

Note: If you are using the Specific Date trigger > This gets triggered on a specific date. You’ll need to specify the target list inside this trigger, and whether this trigger will execute once vs recurrent. Please be aware when using the recurrent option that the actions will execute each day, on the same user. So to avoid duplicate sending, you can use a flag within your fields set to turned off when the automation starts and get turned on once the automation has ended.

Get Started

Zapier

Zapier is an online automation tool that connects different apps together, and you can use it as well with your VBOUT account. Once you signup for an account on Zapier, you will be able to create Zaps (an automated workflow between apps) and connect your VBOUT account (through our VBOUT Zapier app) to your other favorite apps. For example, you can automatically add your new Facebook Leads Ads leads to a VBOUT list of your choice, which saves you a lot of manual work. You can explore our Zapbook which includes a few templates in here.

To get started you need to have:

  1. A Zapier online account
  2. Your VBOUT account
  3. Any other third party app you’d like to connect to VBOUT using Zapier (Ex: Google Sheets, Calendly…)

To connect your VBOUT account to your Zapier one, you need to get your VBOUT API User Key.

First, you need to sign in to your Zapier account and create a Zap.

Then, choose a Trigger.

Once, you set up your trigger, choose an action and set it up.

Once you are done, save and publish your Zap.

Below a list of VBOUT triggers and actions that you can use in Zapier:

Triggers:

  • New Contact Property Change
  • New Email Campaign
  • New Contact
  • New Social Media Message

Actions:

  • Add Contact to List
  • Add Contact to List (Email Not Required)
  • Add Tag to Contact
  • Add Custom Event to a Contact
  • Create Email Marketing Campaign
  • Create Email List
  • Remove Tag From Contact
  • Create Social Media Message
  • Unsubscribe Contact
  • Update Contact

Get Started

Creating Email Campaigns

To create a new email campaign, go to Email tab -> Campaigns, and click on Create Campaign. The wizard will walk you through the 4 stages of the campaign creation:

  1. Setup: This is where you specify the campaign details like the campaign name (used internally), subject line, the type (Regular vs A/B testing), and other details. If you are setting up an A/B testing campaign, follow the additional options prompted on the screen to complete the AB testing criteria.
  2. Lists: On this step, you can choose who are you targeting between your Lists, your Audiences, and your Folders. You can always choose a combination of all. If duplicates were detected, the system will send the contact one email only.
  3. Design: On this step, you have the option to start your email from a ready template, use a prebuilt template, recycle an old template or create a new one from scratch. If you choose New Design you will have the option to either create a simple text email via Basic Editor or to design your own via Template Designer. 
  4. Summary: This is the last step of the campaign where you can review your setup, run a spam check on your campaign and send a draft email to yourself.

Once you confirm that the template is ready, choose to send the campaign now or sometime in the future. You will also have the option to save the campaign as a draft to continue working on it at a later time.

Note: The system always uses your account time zone to send out the campaign.

Get Started

Creating Lists with Forms

Creating Lists and fields

Forms, Embed and Form settings

Creating your lists is a fundamental step in getting started using your account. Follow these instructions for creating and configuring lists:

1.  Create a list

  • Click on the Contacts option in the left sidebar.
  • Navigate to the Lists tab at the top.
  • Click on the Create List button.

In the popup that appears:

  • Provide basic details like the list name, sender email address (From email address), sender name, and reply-to email address. These sender details are crucial for sending confirmation emails to subscribers who sign up.
  • Optionally, add details about the list to remind users why they are receiving the email.
  • Click Create to finish.

2. Configure List Fields:

After you create your list, use the Form Builder to set up fields for records.

Go to your lists view, find the list you want to configure, and click on Fields & Form.

On the next page:

  • Edit list/form fields by adding new ones or deleting/editing existing ones.
  • Single-click on the type of field you want from the left options to automatically add it to the form.
  • Customize premade fields like First Name, Last Name, Email, and Phone by renaming them or specifying whether they are required.
  • Save your form by clicking Save Form in the bottom right.

3. Get Embed Code (Optional):

If you plan to embed the form on your website, click on the Embed Code button on the top of the form settings page.

4. Configure Form Settings:

Click on the blue Settings button next to the Embed Code button.

Subscription settings includes:

    • Allow Multiple Submissions from the Same Contact: Enable this option if you want a contact to submit the form or subscribe to the list multiple times without any restrictions.
    • Email Confirmation Required (Double Opt-In): Activate this setting to require contacts to confirm their email addresses by responding to a confirmation email. This adds an extra layer of verification to ensure the validity of the provided email addresses.
    • Turn On Autoresponder: Activate the autoresponder feature to automatically send a predefined response or message to contacts immediately after they subscribe or submit a form.
    • Notify Admins of New Contacts: Enable notifications to alert administrators or designated individuals whenever a new contact subscribes or submits a form.
    • Redirect After Subscription: Specify a URL to redirect contacts to a particular webpage after they successfully subscribe or submit a form. This can be a thank-you page or any other relevant destination.
    • Don’t show success message after subscription: Hide the success message after the contact’s subscription.
    • Override Error Messages: Enable this option to customize or replace default error messages with messages that better suit your application or user interface.
    • Update Field When New Value is Empty: Activate this setting to allow fields to be updated even if the new value provided is empty. This can be useful in scenarios where updating a field with an empty value is permissible.
    • Auto Tag When a Contact Joins the List: Automatically assign predefined tags to contacts when they join the list. This helps categorize and organize contacts based on specific criteria or characteristics.

Opt-in communications:

  • Edit the content of the email subscribers receive when signing up.
  • Choose the Subject line, edit From, Reply-to, and Name fields, and create the body of the email.
  • Edit the Success/Failure message after form submission.

Click Submit in the bottom right to save changes.

Check this article to see all the type of fields you can use in a form/list.

Get Started

Website Tracking Setup

Tracking the engagement of your contacts on your website is crucial for effective analysis and functionality within the platform including Conversion Goals, Lead Scoring → [Web Engagement], Popups, Audiences→ [Web Engagement]. Follow these steps to add your website URL and generate a custom tracking code:

Adding your Website

• Click on your profile icon located in the top right corner.
• Select Settings from the dropdown menu.
• Navigate to the Website Tracking Code tab on the left sidebar.
• Click on the Add Website button.

 Entering Domain URL:
• A popup window will appear prompting you to enter your domain URL.
• Ensure to input the exact path to the domain or subdomain using HTTP or HTTPS.

• Once the domain is added, the system will generate a custom tracking code.

Inserting Tracking Code:

• Install the generated code either before the body tag or inside the footer of each page on your website.
• This can be achieved by accessing the source code of your website.

Verification Process:

• Click on Verify Installation to confirm that the code was installed correctly and that tracking is active.
• If the installation was successful, a green checkmark will be displayed next to your domain name.


Get Started

Creating Posts

When you want to Post for Social media, you have 3 options:

  • Post now: to immediately post.
  • Schedule: to schedule a date for posting.
  • Custom Posting: to schedule the same post on different dates.

  1. Access your Social Media Queue and click on Compose.
  2. Choose your social profiles to post to.
  3. Add your post content.
  4. Add your link. This is important if you want to track the click engagement from the different social media channels.
  5. Add your media file, you can either upload a new file or access your saved media inside the File Manager. You can also use the Giphy tab or Open Source Image/video search from Pixabay to get access to thousands of media options for your posts.
  6. Confirm whether you’d like to immediately publish your post by clicking Post Now, Schedule it to post on one specific date, or schedule it to post on a specific custom dates (by choosing Custom Posting).

If you choose Schedule, you will need to choose the date and time.

If you choose Custom Posting, you will need to specify the dates on which the post should be published.

Once your post has been scheduled successfully, you will see it on your social calendar page.

Get Started

Domain Sender Verification

Before sending Email Campaigns or using the Email Action under Automation, you must add and verify a sending domain within the  platform. This action is needed for security and spam compliance purposes.

 You can add a new sending domain by clicking on your profile icon in the top right, and selecting Settings. On the Settings page, select the Domain Sender Verification tab from the left sidebar, and then click on the Add Sender button.

Next, you will be presented with a popup window to enter your sending domain and choose your DKIM length.

After you save, you will see your sending domain on your dashboard, however, this doesn’t mean you are ready to start sending. You still need to complete the verification process which involves adding an SPF TXT record, a DKIM TXT record, and a DMARC.

You can click on Settings to retrieve the actual record to be added on your DNS portal side. This requires access to your Domain Name Server (DNS).


SPF Settings Example:

All you need to do is adding an SPF record to your DNS, using the Hostname, Type, and  Value.

Important note: If you already have an SPF record, you can’t add another one, in this case, you will need to edit your current SPF record and add only the highlighted part which is include:sparkpostmail.com
For example, let’s say you have this: v=spf1 a mx ptr include:bluehost.com ?all already verified in your DNS, then you will add only the highlighted part.
It will look like that: v=spf1 a mx ptr include:bluehost.com include:sparkpostmail.com ?all


DKIM Settings Example:

As for the DKIM, We will do exactly what we did for the SPF record, we will be adding the DKIM record to the DNS.
Important note: Even if there is a DKIM record in your DNS, you can create a new one and add your records.

For GoDaddy, do not put the domain name at the end of the Hostname when you are adding the DKIM record.
If we want to do that for the example/screenshot above, the Hostname will look like that: scph118._domainkey.


Once you add the SPF and DKIM records for the domain click on Test to check if your DNS changes have propagated across the web. Please note that these changes sometimes take up to 24 hours to propagate.

Once the domain has been verified you will notice a green check mark next to the sending domain indicating that the domain will be used as a sender.

NOTE: If you decide not to add a domain name, you can only send test email campaigns through the platform where the FROM EMAIL sender on your campaigns will be replaced with a system default email, ex: dan.marketing.com@vbt.io.

DMARC Settings Example:

Creating a DMARC policy is required to be fully compliant. For your convenience, the platform has a built-in DMARC policy check and generator.

To check and create a DMARC policy, go to Settings > Domain Sender Verification, add your Sending Domain, and click on Generate:

Once you click on the Generate button,  a default record will be created for your convenience. You can edit this record by clicking the Edit icon.

The changes that you make to “DMARC policy type”, “Email analysis percentage”, “Email aggregate DMARC reports to”, and “Email forensic DMARC failure reports to” will be reflected in the Value:

DMARC policy type: There are three types of policies, None, Quarantine, and Reject.

  • None: The mailbox provider won’t take action for emails that fail DMARC.
  • Quarantine: This will make the mailbox providers treat all emails that fail DMARC as suspicious. Quarantining an email delivers it into an area outside of the inbox, such as the spam or junk folder.
  • Reject: The mailbox providers will reject all emails that fail DMARC.

Email analysis percentage: The percentage of emails that will be checked.

Email aggregate DMARC reports to: The aggregate DMARC reports contain information about the authentication status of messages sent on behalf of a domain.

Email forensic DMARC failure reports to: A forensic report is essentially a copy of the email that failed DMARC validation and is typically sent immediately after the failure.

Once you finish, click on the value to copy it to your clipboard:

Once you finish, add the entry to your DNS record and click Verify.

Here’s an example:

Depending on the DNS server, changes might take anywhere from few minutes to 24 hours to reflect. If the verification does not work after that time, please contact support for further assistance.

To learn more about spam compliance and enhancing deliverability, check out this great resource.

Get Started

Managing the Social Calendar

The Social Calendar allows you to observe your posts in a calendar view. Below are some details to help you understand your calendar functionality:

  • Successfully published posts will appear with a ✓ check-mark.
  • Posts with problems posting will appear with an X mark.
  • You can change your view preference to Weekly based, Monthly based or List based.
  • You can navigate backward and forward on your calendar to view older and future posts. The today option will bring you back to your current date.
  • You can apply filters by profile(s) or by group(s) to view posts associated with these accounts.
  • Apply a full-screen mode for full real estate visibility.

Editing Scheduled Posts

If you click on any scheduled post, an editing window will popup which allows you to edit your post and update its content. You can also change the date. Note that you can recycle older posts by modifying their date.

Get Started

Importing Contacts from an Excel

After creating your lists on your account, you have the option to import your database of contacts, to your lists, by using the Mass Import feature under the list Options. To access your mass import, follow the steps below:

  1. Go to your Contacts and select Lists tab from the top.
  2. Choose the list you’d like to import users to and click on Mass Import from the drop down option.
  3. A wizard popup will show where you can customize the import process and do your field mapping. The first step includes the below:
    –  Specify the list name, which will be already pre-populated.
    – Specify Suppressed domains, in case you want to suppress domains from the imported contacts.
    –  Specify if file headers exist on your Excel file (ex: Name, Email, Company, etc…).
    –  Choose to update or skip contacts if they were already on that list.
    –  Choose to apply a default tag to the imported contacts.
    –  Specify an admin email address to notify and send the import report.
    –  An option to validate the email address uploaded for more details check this article.
    The file to upload must be a CSV with a maximum size limit of 5 MB of data.
    Make sure the file is properly formatted and only includes the columns you want to import.
    Note: Random characters, badly formatted emails, and missing required fields can break the upload process.
  4. After uploading the file, you can proceed to the next step where you map your Excel file columns (NAME ABOVE THE FIELD) to the fields you have created on your account under that list settings.
  5. If you haven’t created the fields on your list to match your imported list columns, you can create them by choosing one field type under the Create New Field below.

  6. Once you are ready, you can click on Import and the process will start.
  7. An email summary of your import will be sent to the account admin email.

NOTE: During the import process, the system scans every single record and matches it against existing fields, unsubscribe records, duplicates, bad formatting, required fields and more. This process can take a little bit of time. Make sure to check your file before uploading to make sure the data was properly formatted. If you are having an issue with the import, you can contact our support team and they will assist with the process.

Get Started

Mass Posting

You can use the Mass Posting feature to upload a large number of posts to the platform.

Below are the steps:

  1. Access your Social Media Queue and click the drop down next to Compose. The Mass Posting option will appear:

  2. Choose profiles to post to:
  3. Choose Track URLs option to substitute URLs in posts with trackable links or leave URLs as they are.
  4. Download the sample template from here:

  5. Upload your excel with the ready posts. Please note that the supported format for mass posting on social media is mm/dd/yyyy hh:mm. If you chose to generate trackable URLs, a progress will appear as the system generates the trackable links.

    You can add images, videos or short videos while mass posting, by adding the media path in the third column of your CSV file.
  6. Preview the upload summary with any errors from the upload. You can navigate to the post with the issues and fix them. Most of the time, issues are related to bad date formatting or invalid characters from the upload:

  7. Make any necessary edits to the uploaded posts, including the post preview, URLs and media. Use the Preview Post navigation to get to your designated post.

  8. Click on Continue Mass Posting:
  9. You will be prompted with one final review and Confirm prompt:
  10. A confirmation email will be sent to the account administrator with a summary of the upload.

Note:

  • Mass Image Upload is not supported. However, the system will generate a URL preview when links are available in posts.
  • Mass Posting to Pinterest is not currently supported.
  • Posts must be scheduled at least one hour ahead from uploading.
  • Posts created via Mass Posting will be tagged for your own reference.

You can preview Mass Posting history and UNDO your upload by clicking on the Upload History from the dialog box:

Get Started

Creating a Landing Page

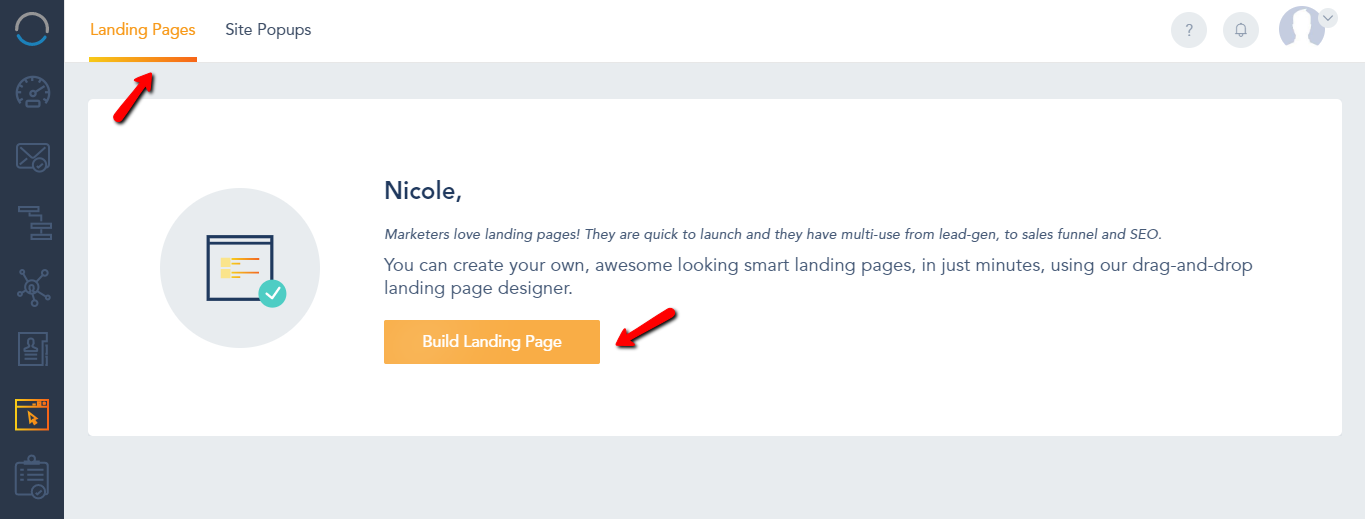
To create a landing page, click on Builder from the left sidebar and then click on the Create a Landing Page button.

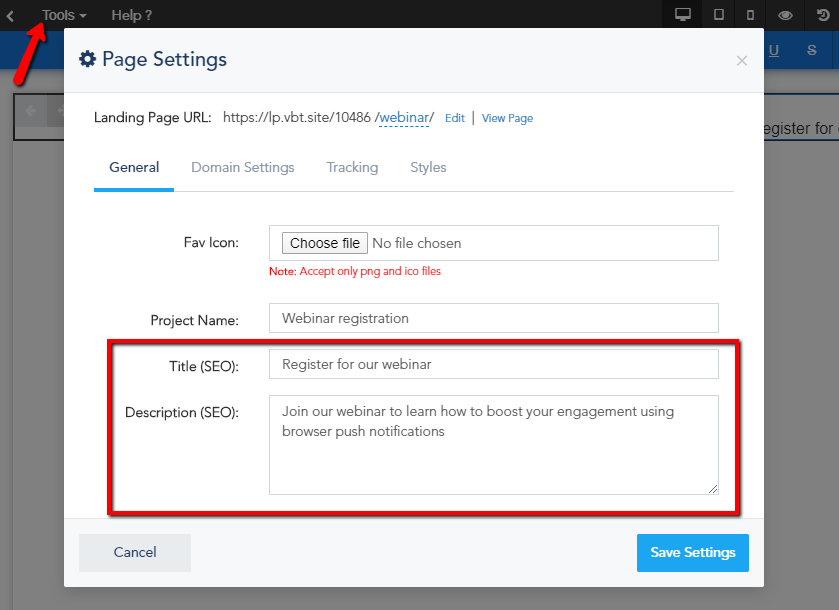
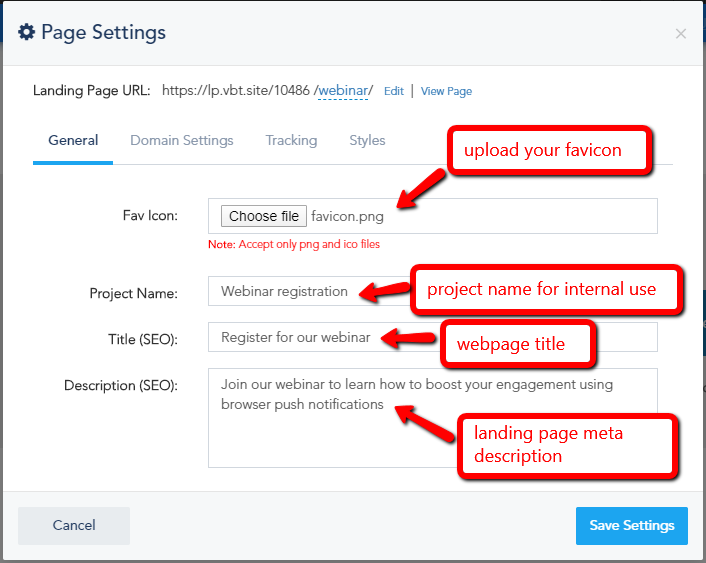
The first step is giving your project a name, for example it could be “August Webinar”… You can also give your page a title (this one is public) and fill out the meta description as well for SEO. The system also allows you to upload your own Favicon for your landing pages. Hit Save Settings when you are done.

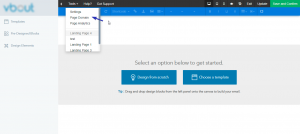
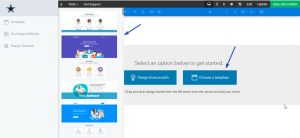
Next you can start building your landing page. To do that, from the left menu, you have three options:

  1. You can select Templates, this will present you with a group of landing page full templates that we have built for you. You can simply drag and drop them in the right building area. Once you do that you are free to edit the content as you see fit.
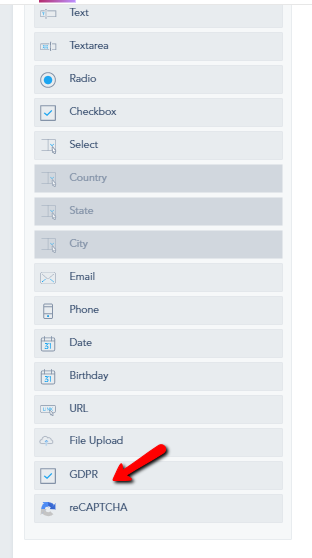
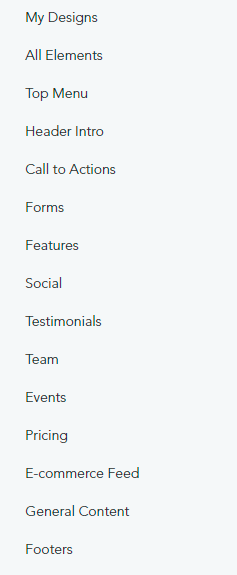
  2. You can select Pre-Designed Blocks, this one will open up another sub menu for each page block or section (Header, Top Menu, Forms, Footers…) where you can select whatever block you need and drag and drop it in its designated area. 

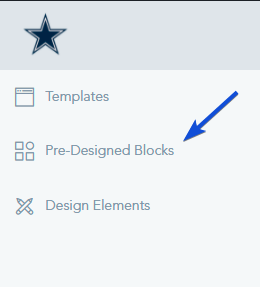
  3. You can select Design Elements, and this one will display the available Layout and Components so you can use them to design your own blocks within your landing pages.

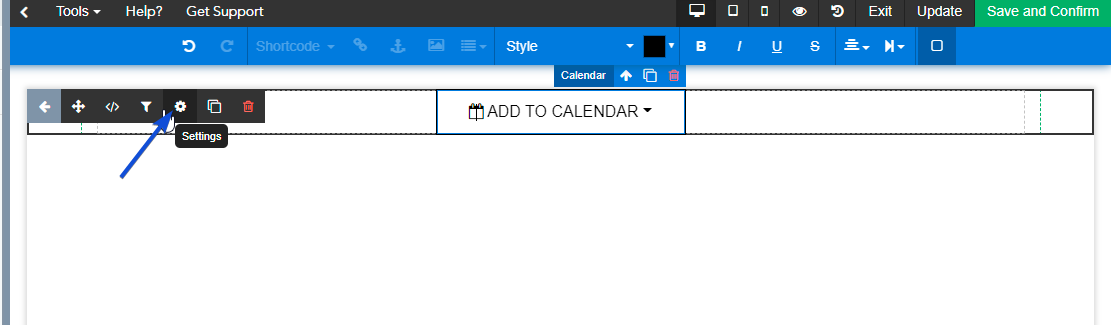
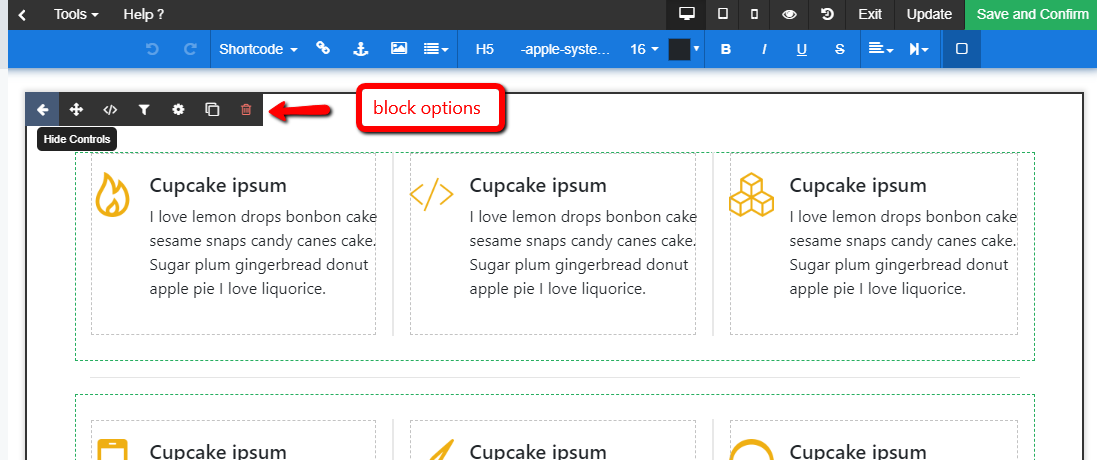
After dragging a block to the right, you will notice each block or section has its own controls in the top. This is what they allow you to:

  1. Change the block position within the page, for example move it up or down.
  2. Undo/Redo your changes.
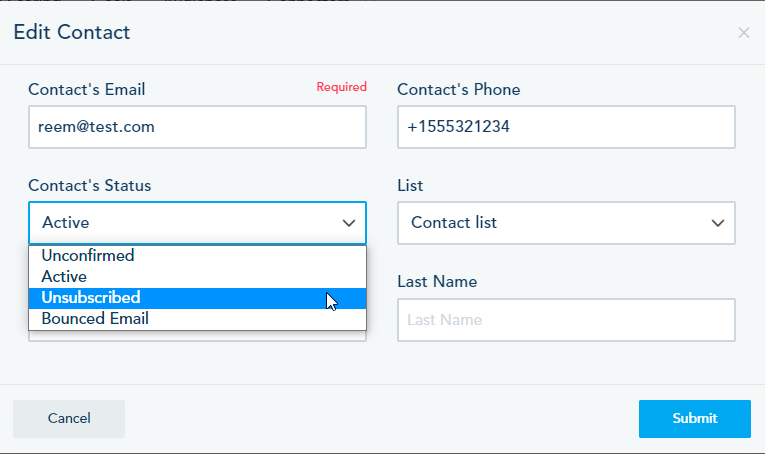
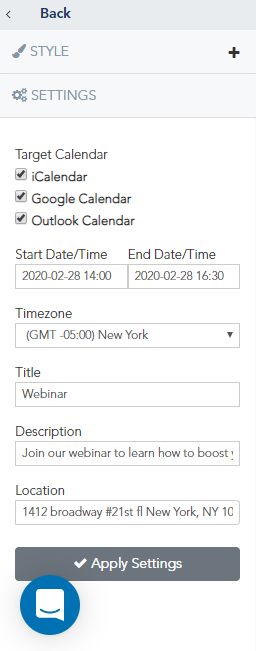
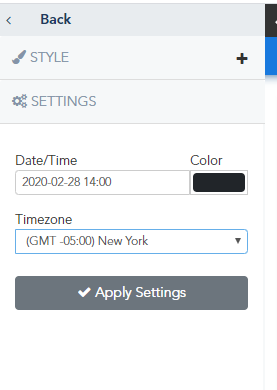
  3. Access a block settings, for example if you are using a form block, the settings window will allow you to choose the list associated with this form…
  4. View source code for current block.
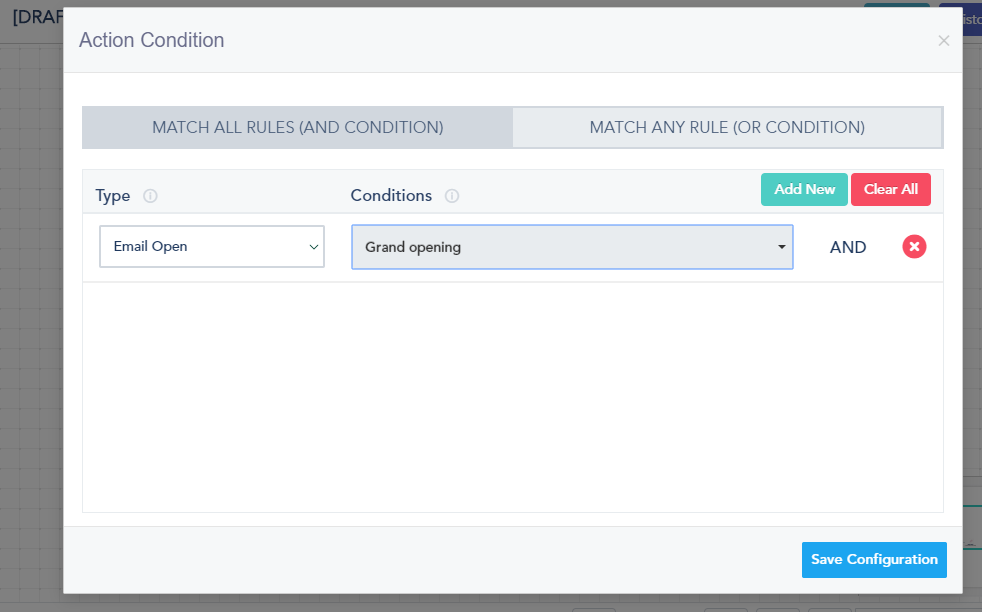
  5. Add filtering options to this specific block. You can for example assign particular audiences for this block so they only can see it.
  6. Clone current block, and the duplicate one will be loaded underneath it.
  7. Remove or Reset state of current block.


Block Elements Details

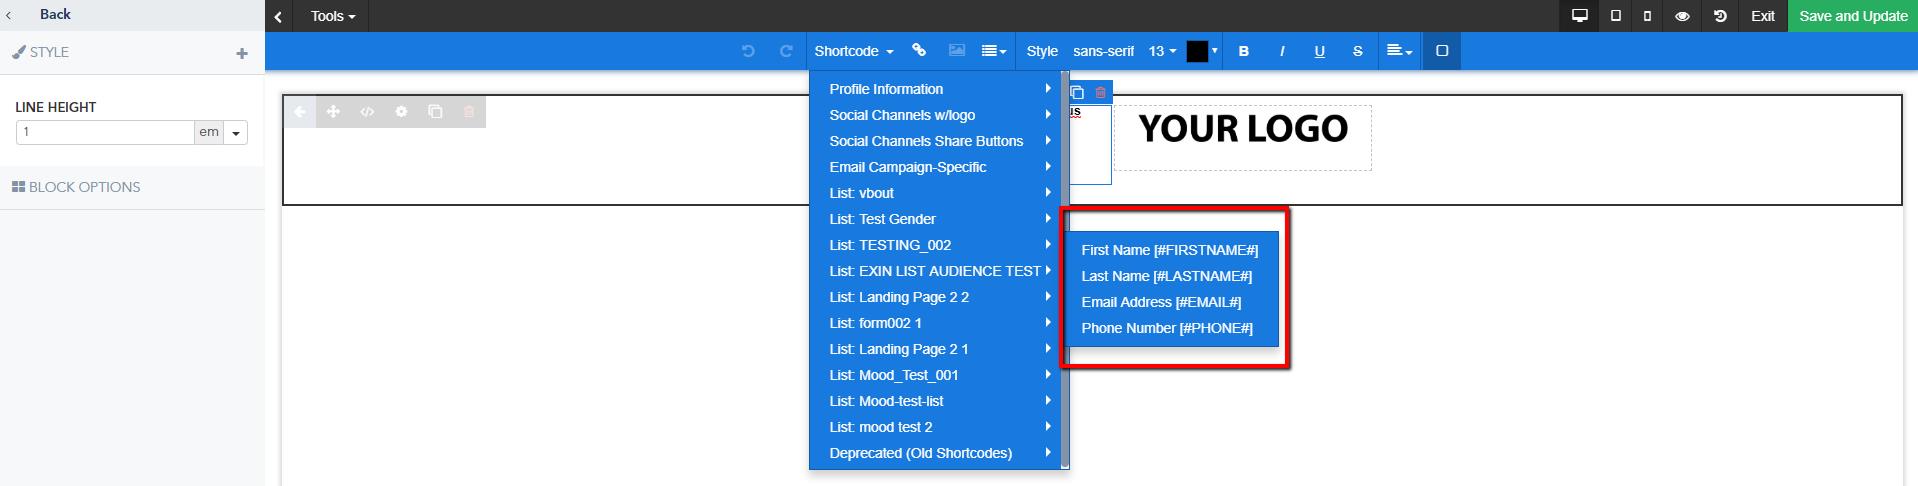
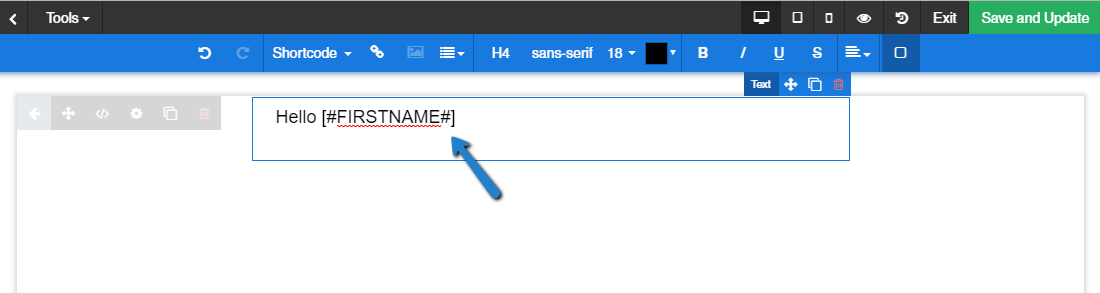
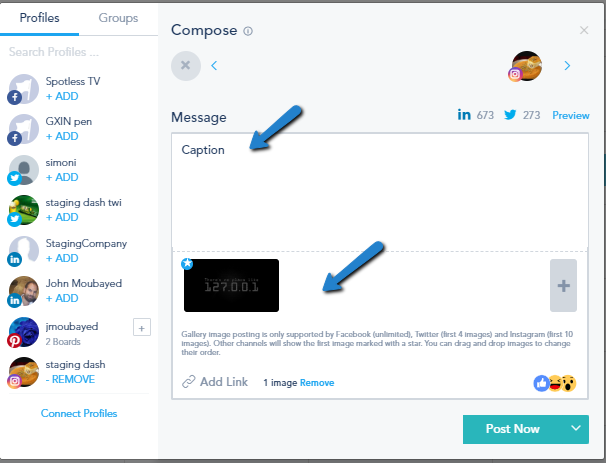
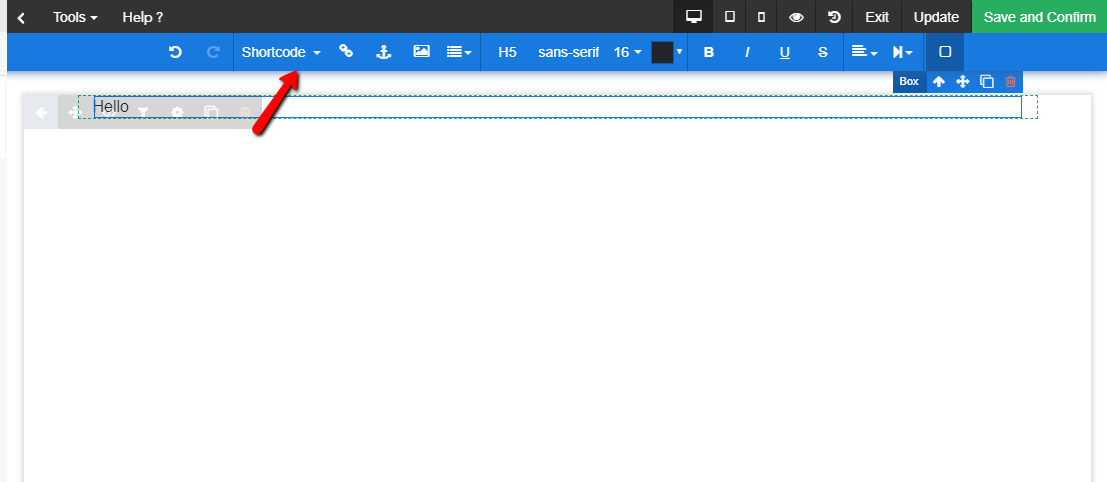
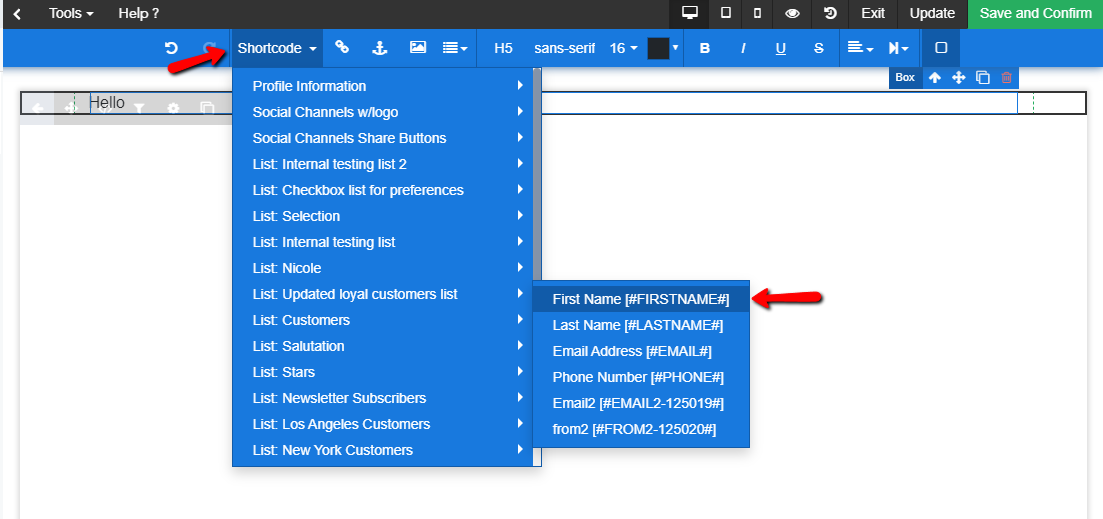
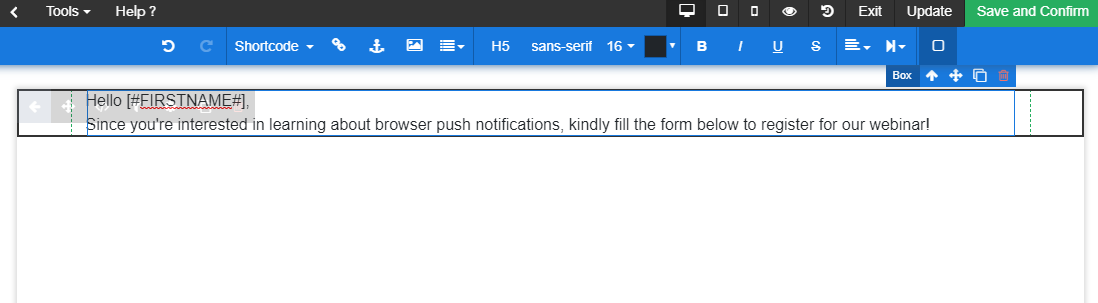
After you add a block, you can click on any element inside this block, for example a text element, and then a settings menu will open on the left sidebar, and it will enable you to edit the font family, size and color of your text. Similar settings will also open up when you click on an image element, you will be able to upload a new image to replace it using the left sidebar.
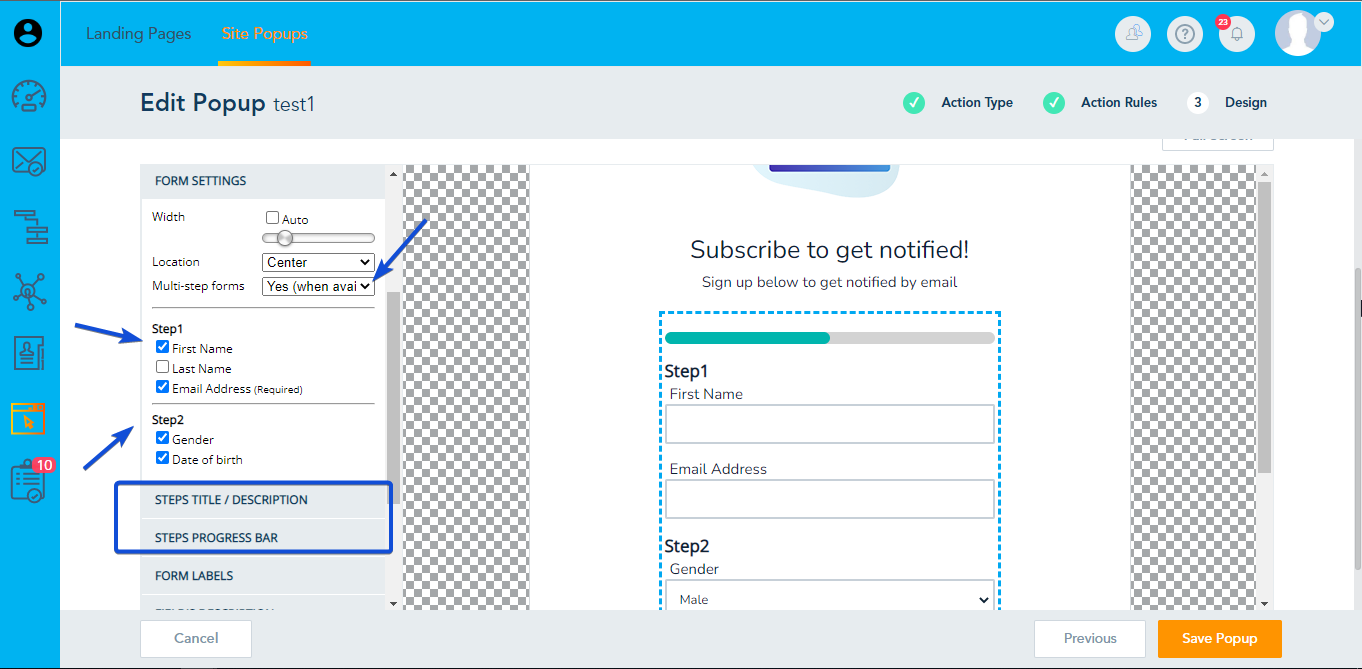
Form Blocks

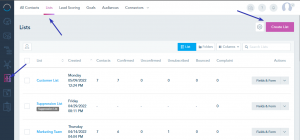
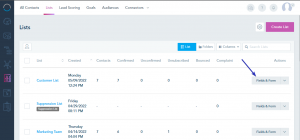
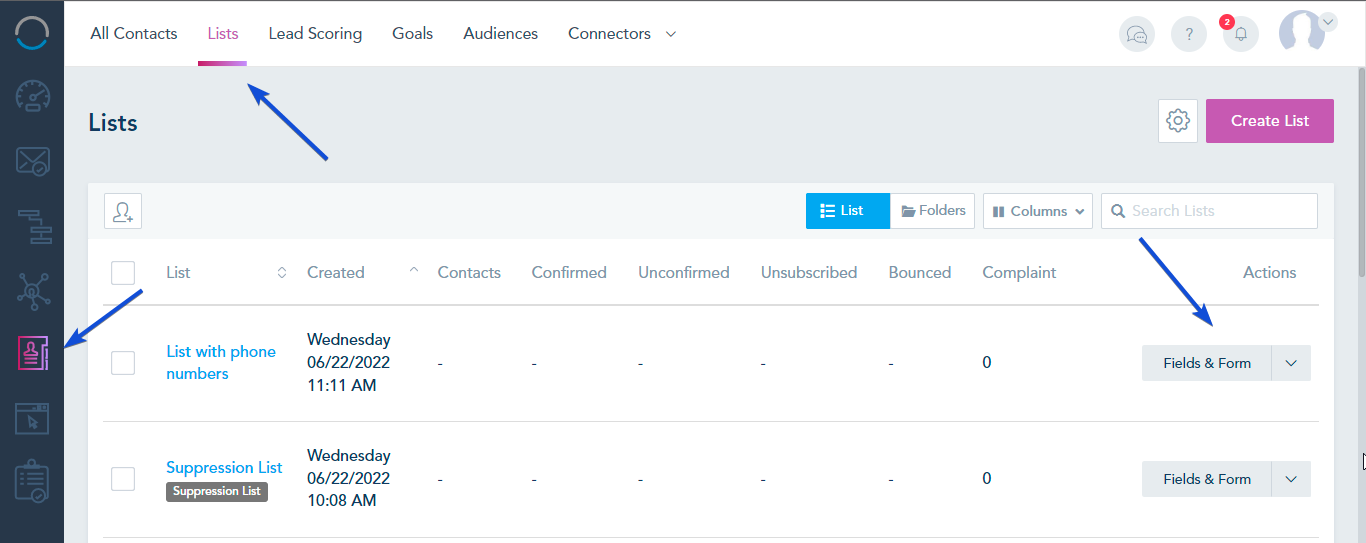
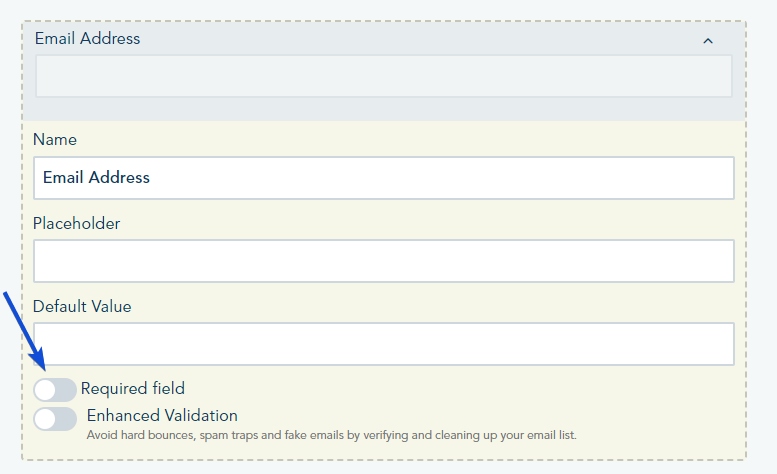
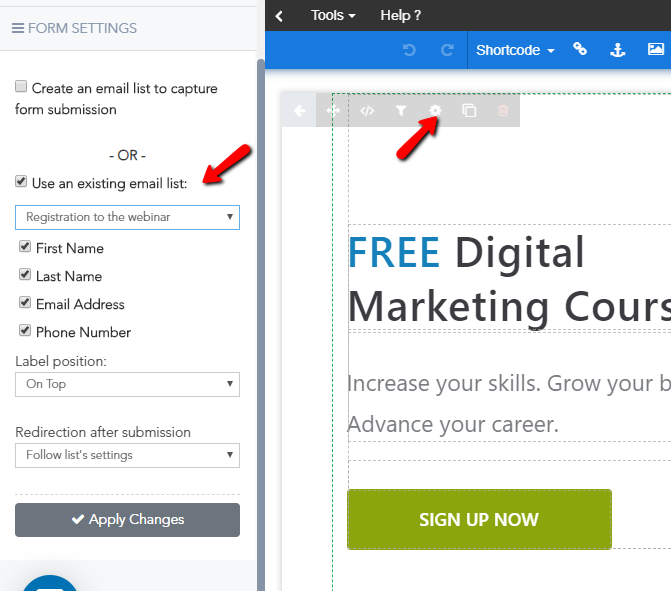
When adding a Form Block, the system will automatically create a new list and link it to this form when you first save the page. If you already have a list that you would like to use, you can link it to the Form by clicking on Block Settings first. Then click on Form Settings tab, and activate the Use an existing email list option. Next you can select your list from the drop down menu and you can even hide/show certain fields within this list on the web form.

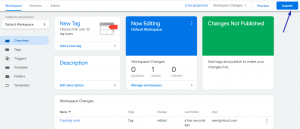
It’s important at the end to Save your Landing Page changes. The system will automatically autosave versions of your Landing Page when you are making changes, this will allow you to fall back to different versions moving forward. However it’s really important that you save your page as a draft at least once.

Get Started

Managing Automated Messages

When creating automation with email sequences, you will need to create your email automated messages so you can use them inside your automated workflows.

To get started with managing and creating your automated messages, go to Automation from the left sidebar and click on Automated Messages from the top menu.


  1. Click on Create Automated Message in the top right.

    Choose to create an Email template.

  2. The first step involves entering some basic campaign related details like the name of this template, a relevant subject line (personalization is recommended), the From and Reply To email addresses. For the template title, we always recommend a relevant name that you can easily reference back to as you are integrating them into the automation or creating your reports.
  3. Once you complete the email sender details click Next to go to the design step. This is where you can create your template from scratch or start from a ready made template.
  4. The last step would be the summary step where you can confirm your design and settings before saving your work before clicking Save and Exit.

To preview the analytics for a specific email template, click on Analytics from the templates view page. You will find details on open rate, clicks, bounces, spam and more.

Get Started

Landing Page Analytics and Heatmap Data

To access Landing Pages analytics, you can head to the Builder where all of your LPs are listed, then click on Analytics for the page in question.

Once you load the stats page, you can see in the top the graph showing the number of visits for a specific period of time which you can edit and select your own date range. You can also access the heatmap (including click and scroll maps) from this stats page.

In addition to that, you can also check the traffic sources, visitor types, and a complete list of your subscribers who visited this page, the devices used, and their countries of origin.

Get Started

Landing Pages Whitelabel Domains

You can use your own domain name or sub-domain to point to your landing pages created on the platform. Furthermore, you can point the same domain name to multiple sub-pages from the same system. Below are simple instructions on how to use your own domain name:

What You’ll Need:

  • A domain.
  • Administrative access to your domain’s DNS with your domain hosting provider.
  • Access to your account.
  • A Landing page

Configuring CNAME to point to your landing pages requires the following steps:

Step 1: Choose and register your domain name.

Step 2: Update your DNS settings with your registrar.

Step 3: Add your domain name to the platform and verify it.

Step 4: Point your root domain to the platform.

Step 1: Choose and register your domain name

If you don’t have a domain name already, you’ll need to choose and register one. You can purchase a domain name from a number of popular registrar sites. Our domain partner has good pricing and a simple domain name management. Registrars will charge you an annual service fee to maintain your domain, but the platform itself does not charge you extra for this feature.

Step 2: Update your DNS Settings with your registrar

Once you’ve registered your domain name, you’ll need to update the Domain Name System (DNS) settings with your registrar. On your registrar’s DNS settings page, create a CNAME record pointing it to “pages.” so your registrar knows to direct people from all your “xxx.my-business-name.com” subdomains to the platform redirect engine. All registrars should have documentation on how to do this (Our support can always assist you in getting this configuration setup properly).

Below is an example of a  domain name DNS configuration:

Step 3: Add your Domain Name to the platform and verify it

After you’ve updated your domain’s DNS settings with your registrar.

1- Add your Domain Name in Landing Page domains section:

Go to Settings -> Landing Page Domains, click on Add a Custom domain.

2- Add the subdomain and the domain:

3- Click on Install:

Note: If you did not configure CNAME properly, you will receive this message:

4- Once you properly configure CNAME, you will see the following:

5- Once the SSL setup is completed, you will have a custom domain configured and secured:

You can edit CNAME configuration by clicking on the drop-down menu:

and edit the configuration:

6- Assign your domain name to your landing page:
Go to to your landing page, Tools -> Page Domain.

7- Choose your domain from the drop-down in Domain Alias and Save Settings. 

Once you complete this setup you will be able to use your custom subdomain to point to your created landing page using this format: subdomain.my-business-name.com/page/[PAGE-ID] where page ID is the unique identifier of the page.

Note: The Page ID cannot be removed from the Page URL.

Step 4: Point your Root Domain to the platform

Making your root domain point to your landing page instead of a subdomain (i.e: adding www.mysite.com) follows the same concept as above with a couple additional steps involved:

1- Add your main domain to Landing page Domains section in settings. i.e: add www.mysite.com or mysite.com to your settings.

2- On the CNAME configuration of your domain you will have to add 2 records one for www.mysite.com, and the other for *.mysite.com and make each one of them point to ssl.vbt.io

3- Activate the option to point to a root domain.

NOTE: if you are using Godaddy, you won’t be able to point your Wildcard domain to an external site. You will have to use Godaddy’s domain forwarding to redirect from yoursite.com to www.yoursite.com.

To find out more about Landing Pages, click here.

Get Started

Creating Site Popups

You can trigger smart popups and messages on your website by using the Site Popups feature available on your account. To get started with Site Popups, click on Landing Pages > Site Popups from the top menu.

Creating Site Popups include the three steps in the tabs below:

Action TypeAction RulesDesign


This is where you specify the Site Popup Name,
When To TriggerOn Page ExitOn Page Entry, On Goal Triggered, Scroll Middle of Page, or Scroll End of Page.
Page URL: where to execute it (you can use multiple) or once a Goal is triggered.
Choose Type: HTML message, Subscription Form, Polling Popup, Redirection URL, or Javascript Code.
You can also Set a start and end date for this action.
Note: The On Exit Trigger only works for desktop screens for now and is not supported by mobile/tablet touch screens as of now.


This is where you specify your:
Target Users: All Visitors, Contacts, or Anonymous.
Device Filter: All Devices, Desktop, or Mobile.
PPC Referral Network Filter: Google, Bing, Facebook, Twitter, LinkedIn, Pinterest.
Geo-Location Filter.
Action Frequency: 
Repeats or One Time.
Delays for this Action.
Example: Trigger an Optin Form Popup, for all site visitors, from the United States, who came from a Google Ad Campaign, 25 seconds after they visit the pricing page.


This is where you can visually edit your content, media and labels for that Site Popup. You can design the popup the way you’d like using the builder available on the left. Once you are done with this step, you can click on Save Popup.

Once you save the Site Popup, you can control its status from the Site Popup screen. To disable the Site Popup toggle the on/off switch.

You can create a site popup with a form by following these steps:

Go to Action Type and choose Subscription Form, choose the list with form that contains the fields you want to include:

After finishing creating the site popup, here’s how it will appear:

In case, you want to use multi- steps form, you need to select a form created with multiple steps when choosing a Subscription Form. Check this link for details on how to create such forms.

In the design section, go to Form Settings and set Multi-step forms to Yes.

Then, you will have the option to choose the related fields in each step and edit the style of Steps title/ description, progress bar, and buttons.

Once done, save the popup.

Get Started

Manage Custom Plans

The custom plans feature will allow you to create a-la-carte marketing plans, for your customers. This means you can create a plan that includes Email Marketing and call it “Email Frenzy Gold”.

To add a new custom plan, you can click on My Custom Plans from the left partnership side menu, then click on Add Plan:

  1. You will need to give your new plan a name, a description and an ID to specify the orders of the plans for your client’s upgrade/downgrade process.
  2. You should choose to activate or not the following options:
    • Disable Access to Billing: Choose whether to allow the business to access its billing page or not.
    • Use Default Agency Billing Profile: Future registrations to this plan will automatically use the agency billing profile to process monthly membership and add-on purchases. Note that you can always change the individual card on file for each sub-account in the future.
    • Limit Access to Settings: Account’s owner will not have access to users.
    • Copy Campaign Assets: If you want to copy campaign assets to the new account created.
  3. Next, you must add a new feature to your plan by clicking on the plus sign. On the drop, you can choose the  product you wish to offer then choose from the different plan limits and pricing options offered exclusively from this portal. (for example you can choose the Email Marketing product, with 10,000 emails/mo or 50,000 emails/mo…). Once you finish adding all the products and limits press Add to add the product into the plan.
  4. The system will automatically display the total base price for the features you picked minus your discount as a partner. You also have the ability to set your own price for your customers and upsell the plans as you see fit. Total Profits = Selling Price – 0.3*(Total Base Price) – Processing fees.

Once you finish that, you will need to click on Create in the bottom right to actually create the plan. If you list your custom plans you will see that each one of them will have its own unique registration URL which will be used to sign up to this custom plan.

Your customers can use the custom plan URL above to sign up to the platform. Signups will be attributed to your partners account and be shown under the Customers section of your portal.

Get Started

Using whitelabel option

The whitelabel option allows you to use your own branding and domain resources so that you can completely hide VBOUT from your end users. There are three options that you can explore:

  1. Vanity URLs: This option when activated will allow you to use your own custom domain for tracking email and social media links. This way when your contacts click on any link you send them via email or social media posts, they will see your custom domain instead of VBOUT.
    Note: This option requires adding some code that is provided to your .htaccess file in order for this to be fully functional.
  2. Branding: This option will allow you to upload your own logo to the dashboard as well as your own signature. End users trying to login will see that instead of the usual VBOUT Branding.
  3. Domain Alias: This option will allow you to use your own custom domain for users to use to access the dashboard. You can also specify an exit domain name when users logout of the dashboard.

Get Started

Setting up your File Manager

File Manager lets you organize and manage your files and media in one place to use them when sending Email Campaigns, designing Landing Pages and scheduling Social Media posts. All the assets you add to your File Manager are accessible on your Landing Page Builder, Email Template Builder as well as your Social Media publisher.

NOTE: There is no limit to the storage you have on your account, however, we recommend that you upload files and images that are optimized for web to give your recipients faster loading experience when opening your campaigns or visiting your Landing Pages.

  • Accessing File Manager:
    Go to EMAIL and click on File Manager.
  • Upload:
    To upload an image or a Downloadable PDF, click the Upload button located on the top left of the toolbar and then drag and drop the files to the uploader.
  • New Folder:
    To add folders click New Folder button located on the top left of the toolbar. We recommend using folder names without spaces, ex:” logos-artwork” vs “logos artwork”.
  • Design on Canva: This will open the Canva designer and you will be able to design an image from scratch on Canva:
  • show URL:
    If you wish to get the path to an image or a PDF file, right click on the file then click on show URL.
  • Filters:
    To navigate and find files use the Filters located on the top right of the toolbar.
  • E-commerce:
    If you have added your E-commerce website to the platform, you can select it and find images of your products here:

Get Started

Reading analytics for site popups

To access the Site Popups Analytics, click on Analytics.

Inside the analytics section, you can see a data chart on how many times the Webhook executed, along with the conversion and abandonment rate. The date range is 30 days by default and can change to your desired time period.

Below the chart, you get a breakdown of the traffic that triggered this Site Popup by Visitors Type, Cookied Contacts vs Anonymous Visitors, along with the rate for each.

The referral pie chart breaks it down by General referral sources, Paid referrals and Social referrals.

Further down, you can switch between the different tabs to view the contacts who viewed the Site Popup, the IP address of the Anonymous Visitors, the Social Media events that triggered the Site Popup (you must be using the Social Media tools on your account), as well as the Geo Location and Devices breakdown. The New Contacts filter displays information about the contacts that filled out the form and completed the conversion.

Get Started

Understanding available reporting widgets


To create your first dashboard:

  1. Click on Build a Dashboard.
  2. Give your Dashboard a name and description then choose if you wish to make it the default dashboard to load once you login to your account.
  3. Drag any report widget from the list and drop it in the area underneath. Each widget will have its own custom settings that you can configure once you drop the report into the dashboard. Use the date picker to specify the range for which to show the report. Presets like today and last week will auto update each time your login.

Below is a list of the widgets available on the platform:

  1. Getting Started: Checklist of things to get you started with the platform.
  2. Custom HTML: Add a custom embed HTML widget.
  3. Video Training: Express onboarding and training videos to help you get the best out of your account.
  4. Events Calendar: List of all scheduled or posted events, email marketing, and social media. You can configure it to show by profile.
  5. Events List: Just like the calendar but in an event format.
  6. Tasks Summary: A list of tasks with the assignee, task board, stage, due date, within a stage, teammate and timeframe of your choice.
  7. Automation: You can filter this by workflow to view performance results.
  8. New Contacts: List of the most recent contacts who joined your list(s). You can choose one or more lists.
  9. List Summary: A summary of your lists with the number Active, Unsubscribed, and Bounced contacts.
  10. List History: A graph that shows you how many contacts joined the list in reference to the time range that you specify.
  11. List Growth: A graph that shows you the variation of contacts joining the list in reference to the time range that you specify.
  12. Conversion Goal: Gives you data on a specific conversion goal created within the platform.
  13. Conversion List: Table list of all your Goals along with their summary.
  14. Leads Funnel: Your lead scoring funnel, which needs to be installed on your account and active with all stages.
  15. Email Campaigns: Performance of your email campaign, Email open and CTR.
  16. Social Insights: Quick snapshot data on a specific social media profile, for a given time frame.
  17. Social Feed: One feed from one of your social media channels, ex: Twitter Messages.
  18. Social Followers: Side by side followers line chart from multiple social media profiles, ex: Facebook vs Twitter vs Instagram.
  19. Social Content: Content from a specific social account during a specific date.
  20. Hashtag stream: Choose a hashtag you added from your social media suite.
  21. Ad Accounts: Pulls a report from your Facebook ads and AdWords accounts.
  22. Google Analytics: Pulls a report from your Google Analytics account, which you need to connect to your dashboard. 8 Widgets currently supported.
  23. Landing Page: Performance report of a specific landing page, visits vs conversion.
  24. Site Popup: Performance of one of your Webhooks, impressions vs conversion. ex: homepage popup performance.
  25. Website Visitors: Breakdown of your site visitors, Anonymous vs Contacts.
  26. Top Visited Pages: List of the pages that are visited the most.
  27. Top Devices: Visit breakdown per device.
  28. Top Referring Countries: List of top referrals countries tracked by the VBOUT platform.
  29. Referral Sources: List of top referrals tracked by the platform.
  30. Social Sources: List of top social media referral channels tracked by the platform.
  31. Paid Referral: List of top paid ad channels tracked by the platform. Must use UTMs in your marketing campaigns for this to work.
  32. Browser Push: Analytics from a specific Browser Push.
  33. Browser Push Templates: Analytics for a Browser Push Template.
  34. Partnership MRR: Table view of your Partnership MRR.
  35. Store Sales: Choose a store integrated into your account and monitor its sales
  36. Top Buyers: The top buyers from your store.
  37. New Orders: New orders in your stores.
  38. Sales by Country: Sales divided geographically.
  39. Retention: A graph showing new customers and retained customers
  40. Checkout Funnel: A funnel of the steps that the client followed before reaching checkout.
  41. Product Search: The products searched in your store.

Get Started

API and Connectors

The platform offers a variety of API tools for you to integrate your app with us. To find your API key, while logged in to your dashboard:

  1. Head to your profile icon in the top right, and click on it, then select Settings from the drop down menu.
  2. Select API Integrations from the left sidebar.
  3. You will be able to see your API User Key displayed by default. You can copy it and paste it on whatever app you are trying to connect.
  4. If you would like to look at the latest API logs, you can do that by clicking on API Logs to the right.

To check out our open API documentation, you can click here.

Get Started

Restricted Content Policy

We work with various industries and businesses who utilize the platform at different capacity. While we do not discriminate against one type of business versus another, some have higher than average abuse complaints, which can have an impact on other customers using the platform.

To protect our customers, we reserve the right to block or restrict your use of the platform if you serve any of the following industries:

  • Multi-level marketing or affiliate marketing
  • Work from home and make money online type of promotions
  • Cryptocurrency (ex: ICOs or trading)
  • Pharmaceutical products
  • Certain fundraising campaigns
  • Gambling services or products
  • Political groups or affiliations that promote hate and violence
  • Pornographic content or membership sites
  • Dating sites
  • Complex financial services offering

The list above does not cover all industries but is a general refence to the types of business that trigger high abuse complaints.

If you are not sure your industry is permitted to use the platform, feel free to reach our support.

A/B testing

To turn on A/B testing for your campaign, click on the A/B Campaign option during the first step of the campaign wizard (Setup).

Once you select A/B campaign, you will need to provide additional campaign related details like the Test Variable. It can be the Subject Line, Content, From Email or From Name. Once you select your variable, you need to provide a value for each version for this variable. For example, if you choose your Test Variable to be Subject Line, then you need to provide a subject line for Version A and a subject line for Version B. The split setting will ask you to configure how many emails will be sent to your target lists by splitting the total recipients into three groups. Subset A will get the first variation of your campaign, Subset B will get the second variation. Subset C will receive the winning version of both subsets.

If you chose the different content test, you will be prompted to insert both campaign content from the template builder screen.

Get Started

Managing social media groups

You can group social media profiles for an easier publishing and stream management. This is useful when managing large amount of profiles for different brands or you have many team members assigned different groups of profiles.

You can create a group from the Compose dialog under Social Media > Queue:

add-group

add-group-screen-2

After creating the group, you will have the option to edit or delete it from the plus sign next to the group name.

Once a group is created, you can choose a group to populate all the profiles inside of it for posting:

You have the ability to filter the calendar by group(s):

filter-calendar

To manage multiple social media feeds from different profiles you can click on the Social Media > Streams and choose groups from the left panel. You will see all the active Feeds from each profile side by side with a horizontal scroll. Feel free to drag and arrange feeds in the order you’d like to see them:

Group-Streams

To manage which feeds to show, click on the right column +/- option and choose from the popup:

In your dashboard, Social Followers widget report can also be customized by group:

Get Started

Email testing – sending draft emails

In order to test your email templates, you can send draft emails to yourself or your teammates using two ways:

  1. If you are inside the email builder, you can click on Tools→Send Test Email. Next you can input as many email addresses as you want as long as they are separated by a comma.


  2. If you are inside the campaign wizard, once you get to the final step (Summary). You can send test emails as well using the provided email field in the bottom.

Note: In case you have used Shortcodes in your email, these one will not show in your test email.

Get Started

Reading analytics for email campaigns

To read your campaign stats,  go to Email -> Campaigns and click on Analytics for this specific campaign.


You will see the campaign overall analytics from Open Rate, CTRs, Unsubscribes, Bounces, Conversions  and email engagement.

Additional campaign data are available to be viewed if you scroll down to the Campaign Breakdown:

  1. Use the filter to view who opened your campaign.
  2. View bounced, unsubscribed or complained emails.
  3. View campaign links that were clicked with total and unique click count.
  4. You can also view subscribers who clicked.
  5. View open locations, devices used and email clients.

You can always download this data by clicking on Export.

Note: Email engagement is measured by the amount of time users spent with your campaign open on their email client. If the contact opened the campaign for less then 2 seconds, they Barely Read the content, between 2 and 5 seconds, they Skimmed through it, anything above 5 seconds is counted as a Fully Read.

Get Started

Native HubSpot CRM connector

You can connect one or multiple HubSpot accounts into your dashboard and start creating sync instances for the following objects:

  • Contacts
  • Deals
  • Companies

You can access the integration tab from under the Contacts > Connectors > HubSpot Connector (Add-On must be installed or part of your plan)


The sync is bi-directional and can be customized as a one-time, recurrent or part of an automation at the contact level:

You can customize the sync data as well as your mapping criteria:

You can add different buckets of data and save your instance.


Here are some examples of how data will look like on HubSpot.

  • Campaigns open, Links clicked and Pages visited:
  • Lead status and Lead score
  • Goals reached
  • Automation triggered

Get Started

Native Zoho CRM connector

You can connect one or multiple Zoho accounts into your dashboard and start creating sync instances for the following objects:

  • Contacts
  • Deals
  • Companies

You can access the integration tab from under the Contacts > Zoho Connector (Add-on must be installed or part of your plan)

The sync is bi-directional and can be customized as a one-time, recurrent or part of an automation at the contact level:

You can customize the sync data as well as your mapping criteria:

You can add different buckets of data and save your instance.

Get Destination URL (if you’re using the Automation sync) by going to your List of Zoho Syncs select the drop-down and click on the “Get Destination URL” option.


Here are some examples of how data will look like on Zoho


  • Lead score and Lead status
  • Links clicked and Pages Visited
  • Campaigns open
  • Goal Reached and Automation Triggered

Get Started

Using the form API integration

Sync your website’s Native form with Lists using the Form API. Below are step by step instructions on the setup.

  • Create a list with all the necessary fields you would like to synchronize using the Fields & Form Builder.
  • Get the API code of that list. To get API code click the Embed Code Button
  • Go to the API Integration section of the popup and copy the code.
  • Get the IDs of the fields from your native website form.
  • Change the IDs of these fields and add them to the native website tracking code. Below is a code snippet example of the final embed code:
  • <script type="text/javascript">
    
    
    var _vbset = _vbset || [];
    _vbset.push(['_account', 'VBT-34685-1036']);
    _vbset.push(['_domain', 'http://honyabooks.com']);
    _vbset.push(['__vbvar__', ['_listID', '10612']]);
    _vbset.push(['__vbvar__', ['_firstname', 'custom-74066']]);
    _vbset.push(['__vbvar__', ['_lastname', 'custom-74067']]);
    _vbset.push(['__vbvar__', ['_phone', 'custom-74069']]);
    _vbset.push(['__vbvar__', ['_field-74070', 'custom-74070']]);
    _vbset.push(['__vbvar__', ['_email', 'custom-74068']]);
  • (function() {
    var vbt = document.createElement('script'); vbt.type = 'text/javascript'; vbt.async = true;
    vbt.src = ('https:' == document.location.protocol ? 'https://' : 'http://') + 'www.vbt.io/tracker?_account='+_vbset[0][1]+'&_domain='+_vbset[1][1];var s = document.getElementsByTagName('script')[0]; s.parentNode.insertBefore(vbt, s);
    })();
    
    
    </script>


Get Started

Browser Push setup

Browser Push is a great way to turn website visitors into subscribers, without providing identifiable data beyond their browser ID. This also lets you offer existing email subscribers, new ways to receive messages from you, in real time, without opening their inbox.

Below is a step-by-step guide to activate and setup Browser Push feature on your account

SETUP AND INSTALLATION:

  • Make sure that this feature is part of your plan or is installed from your Add-on section on your account.
  • Under your Settings page, click on Website Tracking Code to add your website and properly install the tracking code on the footer of your site. More information on Website Tracking can be found here. Note that your domain must be over https for browser push to work properly.
  • Once you add and verify your website, click on Show Domain Settings from the right drown option to activate the Browser Push listener within your tracker
  • The screen below gives you the flexibility to configure the tracking end points you want to activate

  • A new option will be available to setup and install your Browser Push
  • Below is a tab breakdown of your Browser Push Settings
Opt-in SettingsOpt-in DesignNotification DefaultsIntegration
Here you can make the prompt to opt-in smarter by adding some delays, segment them to activate on your cookied contacts, anonymous or both, as well as a re-opt-in option and target pages to show this prompt. The biggest mistake marketers make is to blindly trigger the default Browser Push prompt, which does not give visitors enough time to build a relationship with you.


In Popup Design, you can customize the main permission prompt, asking visitors if they wish to opt-in to your Browser Push list. Note that this is different from the default browser permission behavior which normally offers no delay or customization options. The prompt from the Popup Design will give visitors the option to Allow or Decline the browser push option.

Here you can put the Title of your Notification and see a live preview of your changes.

In Integration, you need to download the SDK file and upload it to your root folder on your website. Keep in mind that you need HTTPS on your site so you can use Browser Push notifications.

You can download and save the SDK file by Right-click -> Save as in this link.

  • Once you finish the setup above, visit your website to test the installation. If the message below did not show, that means that there is something wrong with the installation.

BROWSER PUSH ANALYTICS:

  • When a visitor clicks on Allow, they will automatically be added to your Browser Push Subscribers. You can view them by clicking on Browser Push Analytics.
  • Browser Push Analytics displays a detailed report on your subscribers. Toggle between the tabs to view records in the Active tab, with meta-details on device, total messages sent, Clicks and date of signup. If the subscriber was a cookied contact with an email on a list, the platform will automatically merge the record, otherwise you will see an anonymous IP as a subscriber. Click on the Email/IP to access to the full user profile with detailed activities.
  • You can also include an automated report on your Browser Push, by domain, under your Dashboard Reports.
  • You can check the full analytics on each automated Browser Push message added to a workflow. You can access them under the Analytics portion of your Automated Messages.

BROWSER PUSH STATUS AND ACTIVITY:

  • On the contact’s page, the Browser Push status of the subscriber will be changed to active
  • You can create browser push message by going to Automated Messages, click on Create Automated Message > Create Browser Push Template.
  • The prompt to configure the browser push includes two tabs.  In the Notification Message you have to select the Notification Name, Source (target Domain), Notification Title and the Notification Icon. Default will be loaded from your configuration page for convenience but can be modified. Lastly, configure your Destination URL and finally the Message. You can test the message by clicking on Try it now or click on Save Message.

  • Advanced Options tab is only available for Chrome/Windows users. You can include a cover Image, as well as add one or two call to action buttons with a custom link for each button. With this option, the user will have a total of 3 destination links between the default URL and the 2 call to action URLs
  • Once you send the browser push message, the users should receive the Browser Push Notification.
WindowsAndroid
  • Finally, all Browser Push Engagement will be logged in the activities of the user with complete details on Device, Status, Send Date (when the message was queued to be delivered to the recipient’s browser), Delivery Date (when the recipient actually opened the browser and the system was able to deliver it), Click Date and the Click Type (which URL the recipient clicked on)


You can check this article to see how you can add a Browser Push to your Workflows.

Get Started

Twilio SMS

Twilio SMS is one of the integrations the platform offers. To connect your Twilio account, follow these steps:

Go to the Connection Center, and choose Connect to Twilio.

To complete the Twilio connection, you need to add the required keys. Please follow these steps to find your keys in Twilio:

  • Twilio Account SID and Auth Token:

  • Twilio Verified number:
    Note: Make sure to use the same format shown in the active numbers of your Twilio account


You have successfully connected your Twilio account.

Afterward, you go to Automation, select a Trigger and choose the Action: Twilio SMS

You can choose a template from the drop-down list

Or you can choose to CREATE NEW SMS TEMPLATE, where you will be taken to the following page:

Twilio SMS Status

Every Twilio SMS or MMS message request has a status value which describes the current state of the message. Here are the most common message statuses, and their meanings.

Outbound Message Status Progression

When sending outbound messages with the REST API, this is a typical sequence of status values:

Queued Twilio has received your request to create the message. All new messages sent from a specific Twilio phone number are created with a status of queued.
Accepted Twilio has received your request to create the message from a Messaging Service. Twilio is determining the optimal ‘From’ number from your service.
Sending Twilio is forwarding your message request to one of our Super Network partners.
Sent Twilio has received a confirmation from our Super Network partner advising they have accepted the message.

Twilio Opt-out Message

Recipients can reply with the word STOP to opt-out from Twilio messages. In this case the contact will be automatically tagged with “Twilio-Message-stop”.

Note: According to Twilio Policy, if you plan to use Twilio to send any text messages from 10DLC phone numbers, you’ll need to register your messaging use case (known as a Campaign) in Twilio Console or with Twilio APIs. Messages from unregistered numbers are subject to filtering and higher unregistered fees, and may ultimately be blocked by telecommunications carriers. For more details, please check this Twilio.

Get Started

Add your site tracking code to Google Tag Manager

You can add your Site Tracking Code in your Google Tag Manager by following the instructions below.

Open your GTM account and choose the website you want to set up the Tracking Code on.

Click on Add a New Tag.


Choose a name for the tag and click on Tag Configuration.


Choose Custom HTML.


Go to your account, and Toggle “Using Google Tag Manager?” on, then click on Submit.


After that, click on Show Embed Code.

And copy the Site Tracking Code.


Then go back to GTM and Paste your Site Tracking Code.


Click on Triggering.


Select All Pages.


Now click on Save.


Then Submit, Publish and Continue.


Now to make sure that the tracker is working, you can open your website, go to inspect element, then network, and search “tracker”.
You will find our tracker in the results.

Get Started

Access token authentication error

Social media platforms serve as the cornerstone of online communication, facilitating connections, sharing, and engagement on a global scale. However, the ecosystem of social media extends beyond the platforms themselves, encompassing a myriad of third-party services like VBOUT, which enhance functionality and streamline marketing efforts.

Access tokens serve as the digital keys that grant third-party services like VBOUT access to users’ social media accounts. These tokens establish a secure connection, allowing seamless integration and functionality across platforms. However, the transient nature of access tokens poses a challenge. When tokens expire or become invalid, users are prompted to reconnect their social accounts to the external service, generating a fresh token in the process.

Social networks enforce stringent security measures to protect users’ accounts and data from unauthorized access and malicious activity. These measures include employing advanced algorithms to detect suspicious actions and promptly invalidating access tokens associated with compromised accounts.

VBOUT, like other external partners of social networks, operates within the framework of these security measures, often surpassing the standards experienced within the social network itself. While token expirations and disconnections may present short-term inconveniences, they are essential for maintaining the trust and security of users’ accounts and data.

If you notice a red alert on any of your connected profiles, the chances are there is an Access Token Authentication error.


To re-establish the connection, Go to your Connection Center.

Locate the account with the authentication problem and click on Manage Connections to reconnect. You will need to go over the same Authentication steps as you have done when first connecting the account:

If the issue persists after clicking on Manage Connections, you can Unlink the account then try connecting again.

Token expiration can occur due to the following reasons:

  1. Manual changes to account settings
  2. Security measures
  3. Token lifespans
1. Manual changes to account settings

The functionality of platforms like VBOUT hinges on the settings maintained within individual social networks. Any manual changes made to these settings can prompt disconnection from external services. Common alterations include modifying usernames or passwords, revoking access permissions granted to third-party apps like VBOUT, or losing admin status for pages or groups linked to the account. These changes, while seemingly innocuous, can disrupt the seamless integration between social accounts and external services, requiring users to reestablish connections and generate fresh access tokens.

2. Security measures

Social networks prioritize user security by implementing stringent protocols to safeguard accounts from unauthorized access and malicious activity. However, these security measures can inadvertently lead to token expiration for third-party services. Behaviors such as using alias usernames, logging in from different IP addresses, or publishing content flagged for copyright violations can trigger disconnection from platforms like VBOUT.

3. Token Lifespan

Tokens issued by social networks come with predefined expiration dates, designed to mitigate the risk of perpetual access to user information. Token lifespan aligns with each social network’s authentication policy, necessitating periodic renewal to maintain access to external services. As tokens approach their expiration dates, users may experience disconnection from third-party platforms like VBOUT, prompting the generation of new tokens to restore functionality.

Get Started

Social media analytics: Native profiles, Facebook business ad reports, Google Adwords

Social Analytics give you insights on your growth, engagement and demographics. To access Social Analytics click on Social Media > Analytics from the top menu. On your left panel you can toggle between the accounts to access the analytics for each channel.

  • Facebook analytics pulls information such as page likes, impressions, engagement and stories. Other details such as demographic breakdown and geo-location are also displayed for the chosen time range.
  • X analytics displays the follower’s growth for a particular time range as well as the number of mentions, likes, and reposts. Note that due to X’s limited API most of the data should be accumulated moving forward from the day you connect your profile to your dashboard.
  • Linkedin analytics shows the number of company page followers, clicks, engagement, likes, shares, and impressions for the chosen time range as well as geo-location of the followers.
  • Instagram analytics shows the number of your account’s followers, impressions, reach, and profile views.
  • Pinterest analytics pulls a summary of your account’s followers, followings, board, and performance of the pins.
  • Google analytics pulls real-time data from your Google Analytics account for a chosen website. You can switch between websites to change the report.

Social Clicks

To view the CTR of your posts scheduled through your account you must use the URL link tracker when composing your posts. Social Clicks are accessible under the Analytics tab for each account as well as an aggregate of all posts under Social Media > Social Clicks tab on the top. Below is a quick summary of the Clicks report:

  1. Select your social account from the left sidebar.
  2. A list of the URLs used will be displayed.
  3. You can sort the URLs by the latest or by the number of clicks.

Get Started

Exporting your dashboard reports


If you want to share your Dashboard Reports via email or export them or view them in browser, click on Share or Export button in your dashboard view. You will have the following options:

  1. Viewing your dashboard via a public URL which you can share with colleagues or clients. The URL has a private token that can be renewed to revoke access for the old URL. To preview the publicly accessible version of the report you can click on the View in Browser icon.
  2. Sharing the current Dashboard in PDF format or PNG format. To do this, you can click on the Export to dropdown which will present you with 3 actions to choose from. You can choose Direct Download which might take up to few minutes to reproduce the export file, Via Email which typically sends the report as attachment in the email, or Recurring Emails which allows you to schedule the sending of the report in a Daily, Weekly or Monthly manner.
  3. Managing your scheduled reports for different dashboards. First click on Scheduled Reports –> New Report. Second, select the desired Dashboard, configure the report email (subject line, body, recipients and frequency of sending) then click on Save.

Get Started

Managing your contacts

You can manage all your Contacts, Lists and Audiences from one page by going to Contacts –> All Contacts. On this screen you can view and search all your contacts and filter them by List or Audience name from the left panel.


Each contact can be edited, moved to another list, added to another list (copy), assigned to Group or User, or deleted from your account. You can also add a new record by clicking on Create Contact. 

To preview the timeline of a contact, click on their email address. You will be able to view the Contact history of engagement and additional contact details such as Lead Scoring, Geo-location, Referral Source, Subsequent Referral source for each engagement and much more.

You can filter by engagement type and expand the details to view the details of that engagement:

To manage the lists for this contact, send a message, Call or Unsubscribe from Lists, click the options on the top right panel for this contact:

Get Started

Unsubscribe a specific contact

If you want to keep the contact but you don’t want him/her to receive emails you can do that by changing the status of the contact to Unsubscribe.
You can choose to Unsubscribe this contact from a specific list or from all lists.

Contact List Page

All you need to do is to click on Edit next to the contact you want:

Then change the status to Unsubscribe:

Contact Activity Page

You are also able to do it inside of the Contact Activity Page. On the top-right dropdown select the Unsubscribe From All Lists option.

Get Started

Add custom events to contact timeline via API

You can add custom events to your contact’s timeline and activity log using the addNewActivity API call. This is beneficial if you would like to log data from your own platform to your account, such as support tickets and more.

To add a custom event, use the function below using CURL or PHP and replace the data with your own API KEY  as well as the contact’s id:

<?php 
    require_once('../PATH/TO/services/EmailMarketingWS.php');

    // Replace {YOUR_API_KEY} with the API KEY provided from the link above.
    $user_key = array('api_key' => '{YOUR_API_KEY}');
	
    $app = new EmailMarketingWS($user_key);
    $parms = array(
        'id' => 'xxxxx',                              // Replace with the Contact ID
        'description' => 'this is my first activity', // Replace the Description with your Activity's description.
        'datetime' => '2018-08-23 18:00',             // Replace with the Date and Time the Activity is recorded
    );

    $results = $app->addNewActivity($parms);

    print_r($results);
?>

The end result will look like this:


Note that you can use the activity filter to preview the custom events within the contact’s timeline.

Get Started

Reading the referral stats and MRR

To get started with the Referral Stats review, you can access them by clicking on Partnership Summary in the left menu.

This will show you a breakdown of all the clickthroughs that came from the link you’ve shared, the unique invites you’ve sent,  the conversion signup from those clicks, as well as the commission due for that month. The status indicates if the commission was PAID or still UNPAID.

The Total Earnings will be the total commission earn-out to date and the Monthly Recurring Revenue (MRR) will reflect the Monthly Recurrent Revenue accrued this far.

Get Started

Using the platform power tools

As a partner, you get access to a variety of useful marketing tools. To preview available tools click on Tools from the left menu of the partner’ page.

There are currently 4 tools you can use:

  1. Buyer Persona Builder: This tool lets you build a buyer persona for any business and generate a downloadable template for the assembled persona profile. Some partners use this tool as a free add-on to their service offering and others charge to build a persona for a business.
  2. CAN Spam Compliance by Country: This tool lets you to check spam email compliance by country using a visual map and a search functionality. Partners use this handy tool to identify email spam requirement by country and avoid penalties that can amount to thousands of dollars per email.
  3. Product Comparison Chart: This tool lets you compare the platform to other players on the market. Partners use this tool when clients ask them for a price comparison between our platform and other platforms.
  4. Marketing Automation Generator: This tool lets you build up a full marketing journey, a lead capture form, a landing page and an email template, just by filling out a simple smart form. Partners use it as a way to prospect and start a conversation with leads they are working with.

In addition to the tools you can access the  Academy under the Certification menu, which takes you to a FREE 12 modules course, developed by the  team, and covers Digital Marketing Foundation.

The partnership portal also includes a list of rich Resources that partners can download and Co-brand so they could conduct their own webinars, workshops and even share on their own blog. These resources include articles, PowerPoint presentations and infographics prepared by the marketing team.

Get Started

Front end sales site

As a partner, you get a marketing page that is automatically provisioned for you once your partner account has been activated. This custom marketing site has all the attribution and referral back to your partner account setup and ready. You have the ability to modify and brand this page with your own content and even display your custom signup plans on the pricing table with 1 click.

Get Started

Email testing – inbox preview

The platform allows you to preview your emails on different apps and devices right from your dashboard using the Inbox Preview feature. To get started with the inbox preview feature, you can find it:

  1. Under the additional actions for your email template.

  2. On the third step of creating your email campaign. (Design step)

  3. Inside the email builder.
      

Once you select Inbox Preview, you will be presented with a list of apps on different devices, you can select as many as you like for the test. (This is subject to the number of credits that are offered within your plan)

After you select the apps, you can click Send Request in order to run the test. You will be redirected to the results page a few seconds later, and can switch between different apps using the left panel to view the results for the different tests.

Get Started

Managing the streams

Streams aggregate all your profiles in one easy to manage screen. You can toggle between profiles and groups with  a simple click to view the engagement under these profiles. Streams are accessible from the top menu under Social Media.

Your connected profiles will be shown on the left as well as your defined Social Groups. Click on the desired social account or group to display the streams available for these profiles as below:

  • Facebook: On Facebook, you can manage your Page Feed, Messenger Inbox, Reviews, Tagged Posts, and Ads Feed. You can interact with your audience by checking reactions on your posts, commenting, and replying to page messages.
  • Facebook Group: You can check the group’s new feeds and events. Due to Facebook API policy, the feed information is pulled from the date of connecting the group.
  • X: X allows you to access your Direct Messages for easy replies. You can also keep track of your latest followers, Mentions, Retweets, and stay updated with your home and User Feed. Engage with your X community by Retweeting or Liking posts.
  • LinkedIn: On LinkedIn, you can comment on company page posts.
  • Instagram: Instagram lets you interact by replying to comments, liking posts, and viewing your own posts and tagged posts. You can also engage privately through Direct Messages with the option to reply.
  • Pinterest: Pinterest provides a summary of connected boards.
  • Hashtags streams:  Keep an eye on specific keywords across X and Instagram using Hashtags Streams to monitor relevant conversations.
  • Twilio SMS: For Twilio SMS, you can easily check your messages and respond, ensuring timely communication.
  • YouTube Channel: Manage your YouTube channel by replying to comments (published or moderated) and engaging with your audience through comments and likes on your videos and playlists.
  • TikTok: On TikTok, you can track the performance of your videos by checking the number of likes, comments, and views.

Get Started

Personalization

You can personalize your Emails and your Landing Pages by using the Shortcode option:

Click on Shortcodes from the top toolbar, select your target list(s) and pick the correct field you would like to display in your content:

Once you click on your Shortcode, it will be inserted wherever your cursor is. Once the campaign is fully executed and sent the shortcode will be replaced with the proper value available for each contact on your list(s).

NOTES:

  • If a specific contact does not have a value for the chosen Shortcode, they will see an empty space or a fallback option as described in the command options below.
  • Test emails will show the raw Shortcode instead of a value because the campaign had not executed yet. Don’t panic! the system will change this value once the campaign is executed.
  • When targeting multiple lists, you might need to include multiple Shortcodes in the same line. ex: Hello [COMPANY] [COMPANYNAME]. In this example each Shortcode is a reference to a custom field called company that you might have created for each list.
  • Some lists share similar default system Shortcodes in which case if you are targeting multiple lists you don’t have to insert the Shortcode multiple times.

Below are some commands you can apply to Shortcodes so you can format the data properly:

Shortcode Split Using /2

This is used to split a long shortcode and display only the first part of the collected data. The syntax will look like this:
[#FULLNAME/2#] ex: if a subscriber on a list you captured had a full name Richard Fallah than the campaign will show: Hello Richard.

Shortcode Fall Back using the | Character

If some subscribers on a list had empty data for their name, you will be able to fall back on a different shortcode or static text. Ex: one record The syntax will look like this:

[#FULLNAME|COMPANYAME#] ex: if the data on the list did not have first name but company name than the campaign will show: Hello Company Name.
or
[#FULLNAME|*there*#] ex: if you want to show a static text if the full name was left empty by the subscriber than the campaign will show: Hello there. Note the static text has to be between two asterisks.

Shortcode Combo: 

In case you wanted to combine the above 2 cases in one syntax, you can use them as follows:
[#FULLNAME/2|COMPANYNAME|*there*#]

Shortcode Capitalization: 

If you have a mix of upper and lowercase data within your subscriber’s lists, it might not look too well when sending an email. Ex: Hello JOHN, in typing etiquette, can be interpreted as shouting out loud the person’s name. We added 3 simple syntaxes to help you control your capitalization:

PROPER – Capitalizes the first letter of a shortcode value, regardless of existing format:  [#PROPER FULLNAME#] – ex: if you have JoHN DoE as a record, it will turn it into John Doe.

UPPER – Capitalizes the full shortcode value: [#UPPER FULLNAME#] – ex: if you have JoHN DoE as a record, it will turn it into JOHN DOE.

LOWER – Makes the full shortcode value lowercase: [#LOWER FULLNAME#] if you have JoHN DoE as a record, it will turn it into john doe.

Note that the capitalization syntaxes can be mixed with other formats. ex: [#PROPER FULLNAME/2| LOWER COMPANYNAME|*there*#].

Get Started

Default account shortcodes

A Shortcode is a simple variable that contains a predefined value, ex: [COMPANY_NAME] = Joe’s Bike Shop. You can insert Shortcodes within your content and the value will render as defined under your settings. This is particularly handy when sending lots of campaigns or creating many templates. Beside your contact’s Shortcodes your account comes with a default list of personal Shortcodes, ex: company address, phone and social media channels. To access your default Shortcode list you can visit your Settings page,

or from your Campaigns page under the gear utility button, choose Settings:


This will allow you to edit:

  1. The Default Sending Values (From email address, Reply To email address, From Name). You can see these populated when you create new email or automation campaigns.
  2. Your default Address Shortcode [ADDRESS] which stores your business address.
  3. Your Company Shortcodes: [PHONE] and [WEBSITE].
  4. Email Campaign Specific Shortcodes that include the text you’d like to show when you use the Unsubscribe [UNSUBSCRIBE_URL] or View Email Online Version Text [ONLINE_URL] of your campaign or adding a redirection link after unsubscribe [UNSUBSCRIBE_REDIRECTION_URL].
  5. Your Social Media Shortcodes with links to your Facebook, Twitter, Linkedin, Instagram, and Pinterest. Use these Shortcodes to invoke their respective icons.

Get Started

Using coupon codes with your email campaigns

Coupons are great to help you gain new clients, show your loyal fans appreciation or entice customers to try new products by offering promotions, coupons, and special offers. The platform’s coupon tool allows you to create unique coupon codes that your staff can validate easily. Our platform will also collect data on customers who redeemed the offer so you can analyze your campaign performance.

Adding Coupon Shortcode to Email Campaign

To add a Coupon Code to your campaigns, click on the Shortcode option section on the Builder’s top Toolbar under Email Campaign Specific or add [COUPON_CODE] to where you want to place it.


Redeeming Coupon Code via Email

Contacts that receive the Email Campaign will have the Coupon Code link that will redirect to a Coupon Redemption page.

Coupon Code in Email:

Coupon Redemption Page:

You can trigger contacts that have redeemed the coupon code using the Custom Event trigger.
In the automation builder, add the Custom Event trigger, choose Coupon Redeemed option and specify your email campaign.

Redeeming Coupon Code

To redeem a Coupon Code, click the Gear Icon on the Campaigns Page. Select the Coupon Redemption option and enter the Coupon Code for the contact in the Textbox to redeem it.

Coupon Redemption:

Redeem Coupon Popup:

Get Started

Adding media to your social posts

The platform offers many options to add media to your social posts:

  1. Upload new media by dragging and dropping or using the Upload option
  2. Use your file manager to recycle previous content from your library
  3. Animated GIF tab powered by Giphy to search thousands of cool animated GIFs
  4. Open Source Images and Videos powered by Pixabay for access to high-quality stock photos and videos.
  5. Design using Canva

Please make sure to review the below Image/Video upload terms:

Image(s) Upload Terms

  • Please make sure your image is less than 3mb in size.
  • Allowed extensions: jpg, jpeg, gif, png
  • Facebook limitations:
    • Facebook supports multiple images that are up to 4 mb.
  • Instagram limitations:
    • Maximum file size: 8MiB
    • Aspect ratio: Must be within a 4:5 to 1.91:1 range
    • Minimum width: 320 (will be scaled up to the minimum if necessary)
    • Maximum width: 1440 (will be scaled down to the maximum if necessary)
    • Height: Varies, depending on width and aspect ratio
    • Formats: JPEG
  • X limitations:
    • X supports uploading up to 4 images excluding gif.

Video Upload Terms

    • Please make sure your video is less than 20mb in size.
    • Facebook limitations:
      • Facebook supports video uploads that are up to 20 minutes long.
      • Allowed extensions: MOV, MPEG, MP4, AVI, MPG, FLV
    • X limitations:
      • X supports video uploads that are up to 30 seconds long.
      • Allowed extensions: MP4 and MOV
      • MP4 format: H264 format with AAC audio
      • Minimum resolution: 32 x 32
      • Maximum resolution: 1920 x 1200 (and 1200 x 1900)
      • Aspect ratios: 1:2.39 – 2.39:1 range (inclusive)
      • Maximum frame rate: 40 fps
      • Maximum bitrate: 25 Mbps
    • Instagram limitations:
      • Container: MOV or MP4 (MPEG-4 Part 14), no edit lists, moov atom at the front of the file.
      • Audio codec: AAC, 48khz sample rate maximum, 1 or 2 channels (mono or stereo).
      • Video codec: HEVC or H264, progressive scan, closed GOP, 4:2:0 chroma subsampling.
      • Frame rate: 23-60 FPS.
      • Picture size:
        • Maximum columns (horizontal pixels): 1920
        • Minimum aspect ratio [cols / rows]: 4 / 5
        • Maximum aspect ratio [cols / rows]: 16 / 9
      • Video bitrate: VBR, 5Mbps maximum
      • Audio bitrate: 128kbps
      • Duration: 60 seconds maximum, 3 seconds minimum
      • File size: 100MB maximum
    • LinkedIn limitations:
      • LinkedIn supports video uploads that are between Three seconds to 30 minutes.
      • File size: Between 75kb and 200MB.
      • Allowed extensions: MP4

Get Started

Using dynamic and rich content blocks

The landing page builder offers a few dynamic blocks that you can use. These blocks include RSS feeds, embedded videos, event Calendars and event Countdowns.

Once you select one of these blocks and drag it to your page, you can access its settings by clicking on the Settings option in the top of the block itself.

This will allow you to edit the settings for this specific block, so for example if it’s a calendar block, you will be able to select the calendar type (iCalendar, Google Calendar or Outlook Online), input the start and end dates, title, description, location and time zone for the event. This way once you publish your landing page, if someone clicks on the Add to Calendar button, they will automatically be able to add the event to their personal calendar.

The same rule applies to the countdown block, you will be able to edit its settings and specify the targeted date and time.

For RSS feeds blocks, you can input the RSS feed URL inside the block settings. And for the Videos blocks, you can also embed the Youtube/Vimeo/MP4 URL link for example using the block settings option as well which will automatically be reflected on the block itself.

Get Started

Landing page personalization


To add personalization to your Landing Pages, you can use the Shortcode option available inside the builder.

Once you click on Shortcode, hover over to select which list and which element to choose:


This will allow you to add List Shortcodes to your Landing Page text and personalize the experience for your recipients.

If you choose First Name from a specific list, you will see the following:

[#FIRSTNAME#] will be replaced with the First Name value from the list chosen.

In order to better understand Shortcode, click here.

Get Started

Add custom tracking

If you’d like to use your own custom tracking (Google Analytics or others…) on your Landing Pages, you can do that from your landing page Settings window.

  1. Go to the Settings option from the left sidebar.
  2. Click on the Tracking tab from within the settings popup.
  3. Activate the 3rd Party Tracking option and you will see two fields for your tracking code, one for the code that needs to be inserted before the closing </head> tag and the bottom field for the code that needs to be inserted inside the closing </body> tag. Some services require two code options, ex: Google Tag Manager, while others might only require one, ex: Google Analytics.
  4. You can also Activate UTM Tracking

Get Started

Landing page SEO setting

To edit your Landing Page SEO settings while inside the Builder, go to Page Settings from Tools. The settings menu will open, you can input your SEO title and description for this page inside the bottom two fields within the first General settings tab. Once you are done, hit Save Settings and then save your landing page changes from the top right for them to take effect.

Get Started

Adding Team Members

Adding a Team Member

To add a new team member under your account:

1. Click on your profile icon located in the top right corner.
2. Select Settings from the dropdown menu.
3. Navigate to the Users tab.
4. Click on Add User.

User Details:

• Fill in the required fields for the new team member.

• Choose between giving full permissions or assigning custom ones based on the individual’s role within the company.

When you click on the settings gear, you will be prompted with the following option:

Deleting a User

To delete a user, click on the dropdown menu next to the user’s name and select Delete.

Creating a Group

To create a group of users:

• Click on Add Group.

• Provide a name for the group.
• Choose group permissions.
• Click Submit.

Editing/Deleting a Group:

• To edit a group, select Edit.

• To delete a group, click on the dropdown menu next to the group’s name and choose Delete.

For Agency Accounts:

When adding a new user under an agency account, specify the associated account from under  USERS AND WORFLOW.

1. Choose the business from the available options.

2. After selecting a business, you’ll see the following:

Adding a Team Member

After selecting the business, you can create a new team member by clicking on Add User.

Social Media Post Approval:

• Click the gear icon next to Add User to access additional settings.
• From the settings, you can manually approve scheduled Social Media posts.

Admin Team:

Master users will have access to the agency and subaccounts.

• Within the Admin Team section, choose to Add Master User.

• Provide the necessary information.

Note: You can’t choose an existing Email Username:

Managing Master Users:

• To edit a Master User, select Edit.

• To delete a Master User, click on the dropdown menu next to the user’s name and choose Delete.

Admin Team Group:

An admin Team group can be assigned to Master users. To create such group:

• Click on Add Admin User Group.

• Provide a name for the group.
• Choose group permissions.
• Click Submit.

Editing/Deleting an Admin Group:

• To edit a group, select Edit.
• To delete a group, click on the dropdown menu next to the group’s name and choose Delete.

Get Started

GDPR compliance tools

Our platform is GDPR compliant and we provide tools to help our users comply with GDPR as well. Please see the list below:

1- Ability to export contact history

2- One-click erase contact option

3- Adding a field on the forms, to ask for consent

help-page-003

Get Started

Allow adding contacts without an email to a List

By default, when adding a contact to a list using opt-in forms, mass upload, API or third-party integration, you have to provide an email address with the contact which is the primary identifier of that contact. To override this setting and allow adding contacts without an email (ex: Contact us form on your website), navigate to your Lists page and from the right side options drop-down choose Fields & Form. Expand the Email Address field and mark it Not Required.

Note: This setting can impact the performance of your automation.

Get Started

Audiences

Audiences allow you to segment your lists based on specific criteria that you choose. The platform allows you to Create Audiences from your current contact lists. To do that, click on the Contacts option from the left sidebar, then select the Audiences tab in the top.

To create your first audience, click on Create Audience. You will be presented with a form window where you can give your Audience a name, choose your source list(s) that will be used to create this Audience (You can leave this option empty to apply the rules on ALL LISTS). Next you can specify your rules, for example, you can group contacts based on their behavior (opened your last campaign), or based on field values (Title field is CMO), or other rules…

This is another screenshot showing more options being used inside the audience settings.

Audiences can be used later on to send specific email campaigns or inside Automation to target a particular group of contacts.

Get Started

Setting up lead scoring

To setup a new lead score, Go to Contacts – > Lead Scoring, click on Add Score.

Note: Lead scoring is an Add-On that must be installed or part of your plan.

A popup window will appear where you can assign the score rules. You will be prompted with the following configurations:

  1. An Action Trigger which is the type of engagement or data that the person will be scored on (Ex: a duration on site, Watched a video, opened an email or their company size is 1-10 employees.).
  2. Each Action Trigger has its own Conditions/Filters that must be completed (Ex: if you choose duration on site, you will need to specify which domain you are targeting in this field and the time spent)
  3. The Contact Score and Anonymous Score once a user and/or his data match your Action Triggers and Conditions. You might want to accelerate the scoring for known contacts by assigning them higher scores than anonymous visitors, for certain actions considering you have identifiable contact information on them.
  4. Choose if you want to repeat the scoring process each time it is matched or do it one single time.

When you click on the gear next to Add Score button:

The popup will let you configure the maximum score leads can reach as well as enable a notification alert once a lead has reached a certain score that you specify.

You can explore your Leads, their Status and your Score Rules through:

LeadsStatusScore Rules
That’s how your Leads will appear:

You can search leads,  filter them by type (contacts vs anonymous), status, by assigned users or by domains. You can also click on a record to view their profile timeline. If you are working in a team environment you can assign leads to different team members from the Assign To option.

Score Status is a great way to group your leads into human identifiable jargon that will help you take actions manually or through a journey workflow on your dashboard. Your account will come with a predefined set of label that you can click and modify to match your own funnel.

To add a new status, go to the Status tab and click Add Status.


Adding a new Status Label will ask you for the following information:

  1. Color for that label as it will appear on your funnel.
  2. Label Title and Description as preferred by you and your team.
  3. The Ceiling Range of the score that will be in this status. The system will automatically pick up the number from the the previous score and calculate the range accordingly. In the example below, if you put 50 and the previous score was 10 then for this label, anyone that fall into the range of 11-50 will be labeled as Cold Lead.

    You can also edit predefined Status:

To access the list of scores and make changes to them click the Score Rules tab.


You can also Delete the Scores you no longer want by choosing Delete from the Dropdown Menu

Get Started

Setting up goals

Goal setting is a great way to measure the effectiveness of your campaigns. Once you’ve identified your main Goals and KPI’s (Key Performance Indicators), you can use the Goals feature on your account to get in depth information on these goals. To create a goal go to Contacts option and then select Goals from the top menu.

Click Create Goal to configure a new one. You will be promoted with a setup window to complete the process as below:

  1. If you have multiple domains connected to your account make sure to select the correct domain for this goal. Domains have to be properly verified.
  2. Give your goal a name for your own reference (ex: Completed Checkout Process)
  3. OPTIONAL: Choose if you wish to attach a money value to the goal once it is completed. The value can be fixed (by choosing Fixed) or you can get the dynamic value from your platform or e-commerce checkout by adding additional code to your tracking code (if you click on Variable). Each website might have a different TOTAL variable so you might want to consult with your developer and coordinate with the support team.
  4. Next, choose your goal type from the following: Destination URL – Duration – Pages Visited – PPC Referral – Event Triggered (Clicked Link(s), Wached Video(s), Submitted Form) – Funnel Tracking. Depending on your choice, you might need to input some additional details before you have your Goal ready to be deployed.
  5. OPTIONAL: Choose to trigger a Webhook once a goal has been completed by a user. You need to create a webhook before you can choose it from this option.

It’s worth noting that you can also trigger webhooks once your goal has been fulfilled. You will need to have had created the webhook beforehand to be able to choose it in this last optional step.

Get Started

Reading goals analytics

To access the analytics on your goals:

  1. Click on ContactsGoals from the top bar when in Contacts option.
  2. The page will display a table summary of your goals type and performance summary. Find your desired goal and click on the Analytics option next to that goals.
  3. The top preview of the report include a drop down to easily switch between goals and a line-chart of the daily conversion of that goal. You can change the default time period of that report by clicking on the date-picker.
  4. The bar chart displays the percentages for the types of users who reached that goal. It is broken down by Anonymous (random visitors without contact information) and Contacts (Active contacts that are cookied and can be found under your Contacts lists).
  5. Traffic Sources displays 2 pie charts broken down by the original source of users who reached the goal, whereas the left panel represents Direct, Organic, Referral and PPC sources and the right pie chart represents all conversions that came from Social Media.
  6. The table below gives you a detailed breakdown of who are the Contacts that reached your goal, the Anonymous IP’s and their full profile, which social media events and email campaigns triggered this goal,  the demographics of the users as well as conversion by device type.

Get Started

Manage campaign screens

The campaigns page comes with a set of options to search, filter and manage individual campaigns. To sort your campaigns by their status, Scheduled, Sent or Draft, click the filter icon from the top of the table.

You can also sort campaigns by lists using the same filter option but instead of Status, use the Lists select field. Other sorting methods are by campaign Type (Regular vs A/B Testing), Process (Normal vs Chunk sending), or Groups.

The Campaigns page also lets you manage your view and control how much information is displayed on the table view of campaign details. To change the view, click on the column drop-down and choose what you’d like to show/hide from the table columns.

Also, you have the option to choose between list and folders view.

Lastly, you can search for a specific campaign name by using the top right search field and entering the desired name.

Get Started

What is RFC 5322

Each of us send tens of thousands of emails per year, but rarely do we think about the complex standards that make these digital messages possible. RFC 5322 is one such standard, a document that might not be well-known outside IT circles, yet it plays a crucial role in how emails are structured and understood across different systems. Let’s break down this standard to understand its importance better.

Understanding RFC 5322: The Foundation of Emails

RFC 5322, or the Internet Message Format, sets the guidelines for email format and structure. It’s like the rulebook that ensures every email you send reaches its destination looking as intended, regardless of the email client or server.

What Does RFC 5322 Cover?

  1. Header Fields and Body: The standard specifies how emails are divided into header fields and an optional body. The header includes details like the sender, recipient, and subject, while the body contains the actual message.
  2. Syntax Rules: It defines how field names and bodies should be formatted. For instance, field names are composed of printable US-ASCII characters, barring colons.
  3. Line Length Limits: There’s a maximum line length in the email body (998 characters) and a recommended limit (78 characters), ensuring emails display correctly across different devices.

The Significance of RFC 5322 in Email Communication

  1. Compatibility: By standardizing email formats, RFC 5322 ensures that an email sent from one client is displayed correctly in another, maintaining the integrity of the message.
  2. Flexibility and Structure: The standard allows for ‘folding’ and ‘unfolding’ in email headers, letting long headers span multiple lines for better readability.
  3. Adaptability: While it focuses on US-ASCII characters, RFC 5322 has been adapted to work with various character encodings, showing its flexibility.

The Impact on Everyday Email Usage

For the average email user, RFC 5322 works behind the scenes to provide a seamless experience. However, understanding its basics can be beneficial:

  • Troubleshooting: Knowing about email structure helps in diagnosing issues like formatting errors or delivery problems.
  • Email Creation Tools: If you’re using or developing email-related software, understanding RFC 5322 is vital to ensure compatibility and adherence to standards.

Looking Ahead: The Evolution of Email Standards

While RFC 5322 has been crucial in shaping email communication, the digital world is always evolving. New standards and updates will continue to emerge as we find more efficient, secure, and user-friendly ways to communicate. Keeping an eye on these developments is key for anyone in the tech field.

In conclusion, RFC 5322 might not be something you think about when sending a quick email, but it’s an essential cog in the email communication machine. By defining the rules and standards for email formats, it ensures that our messages are delivered and displayed correctly, no matter where they’re sent. So, the next time you hit send on an email, spare a thought for the complex standards like RFC 5322 that make it all possible!


Written with the help of ChatGPT.