
Browser Push is a great way to turn website visitors into subscribers, without providing identifiable data beyond their browser ID. This also lets you offer existing email subscribers, new ways to receive messages from you, in real time, without opening their inbox.
Below is a step-by-step guide to activate and setup Browser Push feature on your account
- SETUP AND INSTALLATION
- BROWSER PUSH ANALYTICS
- BROWSER PUSH STATUS AND ACTIVITY
- ADDING WEB PUSH TO YOUR WORKFLOWS
- Make sure that this feature is part of your plan or installed from your Add-on section on your account.
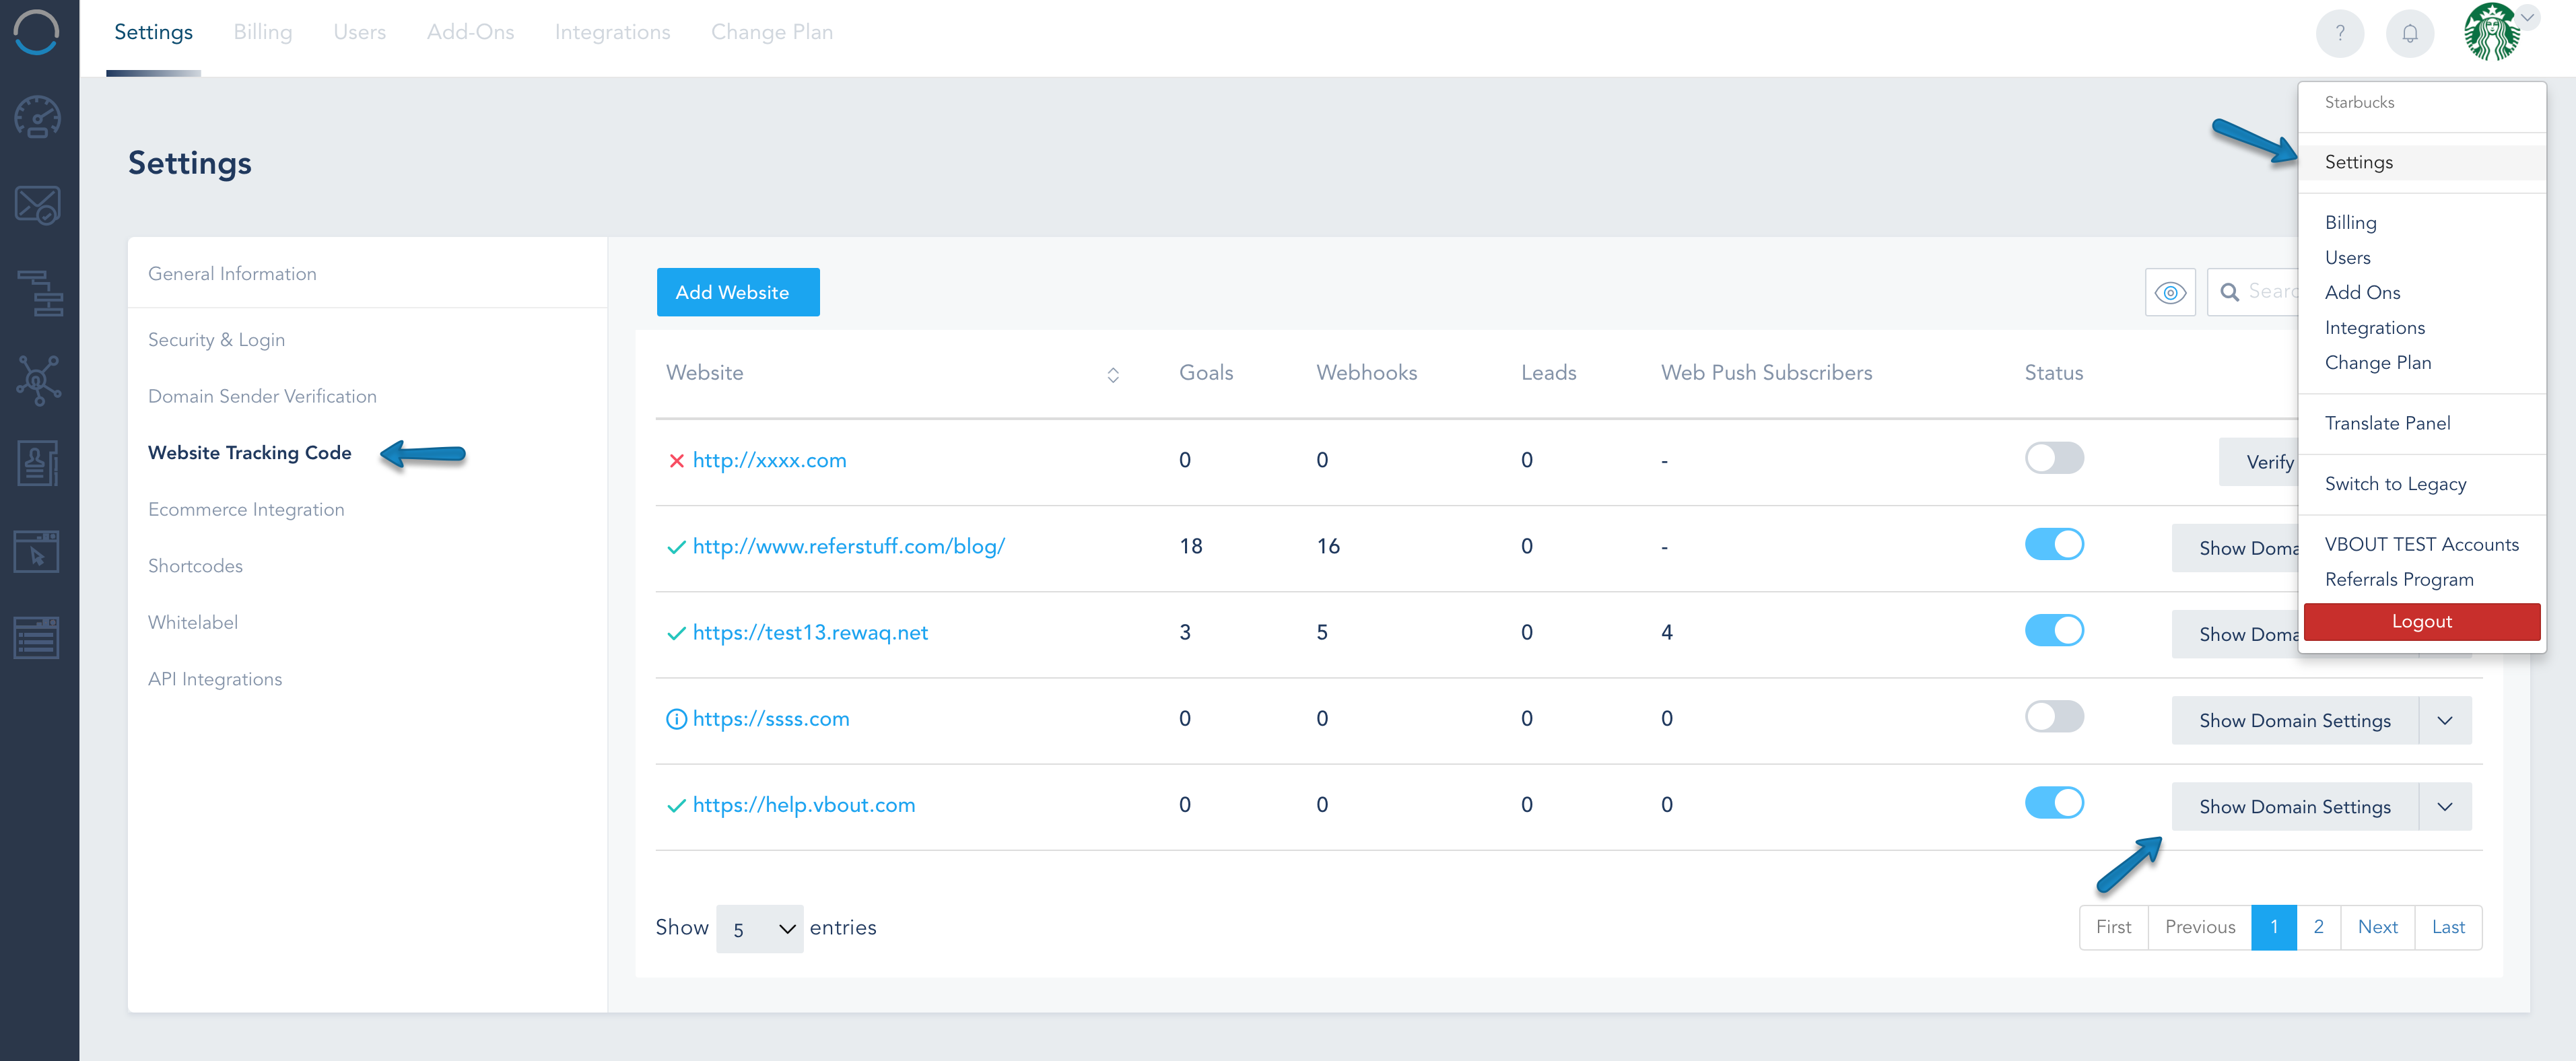
- Under your Settings page, click on Website Tracking Code to add your website and properly install the tracking code on the footer of your site. More information on Website Tracking can be found here. Note that your domain must be over https for browser push to work properly.
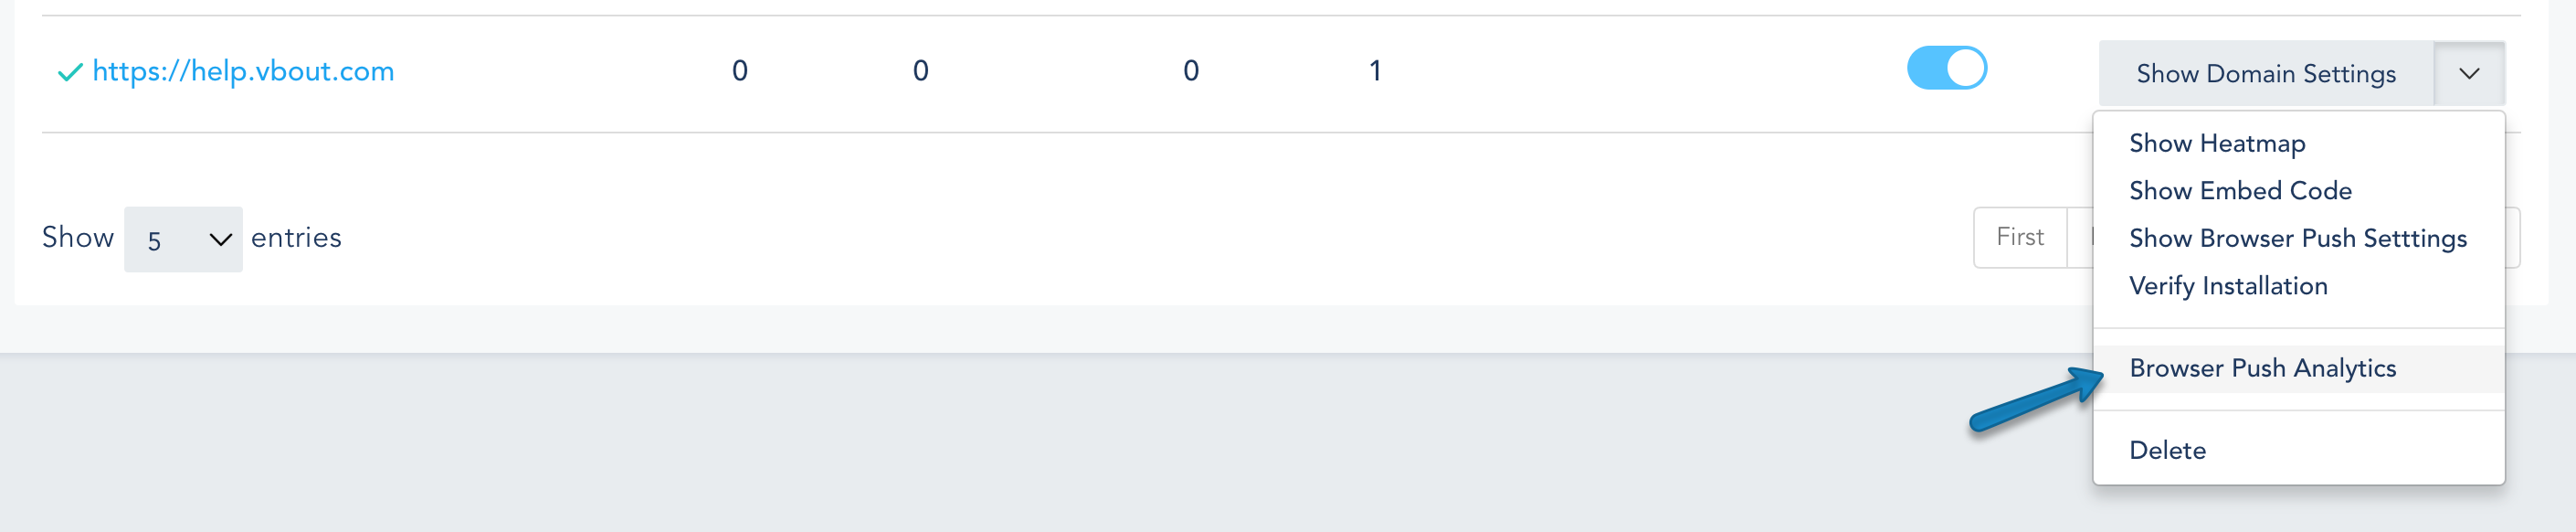
- Once you add and verify your website, click on Show Domain Settings from the right drown option to activate the Browser Push listener within your tracker
- The screen below gives you the flexibility to configure the tracking end points you want to activate
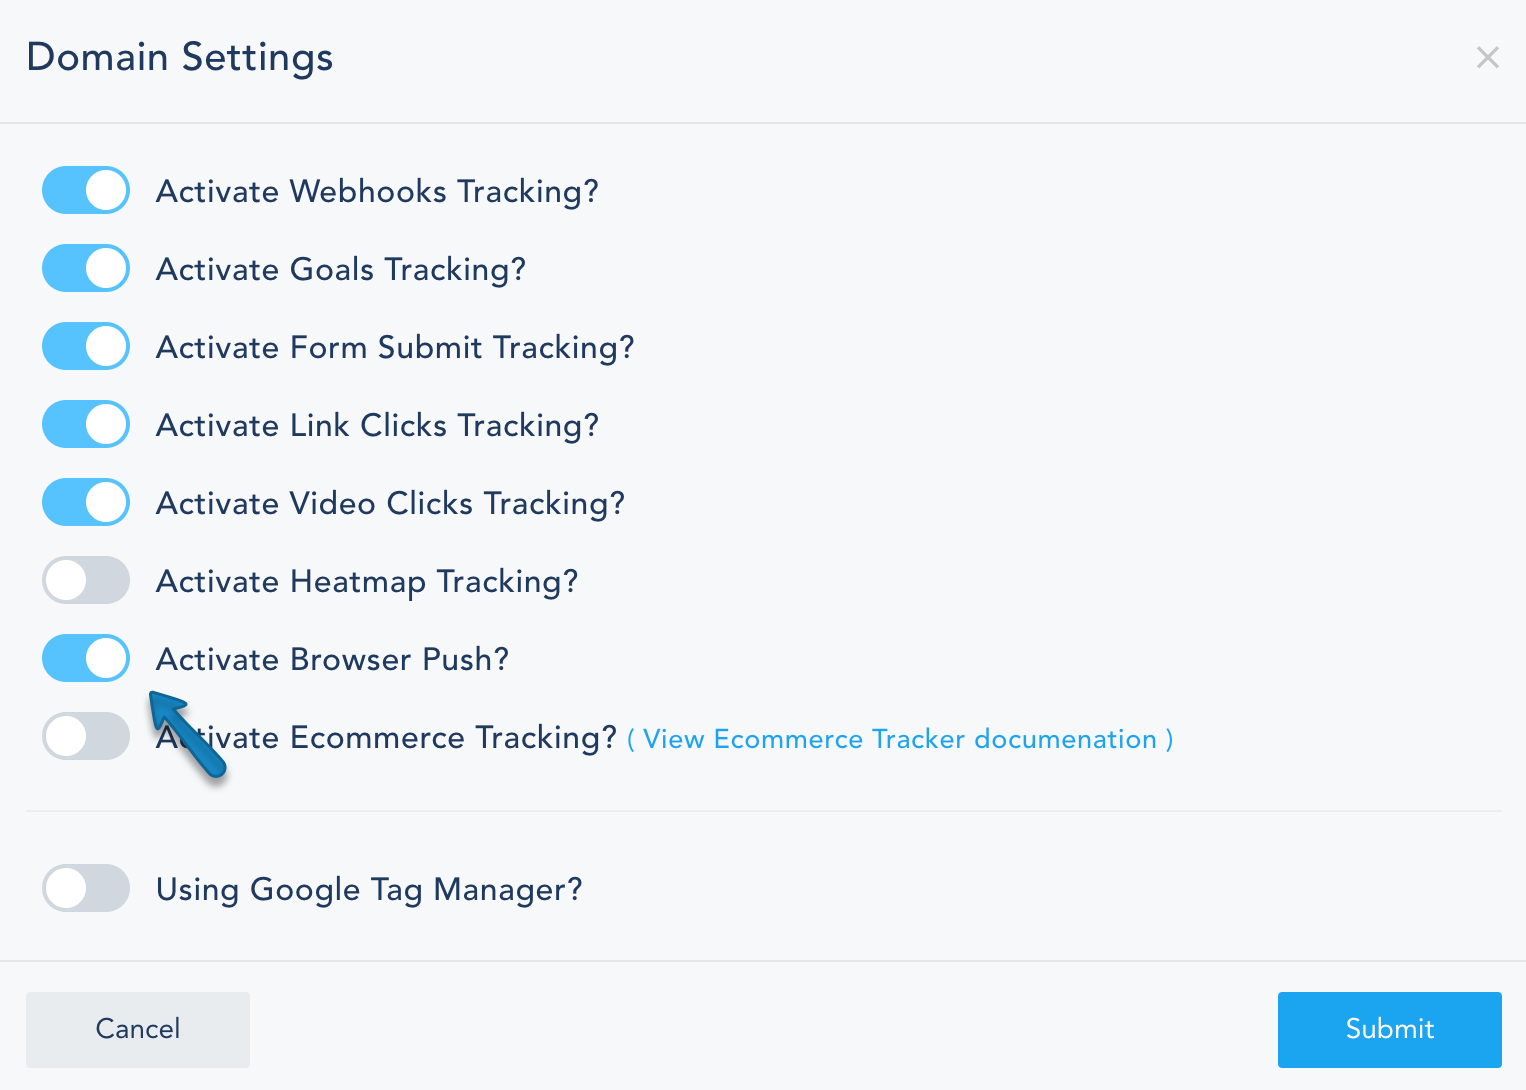
- A new option will be available to setup and install your Browser Push
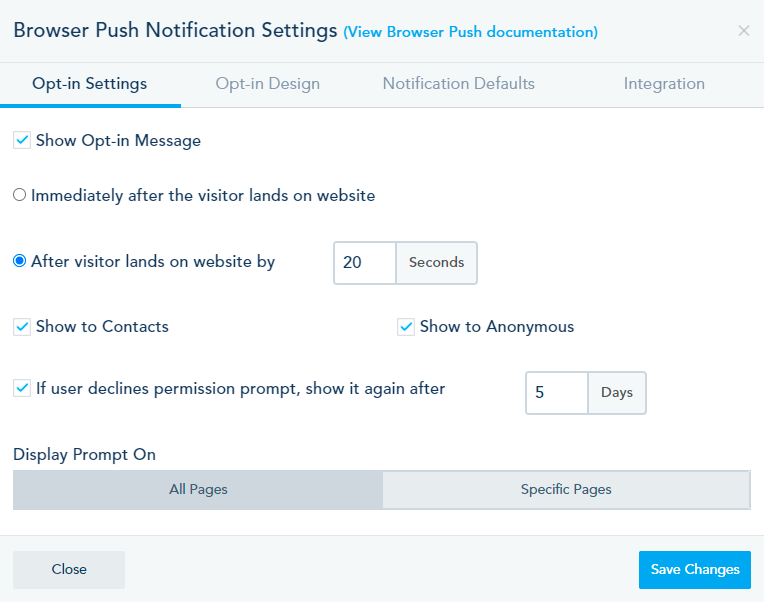
- Below is a tab breakdown of your Browser Push Settings
Opt-in SettingsOpt-in DesignNotification DefaultsIntegration
Here you can make the prompt to opt-in smarter by adding some delays, segmenting them to activate on your cookied contacts, anonymous or both, as well as a re-opt-in option and target pages to show this prompt. The biggest mistake marketers make is to blindly trigger the default Browser Push prompt, which does not give visitors enough time to build a relationship with you.
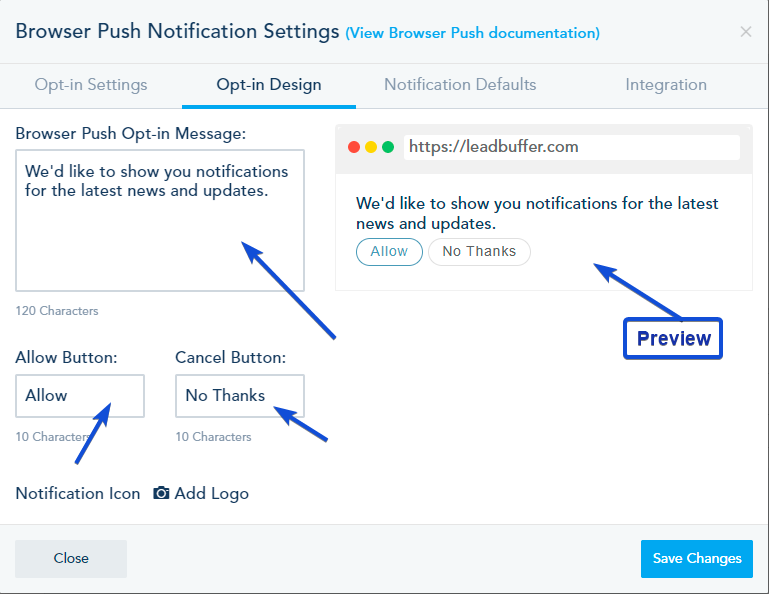
In Popup Design, you can customize the main permission prompt, asking visitors if they wish to opt-in to your Browser Push list. Note that this is different from the default browser permission behavior which normally offers no delay or customization options. The prompt from the Popup Design will give visitors the option to Allow or Decline the browser push option.
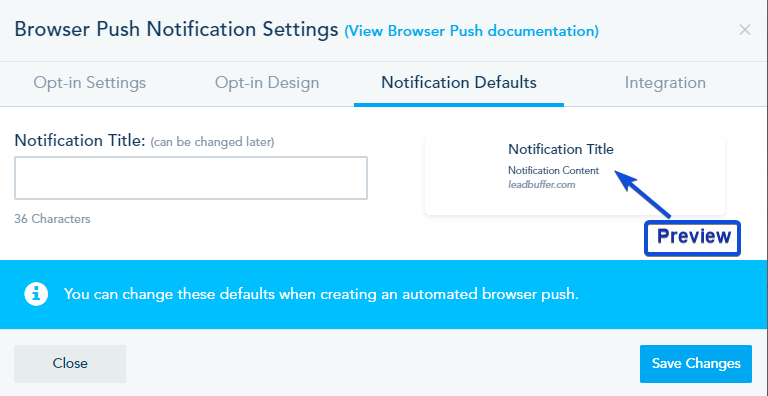
Here you can put the Title of your Notification and see a live preview of your changes.
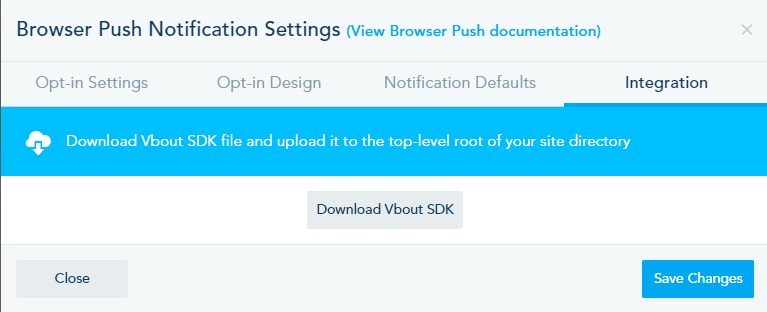
In Integration, you need to download the SDK file and upload it to your root folder on your website. Keep in mind that you need HTTPS on your site so you can use Browser Push notifications.
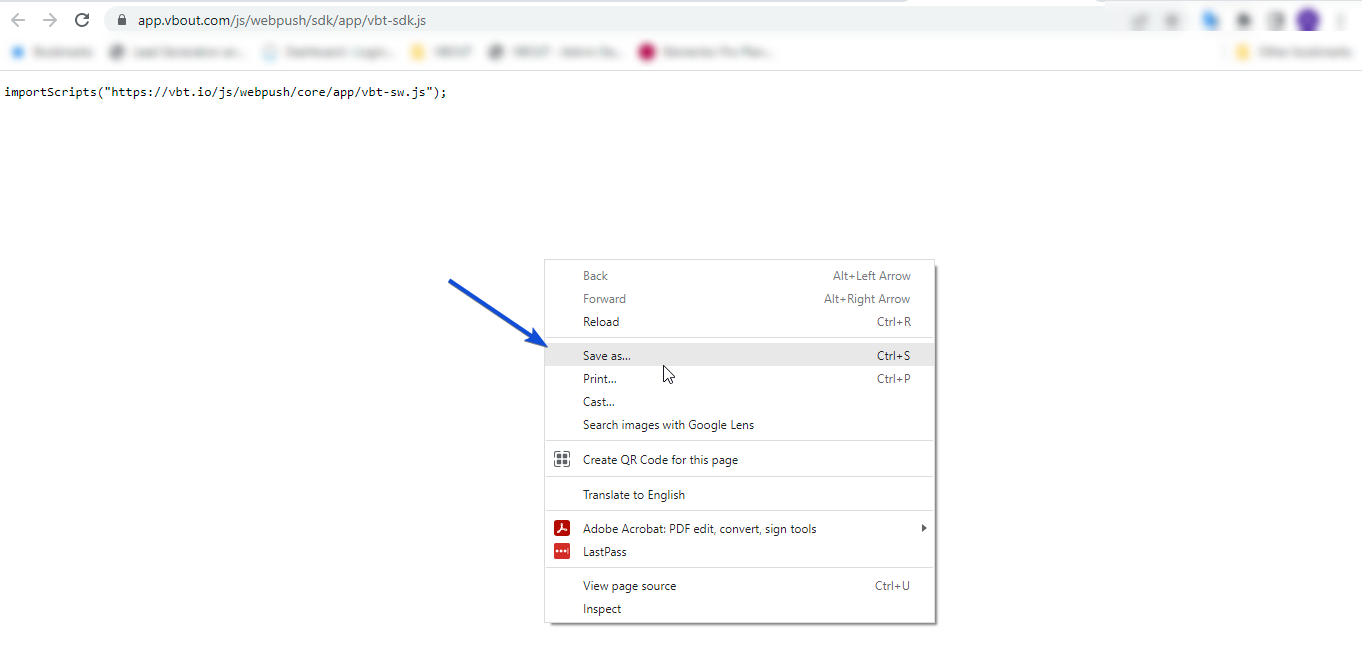
You can download and save the SDK file by Right-click -> Save as in this link.
- Once you finish the setup above, visit your website to test the installation. If the message below did not show, that means that there is something wrong with the installation.

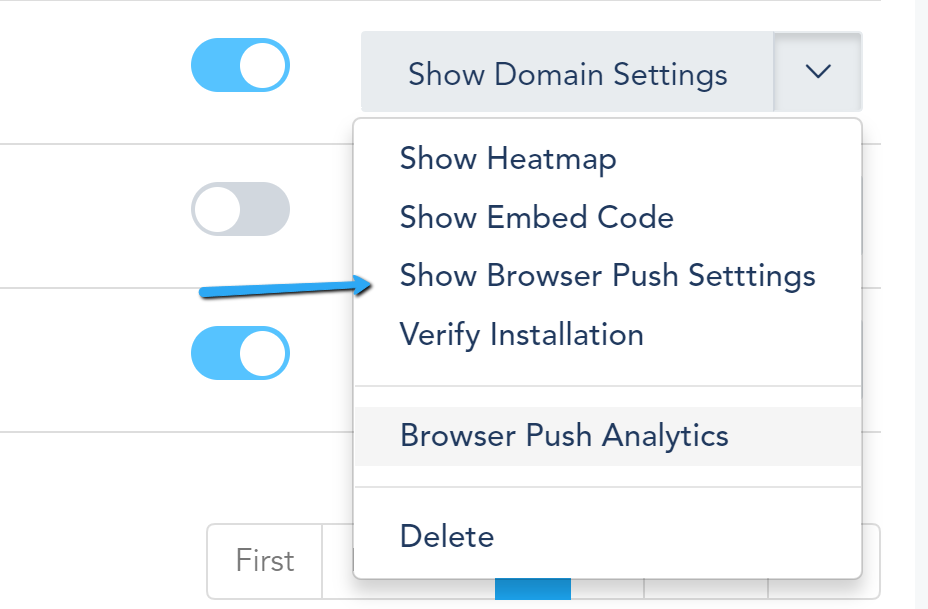
- When a visitor clicks on Allow, they will automatically be added to your Browser Push Subscribers. You can view them by clicking on Browser Push Analytics.
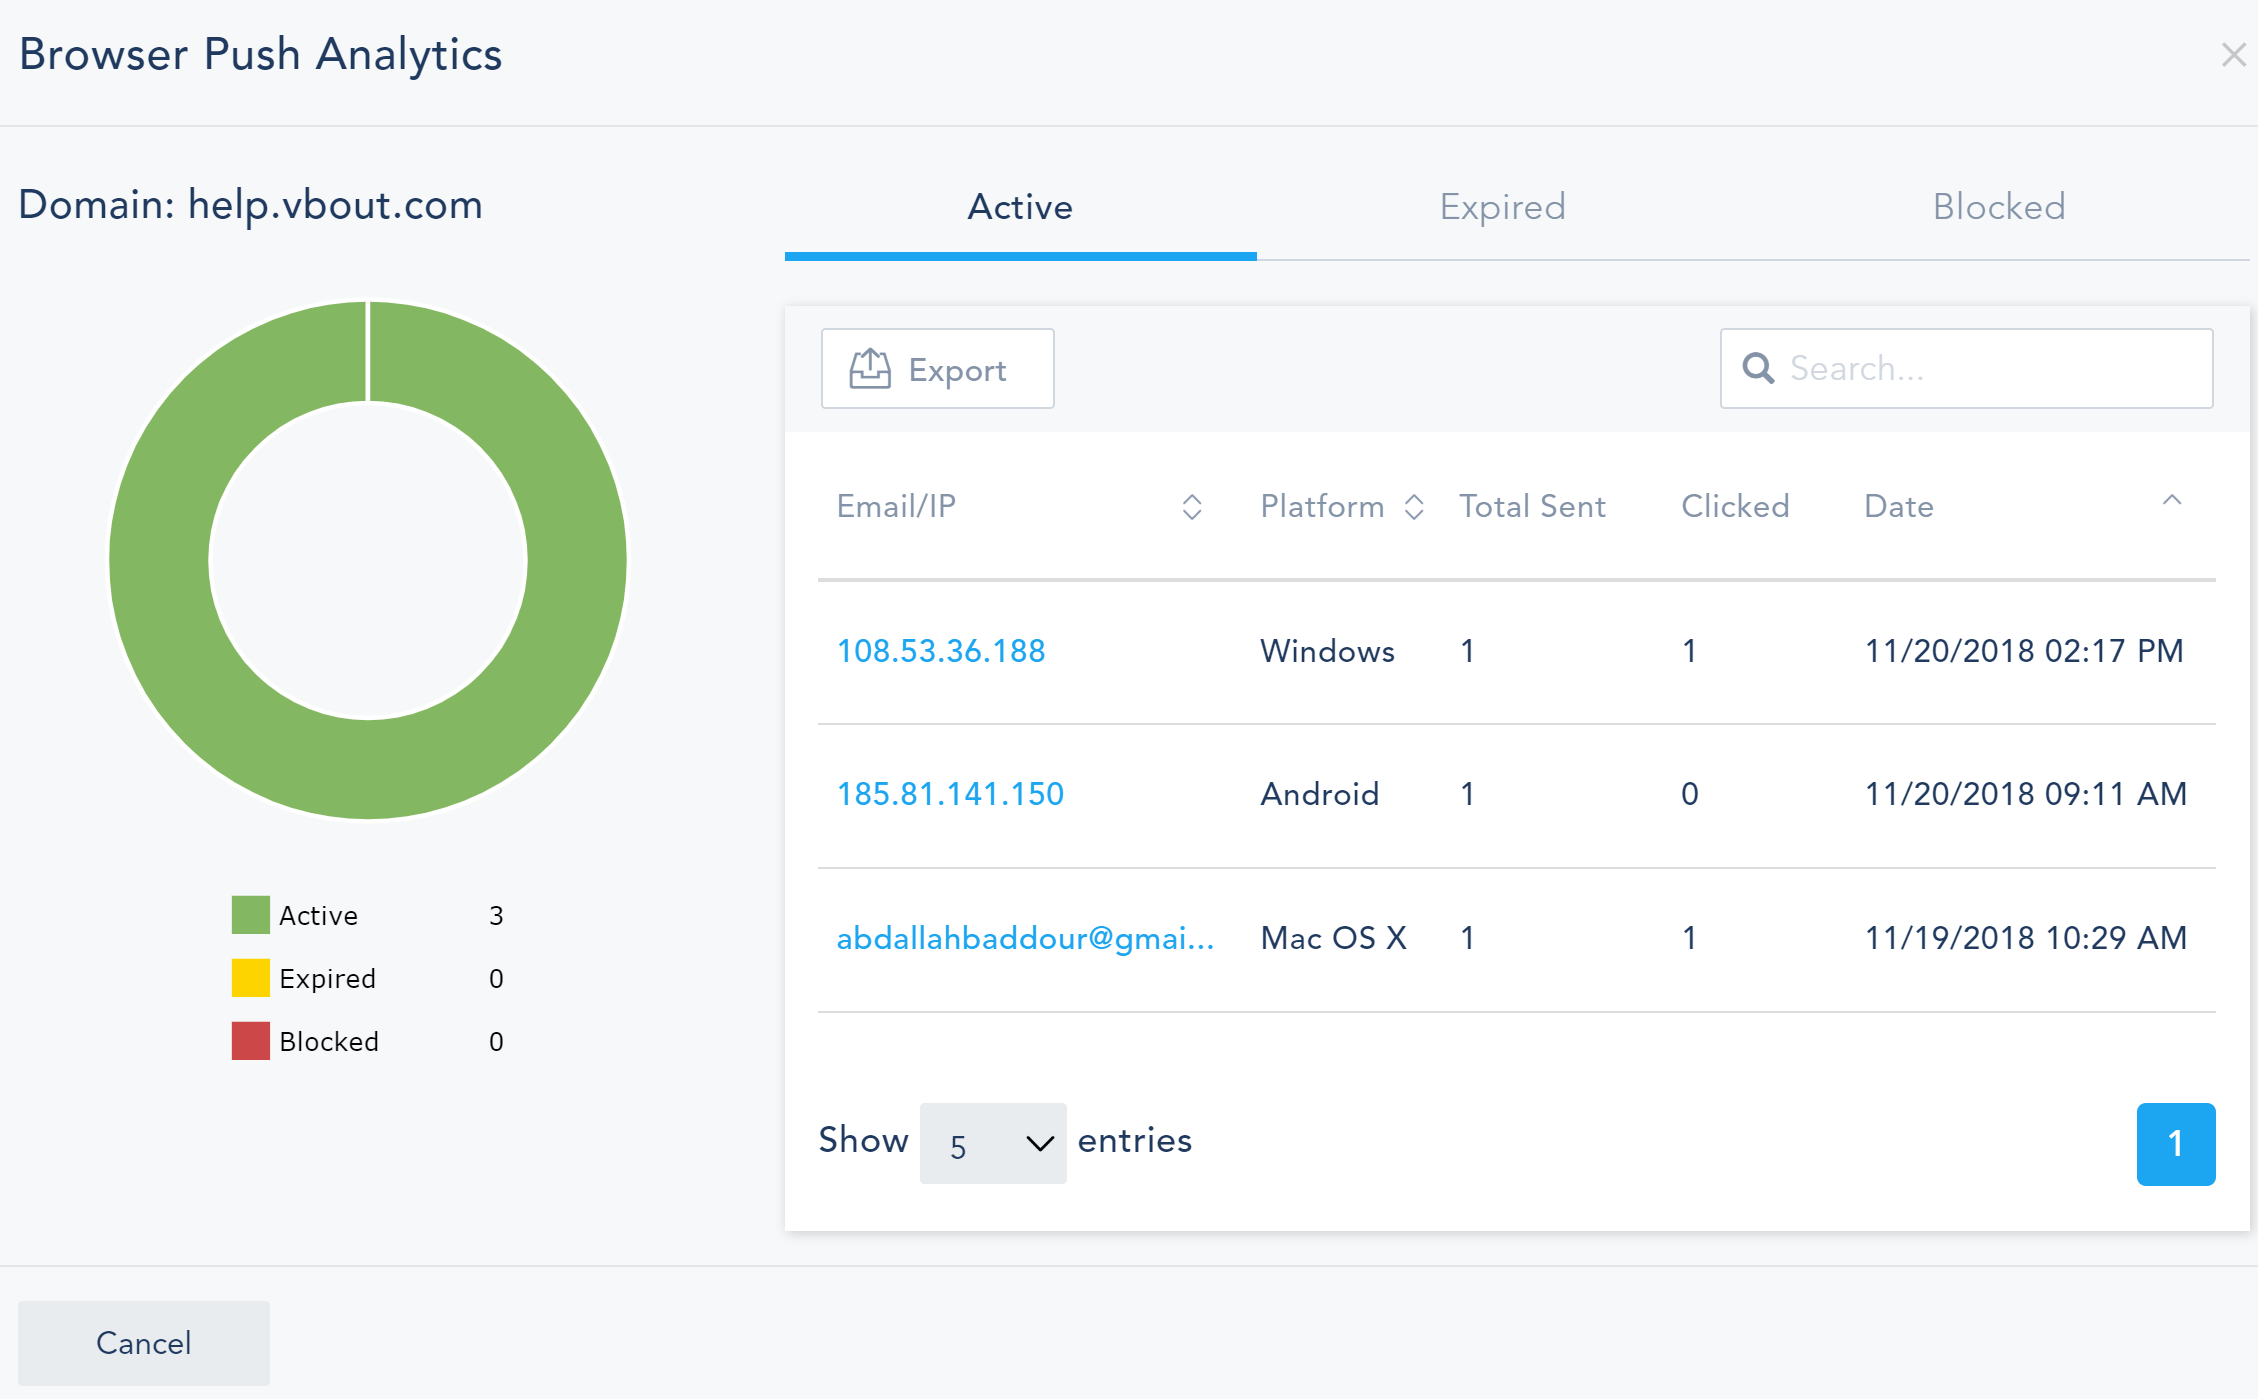
- Browser Push Analytics displays a detailed report on your subscribers. Toggle between the tabs to view records in the Active tab, with meta-details on the device, total messages sent, Clicks and date of signup. If the subscriber was a cookied contact with an email on a list, the platform will automatically merge the record, otherwise you will see an anonymous IP as a subscriber. Click on the Email/IP to access to the full user profile with detailed activities.
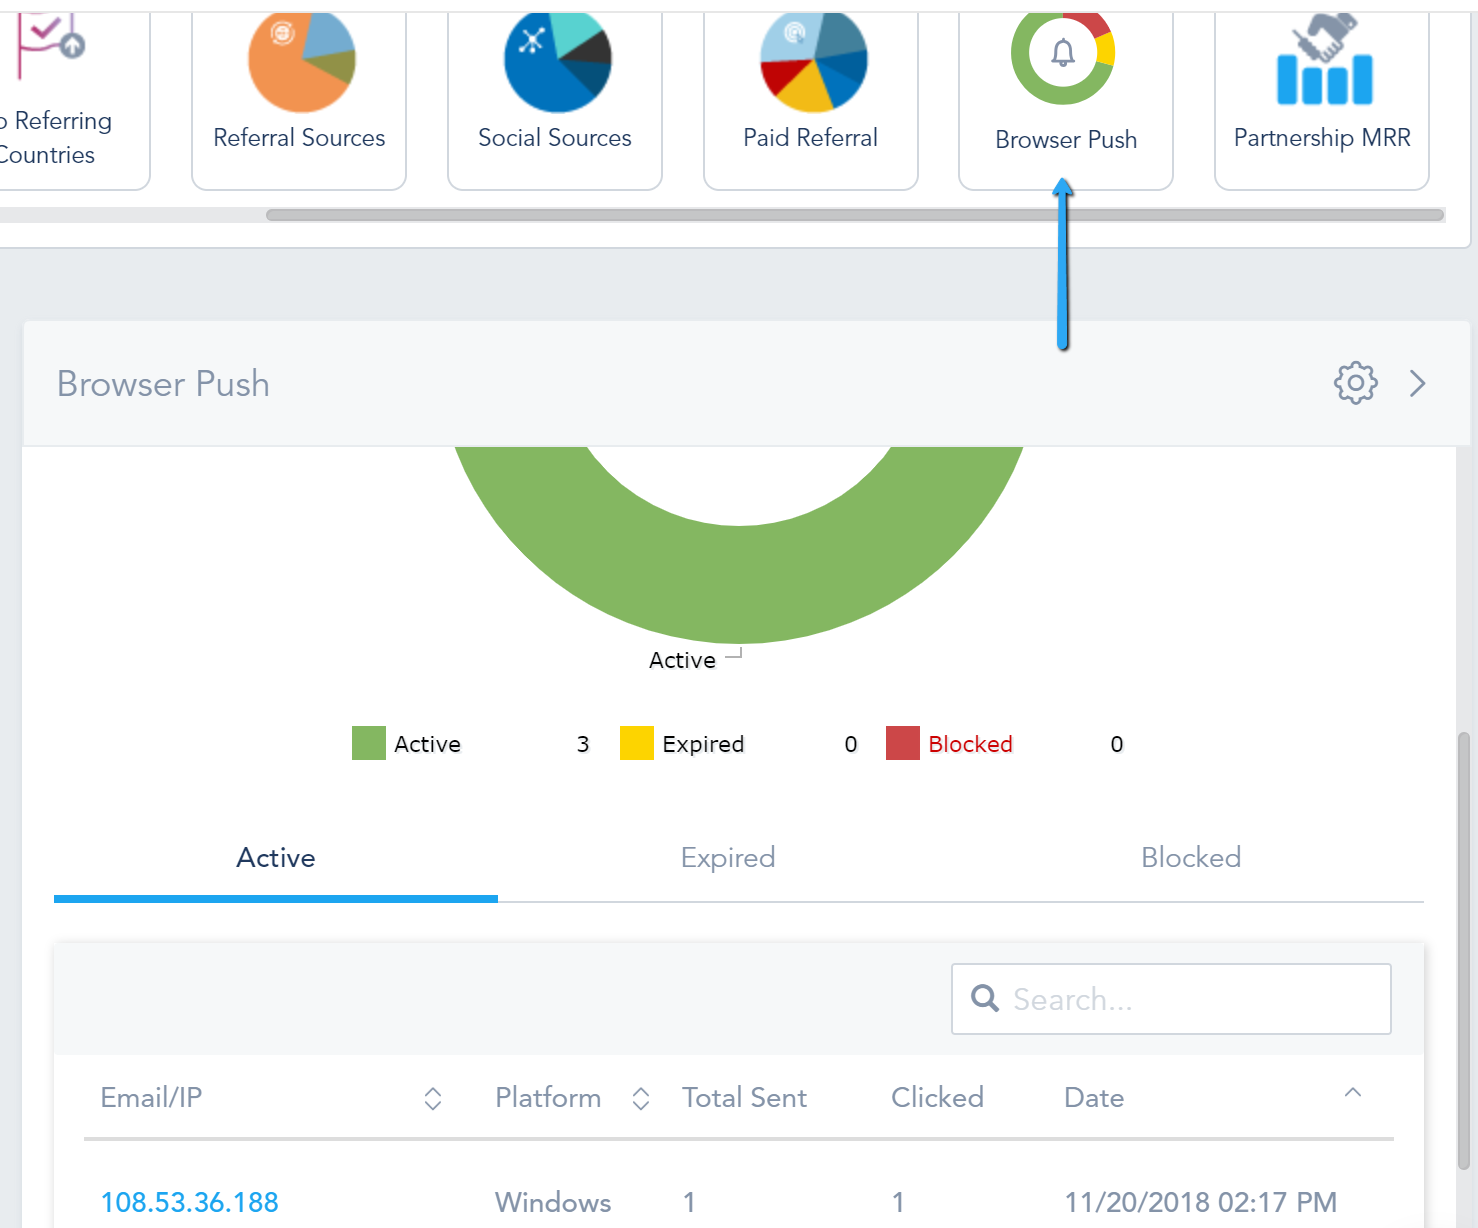
- You can also include an automated report on your Browser Push, by domain, under your Dashboard Reports.
- You can check the full analytics on each automated Browser Push message added to a workflow. You can access them under the Analytics portion of your Automated Messages.

BROWSER PUSH STATUS AND ACTIVITY:
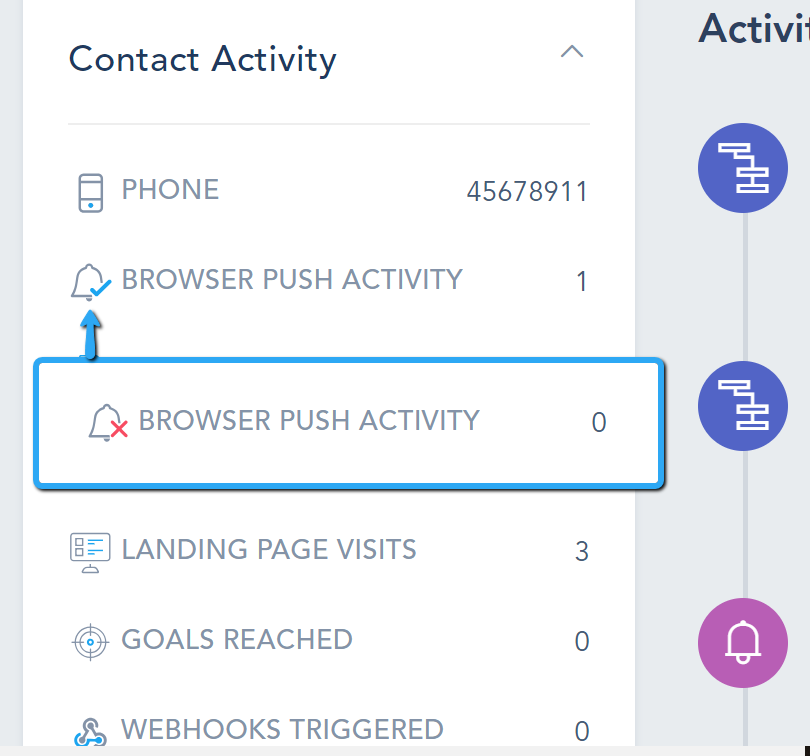
- On the contact’s page, the Browser Push status of the subscriber will be changed to active
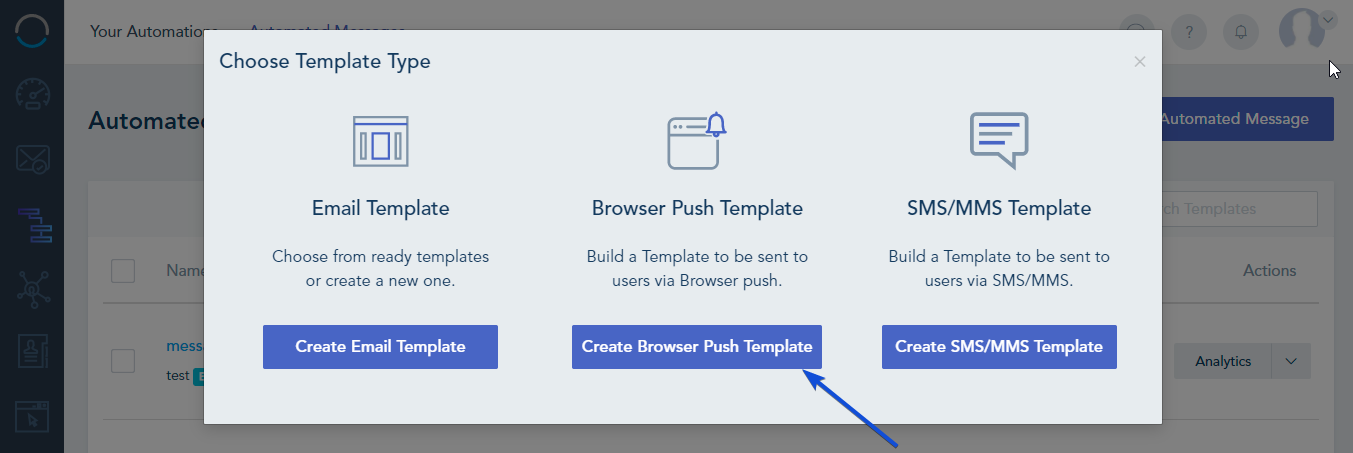
- You can create browser push message by going to Automated Messages, click on Create Automated Message > Create Browser Push Template.
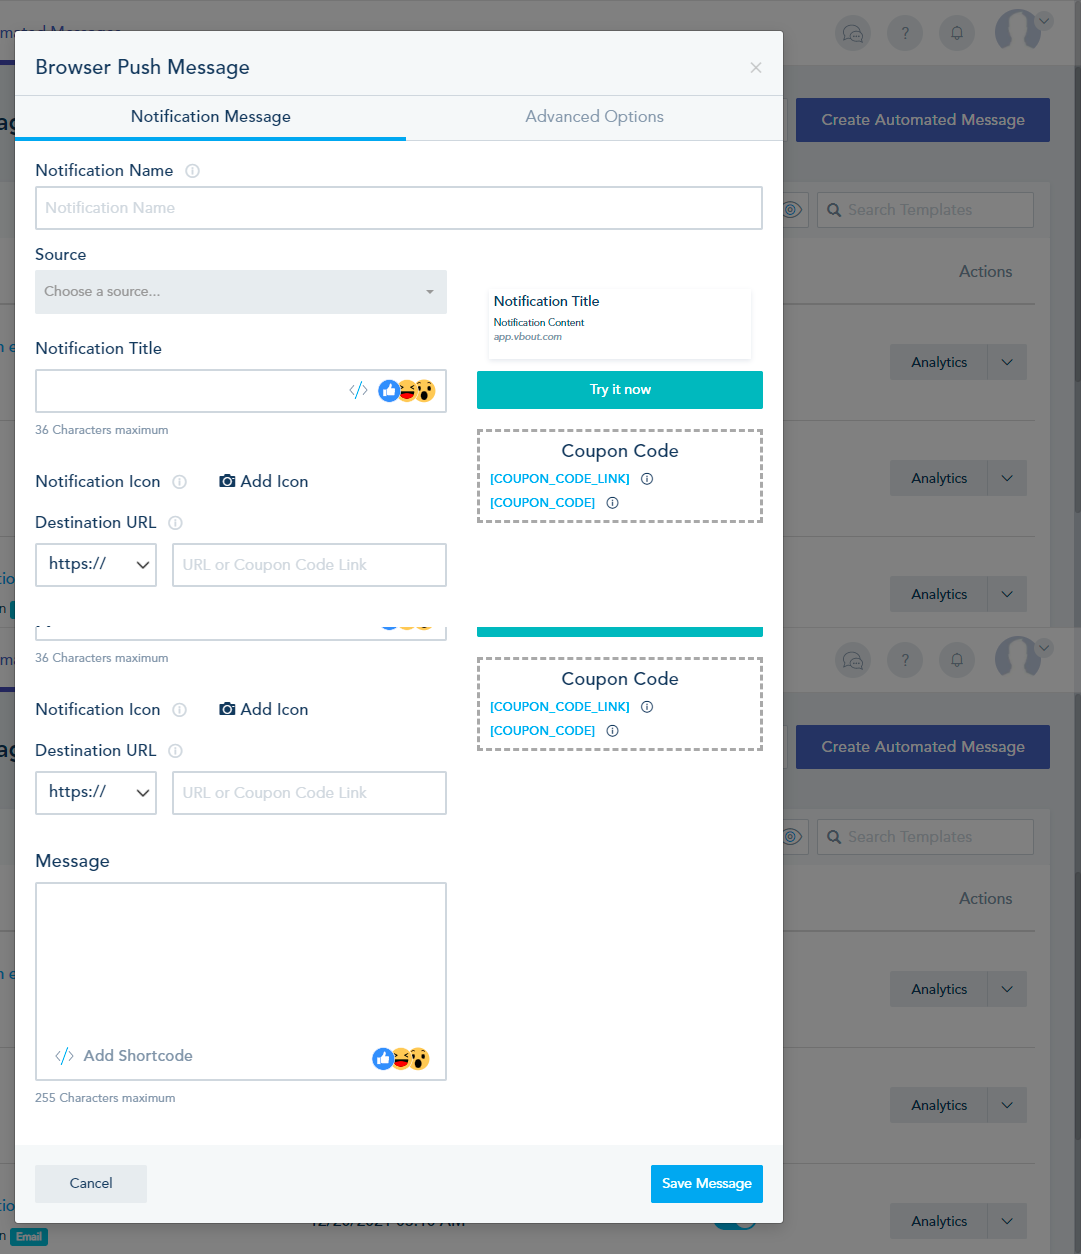
- The prompt to configure the browser push includes two tabs. In the Notification Message you have to select the Notification Name, Source (target Domain), Notification Title and the Notification Icon. Default will be loaded from your configuration page for convenience but can be modified. Lastly, configure your Destination URL and finally the Message. You can test the message by clicking on Try it now or click on Save Message.
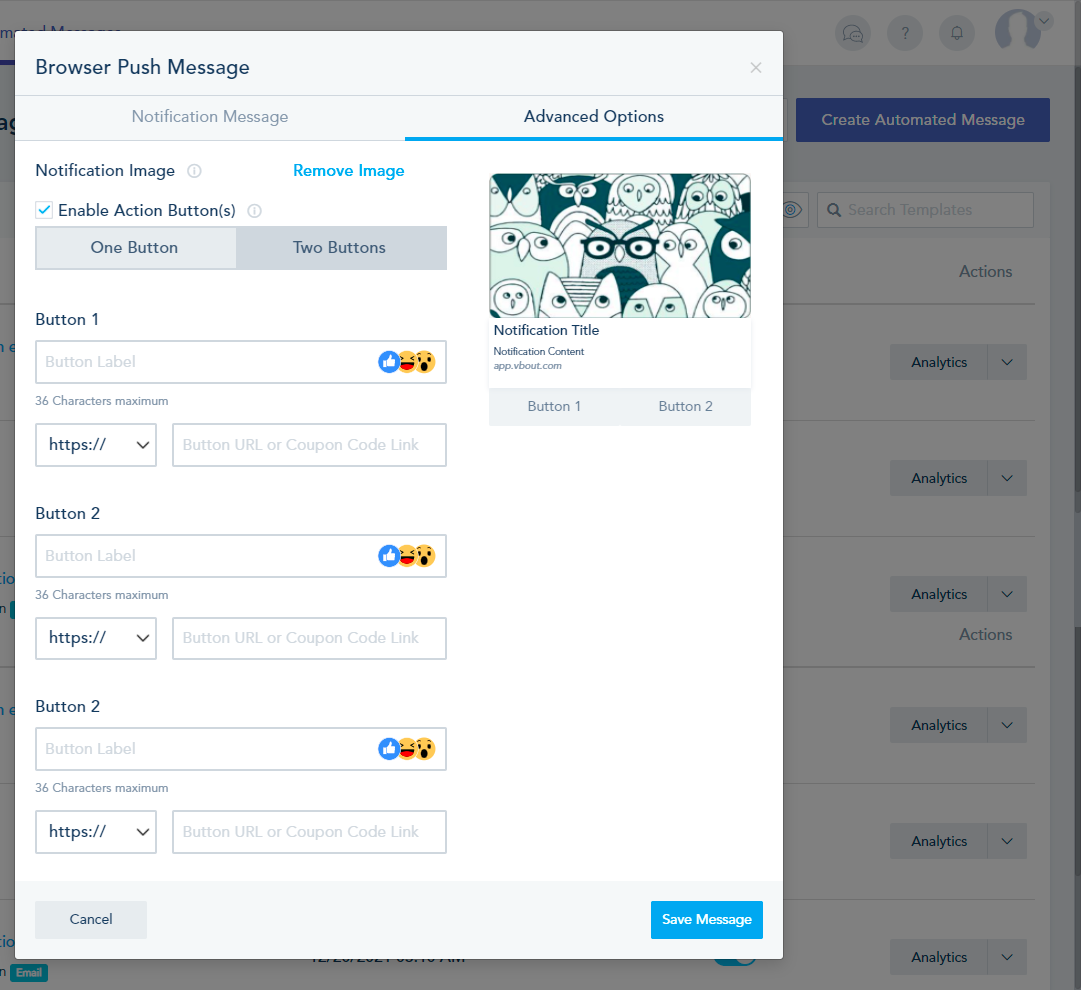
- Advanced Options tab is only available for Chrome/Windows users. You can include a cover Image, as well as add one or two call to action buttons with a custom link for each button. With this option, the user will have a total of 3 destination links between the default URL and the 2 call to action URLs
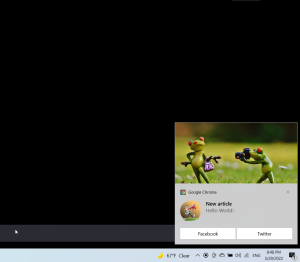
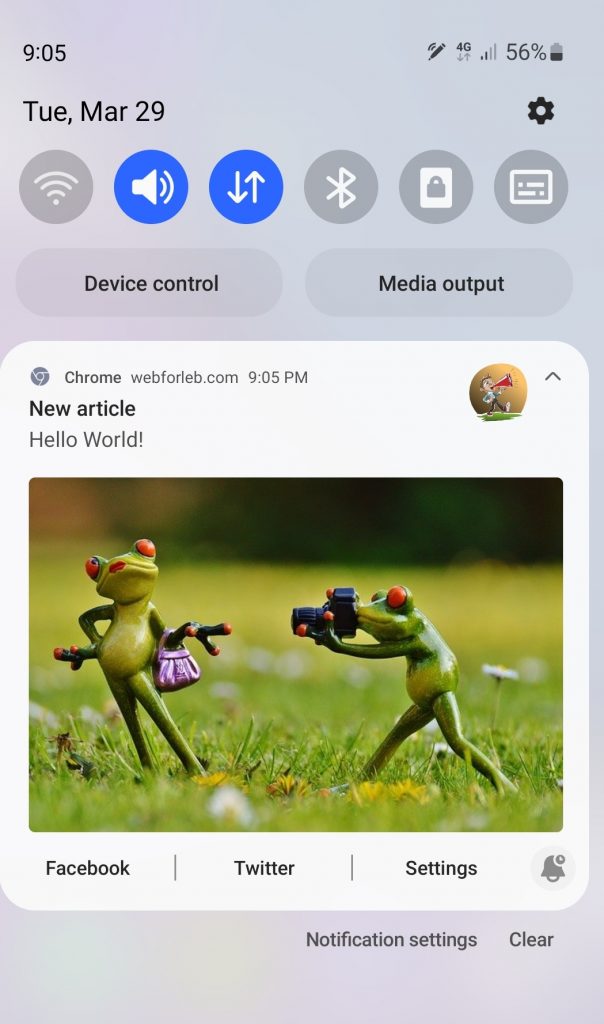
- Once you send the browser push message, the users should receive the Browser Push Notification.
WindowsAndroid
- Finally, all Browser Push Engagement will be logged in the activities of the user with complete details on Device, Status, Send Date (when the message was queued to be delivered to the recipient’s browser), Delivery Date (when the recipient actually opened the browser and the system was able to deliver it), Click Date and the Click Type (which URL the recipient clicked on)

You can check this article to see how you can add a Browser Push to your Workflows.