Tags are important for segmenting, filtering, targeting contacts, in an easier, less complicated way.
In the following, we will discuss how tags work:
Managing Tags: To add/remove tags from your account visit your Settings page, Contact Tags.
Note that you can still add tags dynamically from the automation or from the contact profile page, and then they will appear automatically on the settings page below:

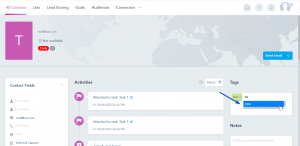
Adding Tags to Contacts: Visit your Contact’s page, click on a record, and add tags to this contact from the right panel.
As you start typing, you will see auto-suggestions to choose from. You can also add new tags directly separated by a comma:
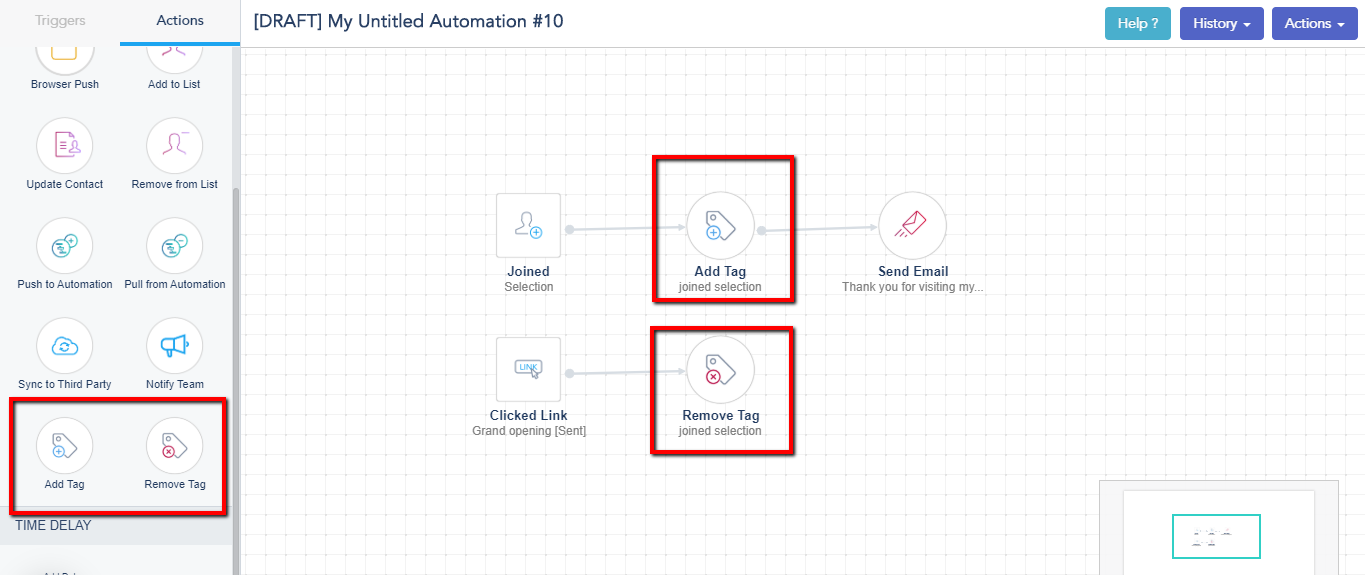
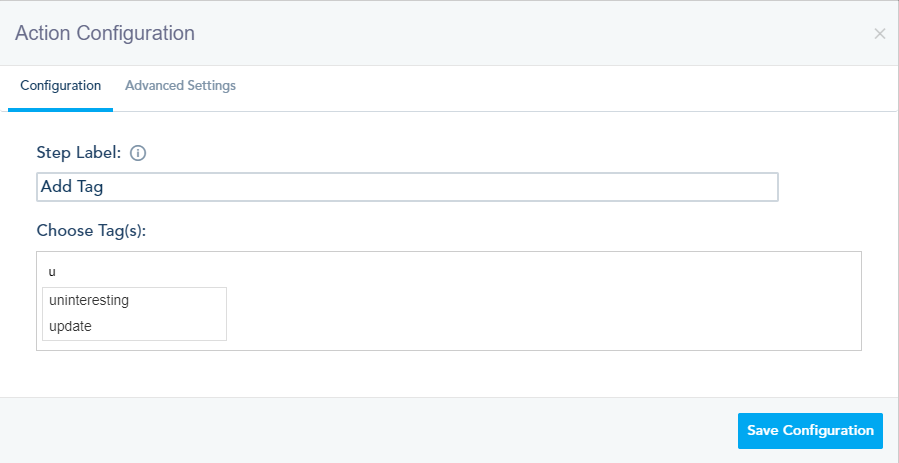
Tags in Automation: You can use the actions Add Tag or Remove Tag in the automation by using the visual workflow builder. Similarly to the contact page, you can add tags on the fly even if they don’t exist on your Settings page.
As you start typing, you will see auto-suggestions to choose from.
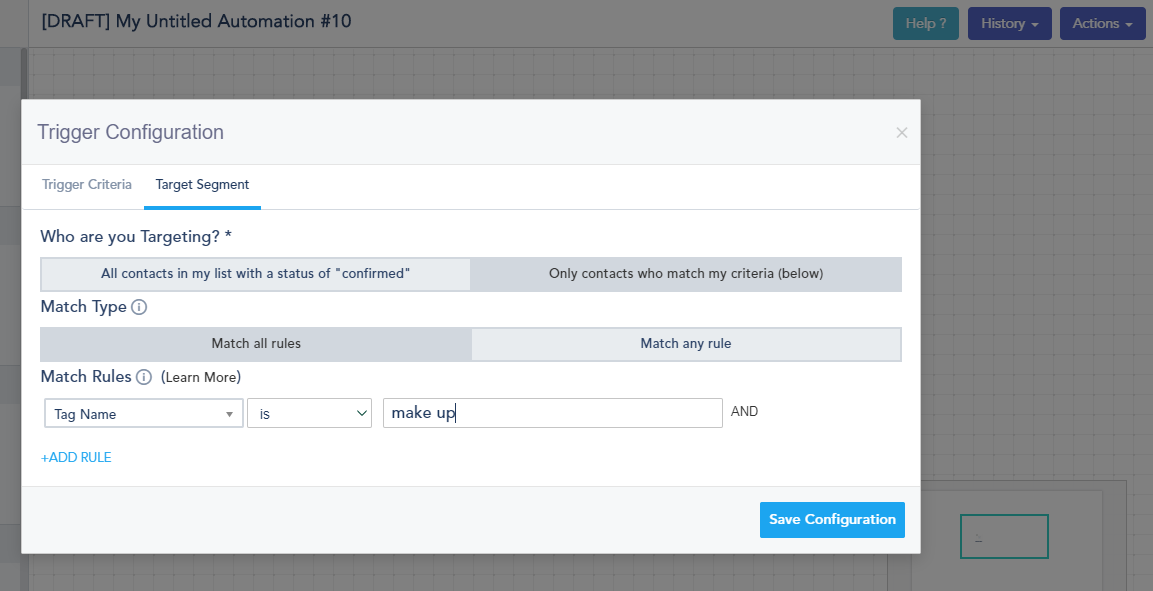
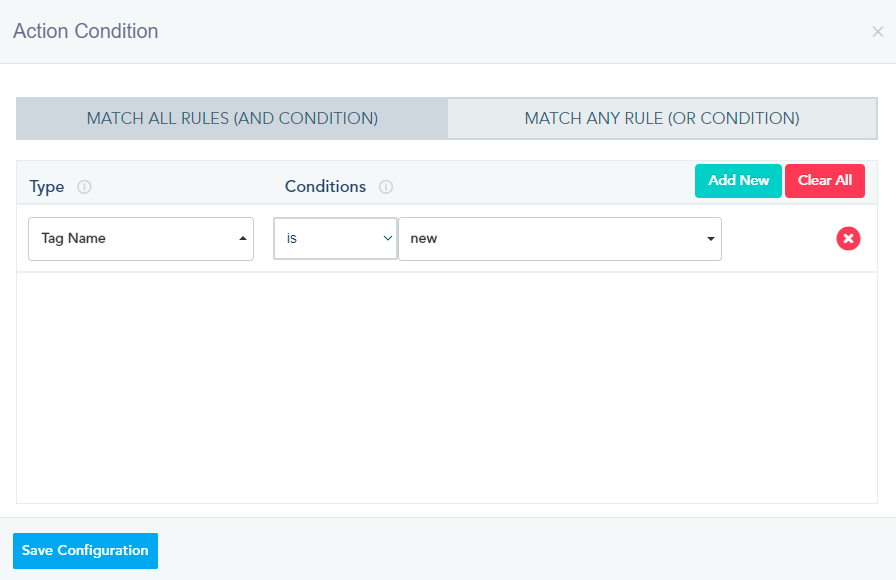
In addition, you can use tags for better targeting inside your workflows, under the triggers as well as the conditions before the actions:
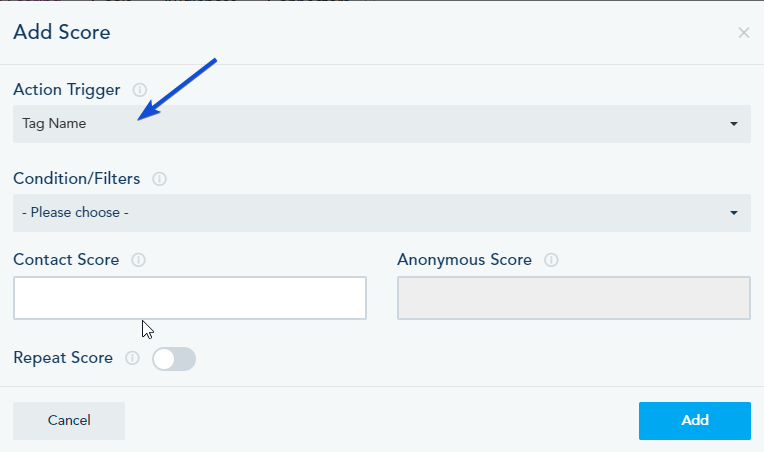
Tags and Lead Scoring: you can use tags inside the lead scoring rules, by choosing the Action Trigger “By Tag Name”:
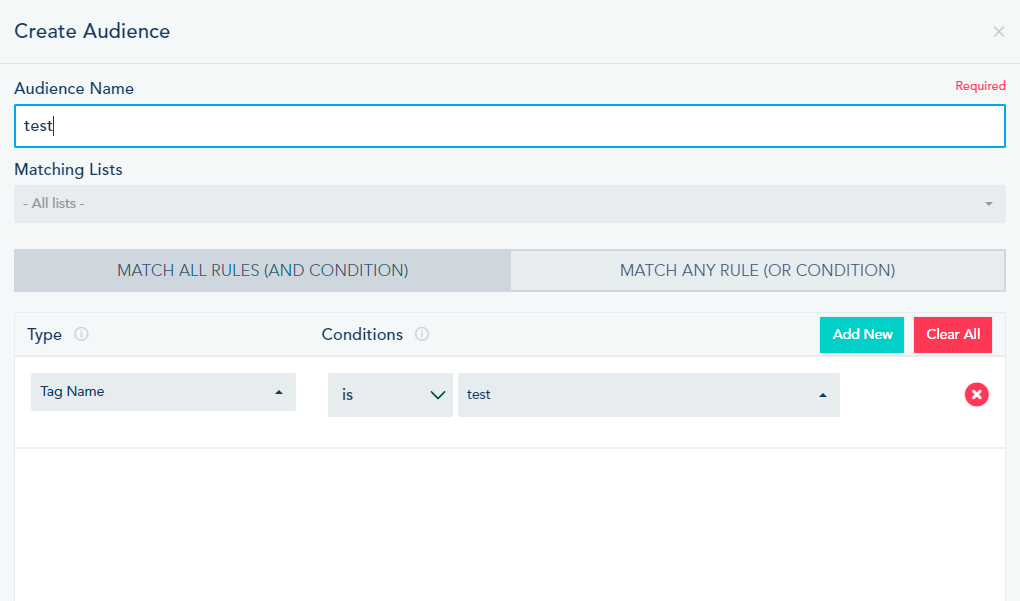
Tags and Audiences: You can create smart segments of your lists based on tags by choosing General Filter, “By Tag Name” then selecting the relevant tag from the drop-down: