
Before sending Email Campaigns or using the Email Action under Automation, you must add and verify a sending domain within the platform. This action is needed for security and spam compliance purposes.
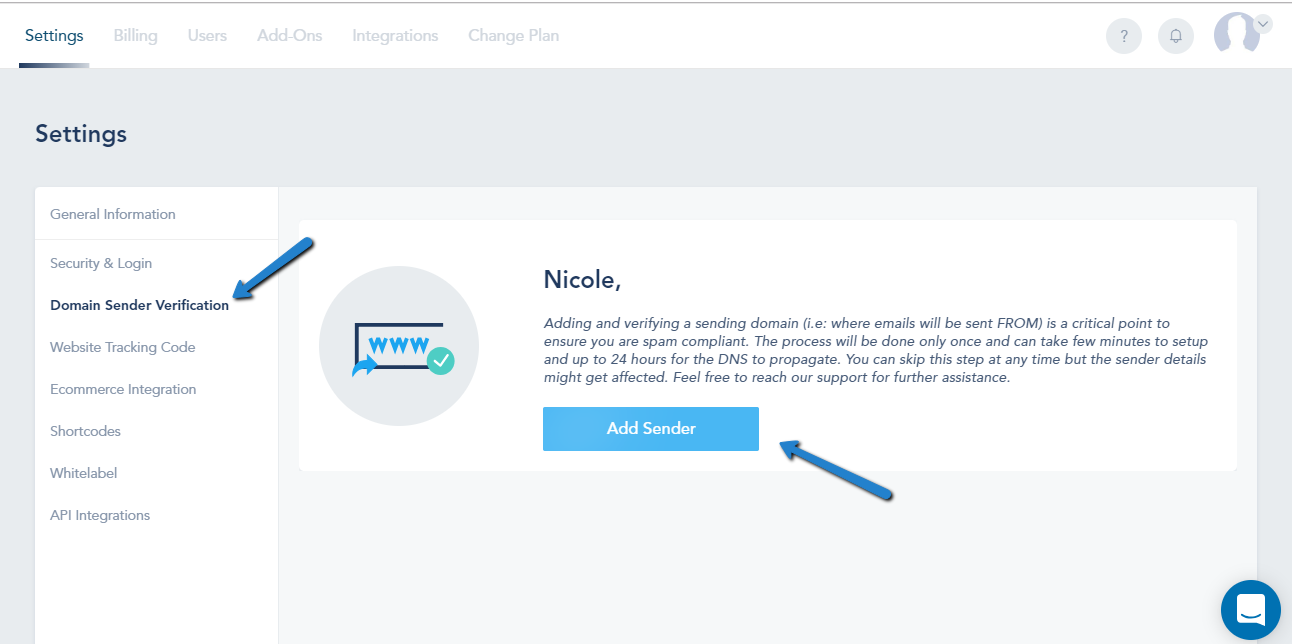
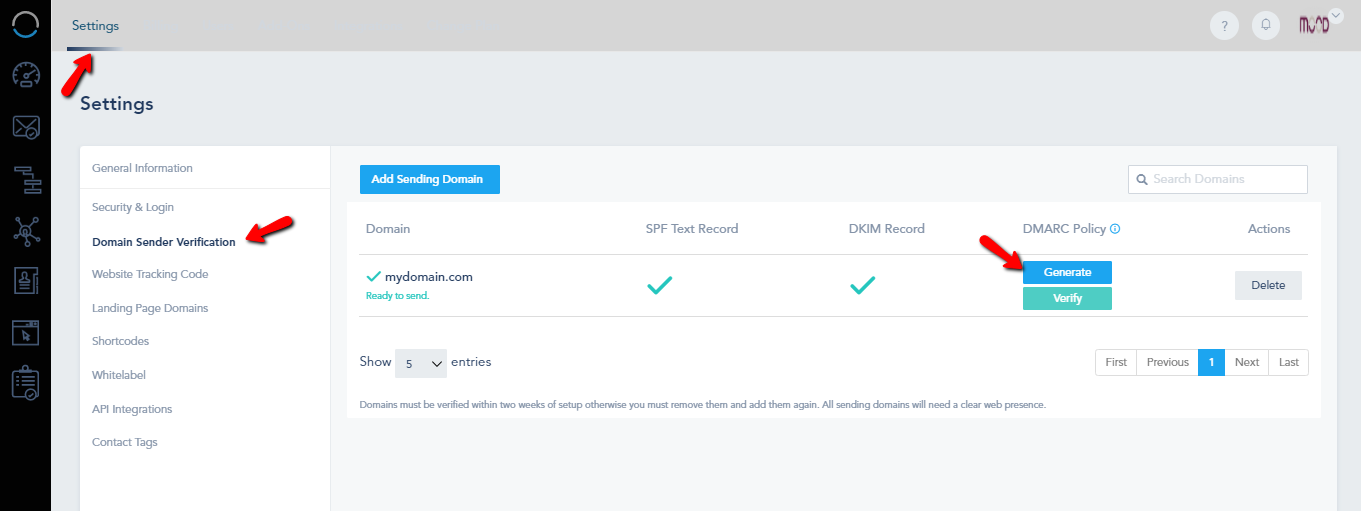
You can add a new sending domain by clicking on your profile icon in the top right, and selecting Settings. On the Settings page, select the Domain Sender Verification tab from the left sidebar, and then click on the Add Sender button.
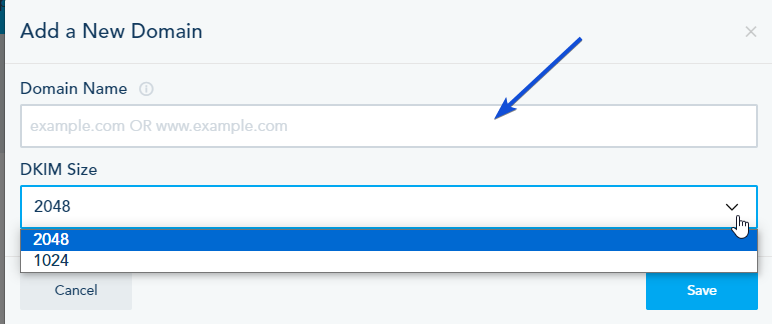
Next, you will be presented with a popup window to enter your sending domain and choose your DKIM length.
After you save, you will see your sending domain on your dashboard, however, this doesn’t mean you are ready to start sending. You still need to complete the verification process which involves adding an SPF TXT record, a DKIM TXT record, and a DMARC.
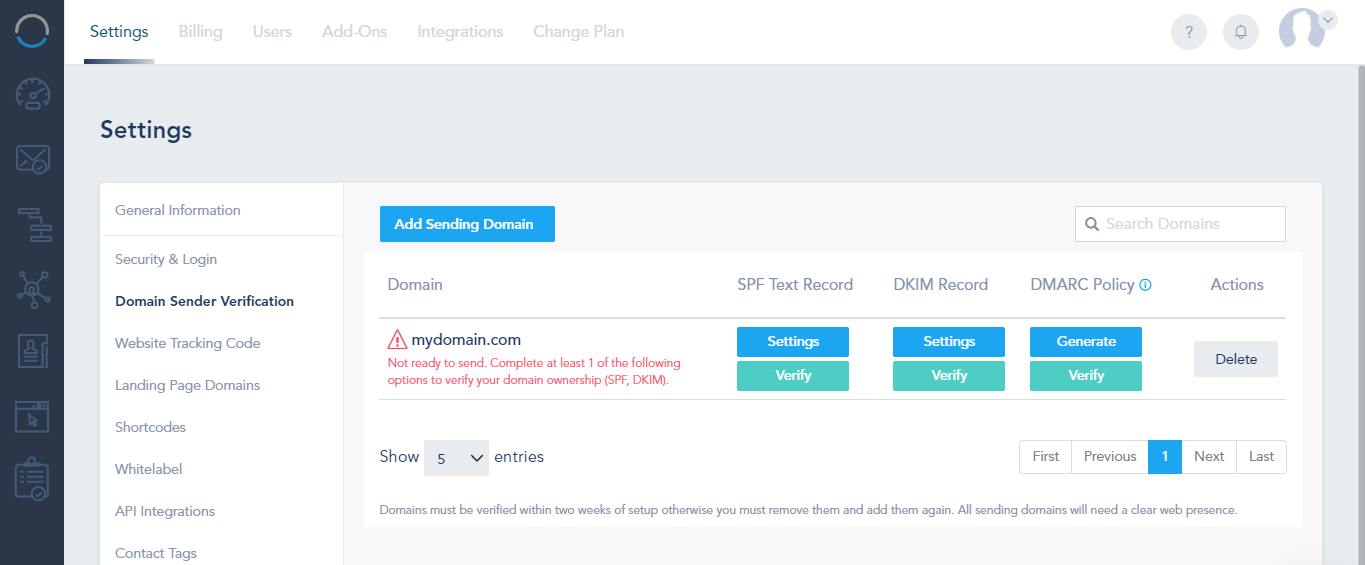
You can click on Settings to retrieve the actual record to be added on your DNS portal side. This requires access to your Domain Name Server (DNS).
SPF Settings Example:
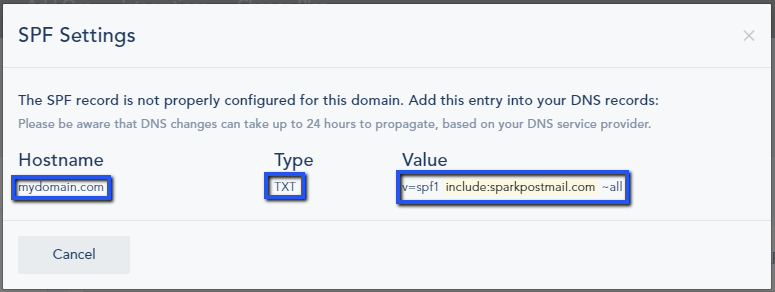
All you need to do is adding an SPF record to your DNS, using the Hostname, Type, and Value.
Important note: If you already have an SPF record, you can’t add another one, in this case, you will need to edit your current SPF record and add only the highlighted part which is include:sparkpostmail.com
For example, let’s say you have this: v=spf1 a mx ptr include:bluehost.com ?all already verified in your DNS, then you will add only the highlighted part.
It will look like that: v=spf1 a mx ptr include:bluehost.com include:sparkpostmail.com ?all
DKIM Settings Example:
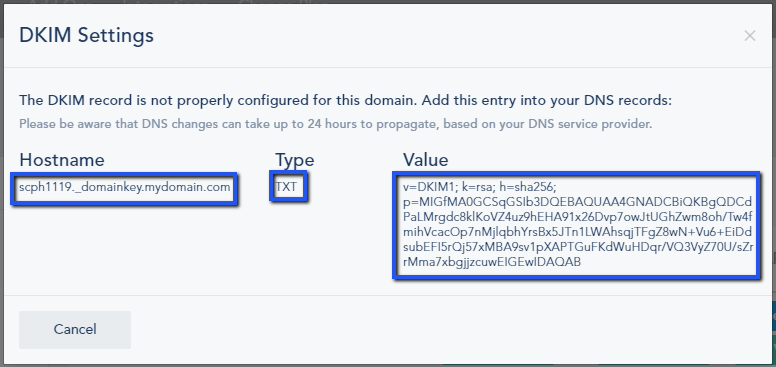
As for the DKIM, We will do exactly what we did for the SPF record, we will be adding the DKIM record to the DNS.
Important note: Even if there is a DKIM record in your DNS, you can create a new one and add your records.
For GoDaddy, do not put the domain name at the end of the Hostname when you are adding the DKIM record.
If we want to do that for the example/screenshot above, the Hostname will look like that: scph118._domainkey.
Once you add the SPF and DKIM records for the domain click on Test to check if your DNS changes have propagated across the web. Please note that these changes sometimes take up to 24 hours to propagate.
Once the domain has been verified you will notice a green check mark next to the sending domain indicating that the domain will be used as a sender.
NOTE: If you decide not to add a domain name, you can only send test email campaigns through the platform where the FROM EMAIL sender on your campaigns will be replaced with a system default email, ex: dan.marketing.com@vbt.io.
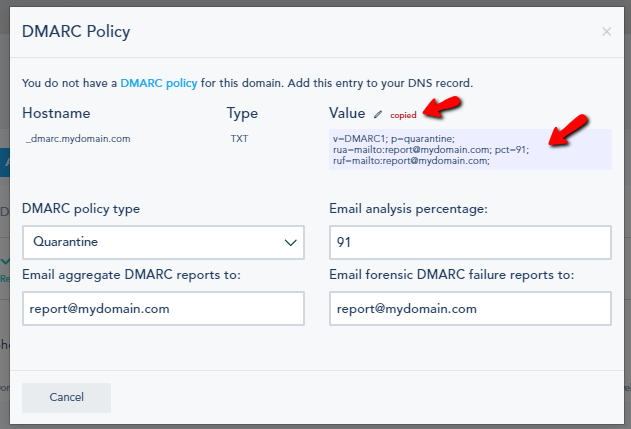
DMARC Settings Example:
Creating a DMARC policy is required to be fully compliant. For your convenience, the platform has a built-in DMARC policy check and generator.
To check and create a DMARC policy, go to Settings > Domain Sender Verification, add your Sending Domain, and click on Generate:
Once you click on the Generate button, a default record will be created for your convenience. You can edit this record by clicking the Edit icon.
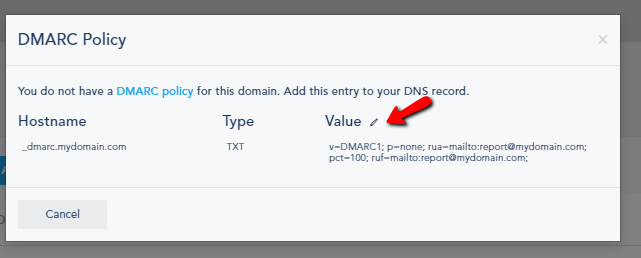
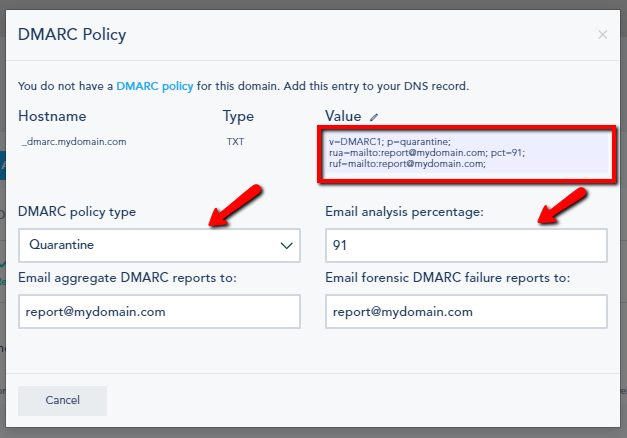
The changes that you make to “DMARC policy type”, “Email analysis percentage”, “Email aggregate DMARC reports to”, and “Email forensic DMARC failure reports to” will be reflected in the Value:
DMARC policy type: There are three types of policies, None, Quarantine, and Reject.
- None: The mailbox provider won’t take action for emails that fail DMARC.
- Quarantine: This will make the mailbox providers treat all emails that fail DMARC as suspicious. Quarantining an email delivers it into an area outside of the inbox, such as the spam or junk folder.
- Reject: The mailbox providers will reject all emails that fail DMARC.
Email analysis percentage: The percentage of emails that will be checked.
Email aggregate DMARC reports to: The aggregate DMARC reports contain information about the authentication status of messages sent on behalf of a domain.
Email forensic DMARC failure reports to: A forensic report is essentially a copy of the email that failed DMARC validation and is typically sent immediately after the failure.
Once you finish, click on the value to copy it to your clipboard:
Once you finish, add the entry to your DNS record and click Verify.
Here’s an example:
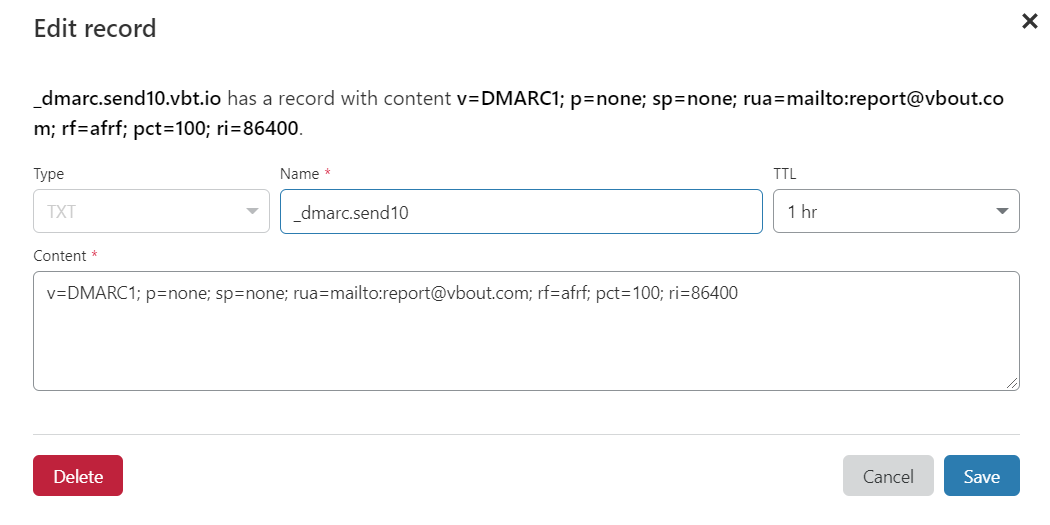
Depending on the DNS server, changes might take anywhere from few minutes to 24 hours to reflect. If the verification does not work after that time, please contact support for further assistance.
To learn more about spam compliance and enhancing deliverability, check out this great resource.