
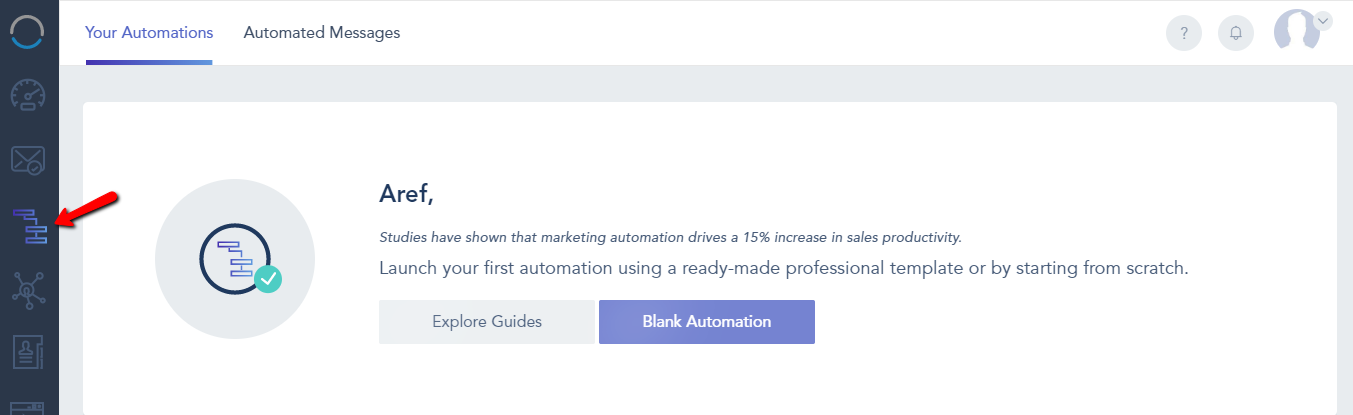
You can build an automation workflow by clicking on the Automation option from the left menu bar. Automation can be one or a collection of workflows that you can create to automatically target contacts, using a simple drag and drop workflow designer.
To start creating your automation:
- click on Blank Automation or Create Automation. This will take you to the workflow editor.
- Name your automation at the top of the editor screen.
- On the left side, you’ll find the Triggers and Actions elements.
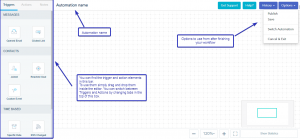
– Triggers: define what starts the automation.
– Actions: Events that occur after the trigger.
– Filters and rules: Add these between actions to redirect specific users to different paths based on their actions.
Setting Up the Workflow:
Starting with a Trigger:
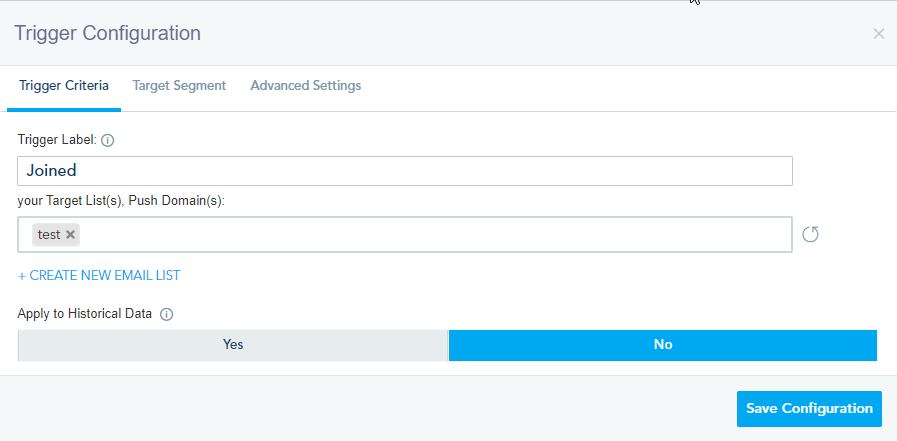
– Select your preferred trigger from the left panel.
– Drag and drop it onto the grid.
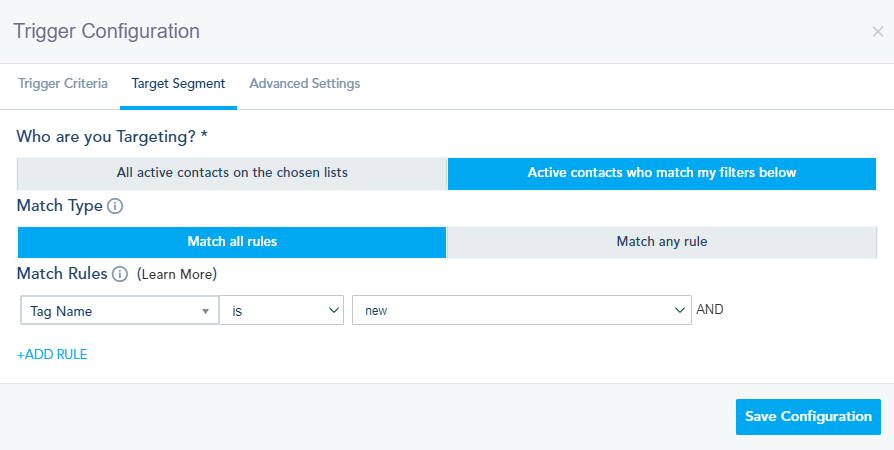
– Double-click on the trigger to preview and configure its settings and filters.
Adding Actions:
– Choose the action you need to perform.
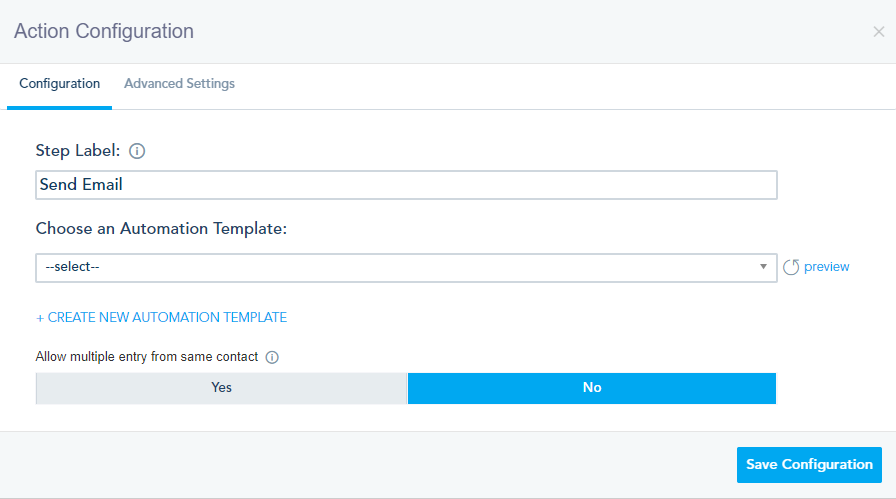
– Double click on the action, to configure its settings.
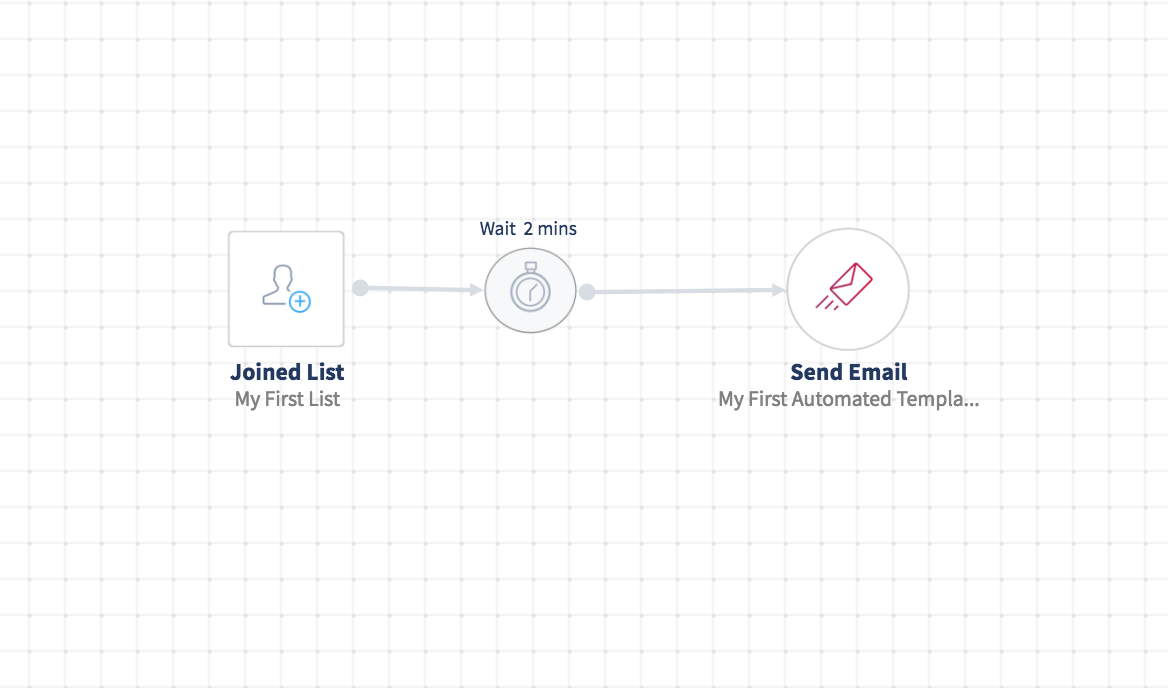
For example: add a confirmation email to be sent out to users who sign up to your specified list. You have to click on the Send Email under Actions and drag it to the right of your Trigger. Double click on the Action to select the proper automation message or create a new one.
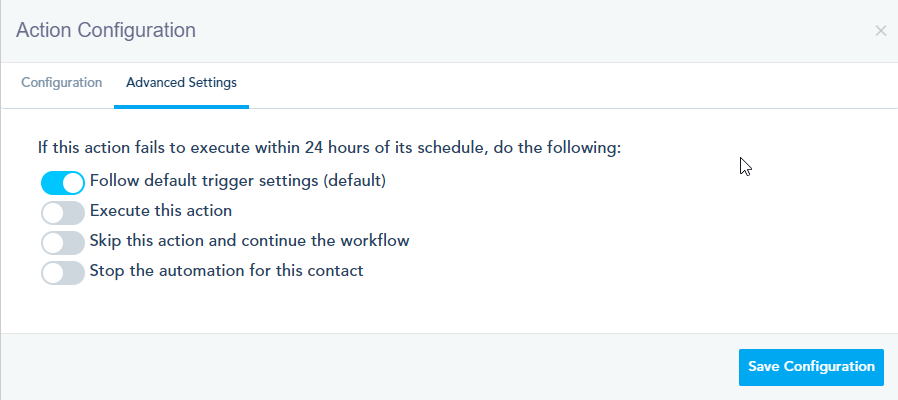
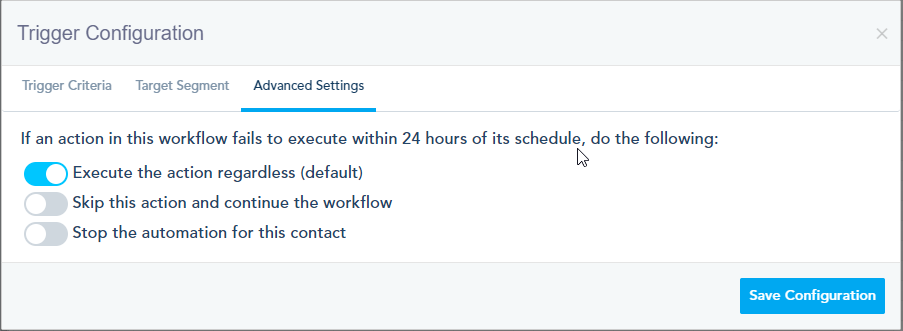
In the advanced settings, you will have the option to decide what to do in case an action fails to execute within 24 hours of its schedule.
Connecting Triggers and Actions:
– Click on the trigger element.
– Press on the black arrowhead and drag it to the next action element.
Adding Delays:
– Find Delays under Actions > Time Delay.
– Double-click on the delay to set the appropriate time before the next action.
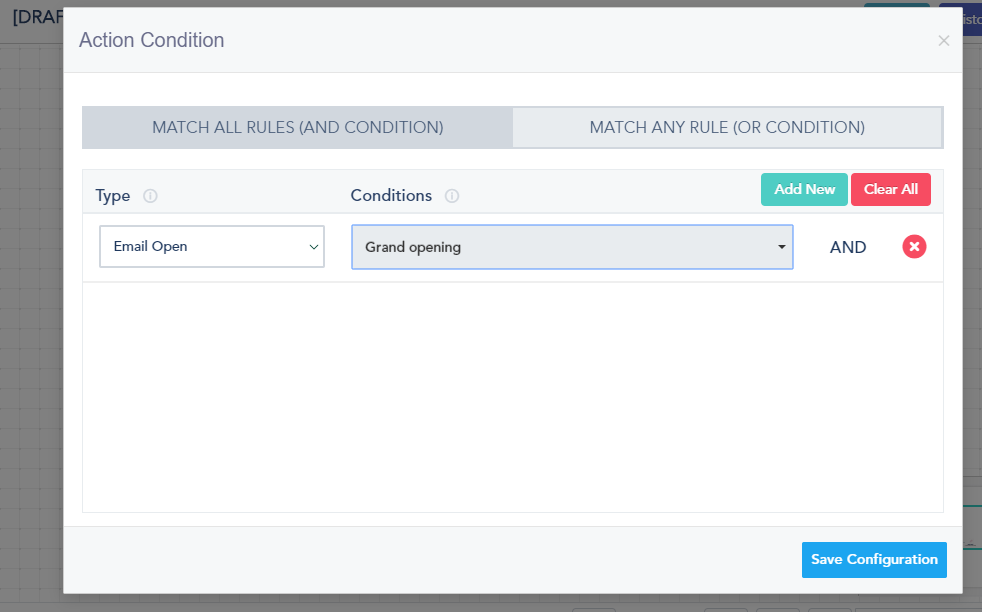
Adding Actions Conditions:
– Double-click on the connector to add conditions and check for specific scenarios before executing an action.
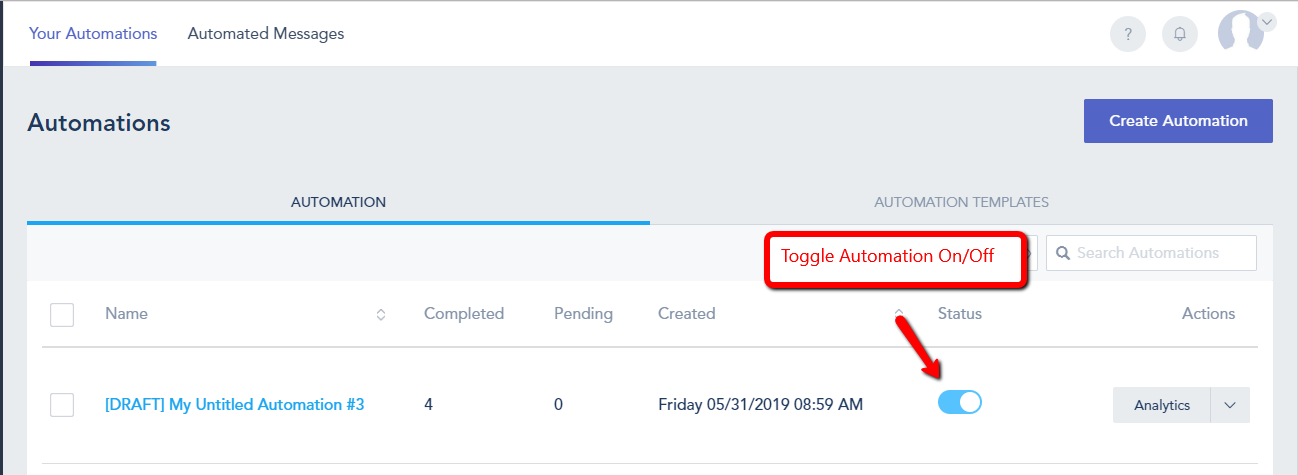
Once your workflow is ready, click on Options in the top right and choose Publish.
You can also save the automation and activate it from outside the editor mode.
Note: If you are using the Specific Date trigger > This gets triggered on a specific date. You’ll need to specify the target list inside this trigger, and whether this trigger will execute once vs recurrently (daily, weekly or monthly). Please be aware when using the recurrent option that the actions will execute each day, on the same user. So to avoid duplicate sending, you can use a flag within your fields set to turn off when the automation starts and get turned on once the automation has ended.