You can design a payment form for various purposes, such as online purchases, subscriptions, or any scenario where you need to collect payments.
Please follow the below steps to create a payment form:
- Creating your product feed
- Creating a new list
- Adding the payment fields
- Setting up the payment fields
- Using payment field
Creating your product feed
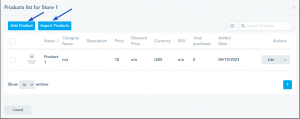
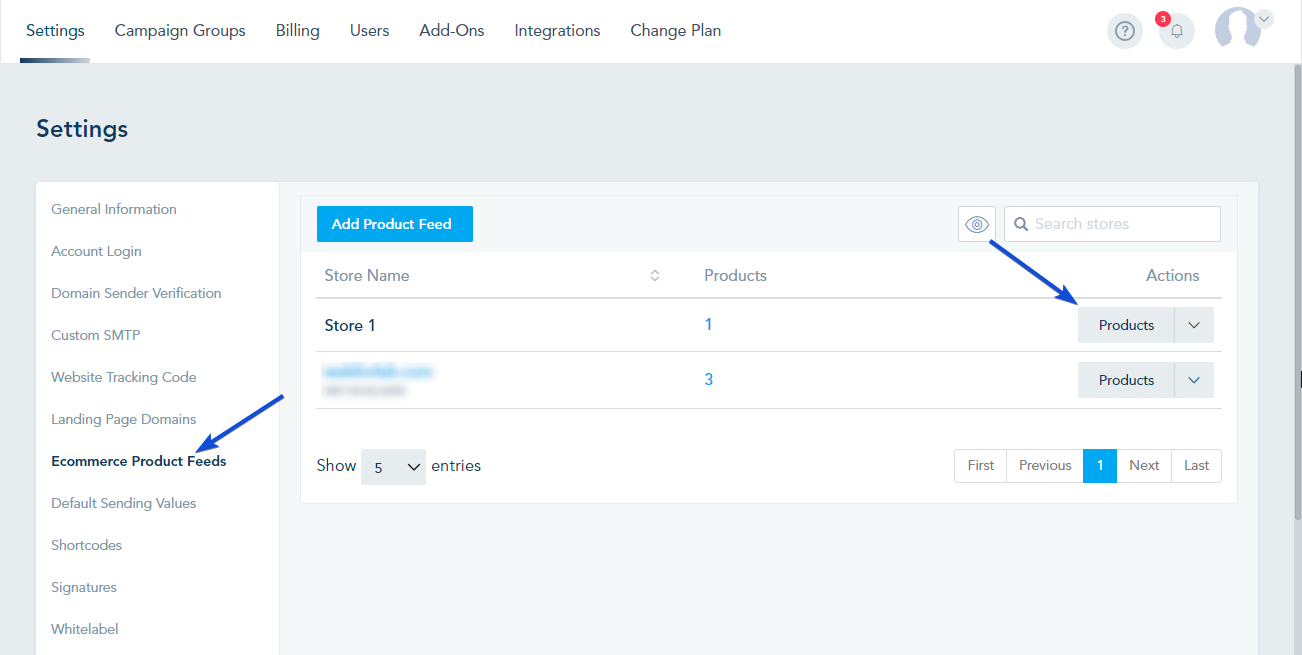
The first step to create a payment form is to connect your e-commerce store or create a product feed.
- To create a product feed, please follow the steps in this link.
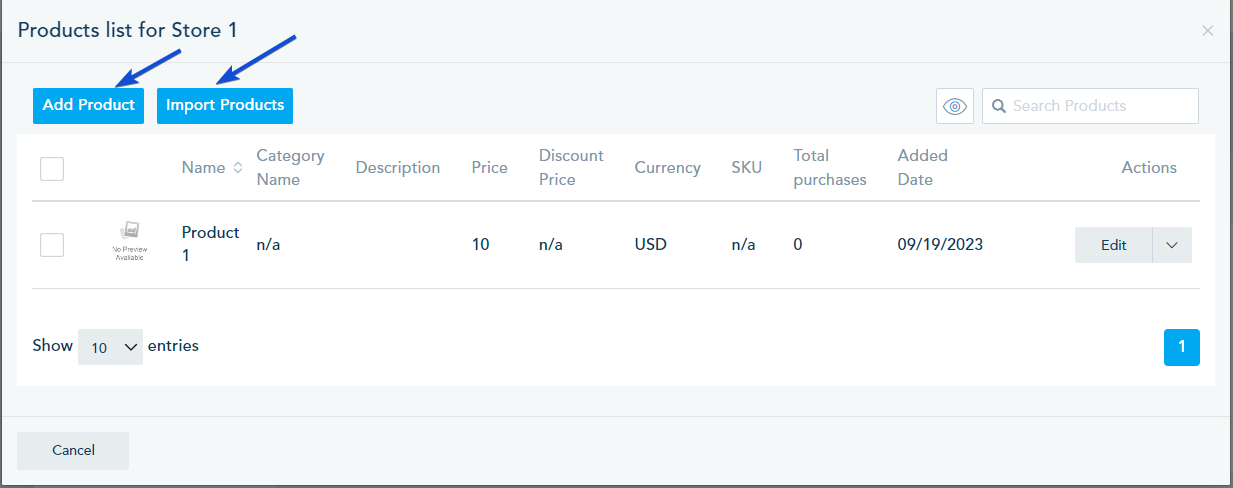
- To add a new product in your store, you need to import or add it in your product feed.

Creating a new list
Create a new list for your payment form following the steps in this link.
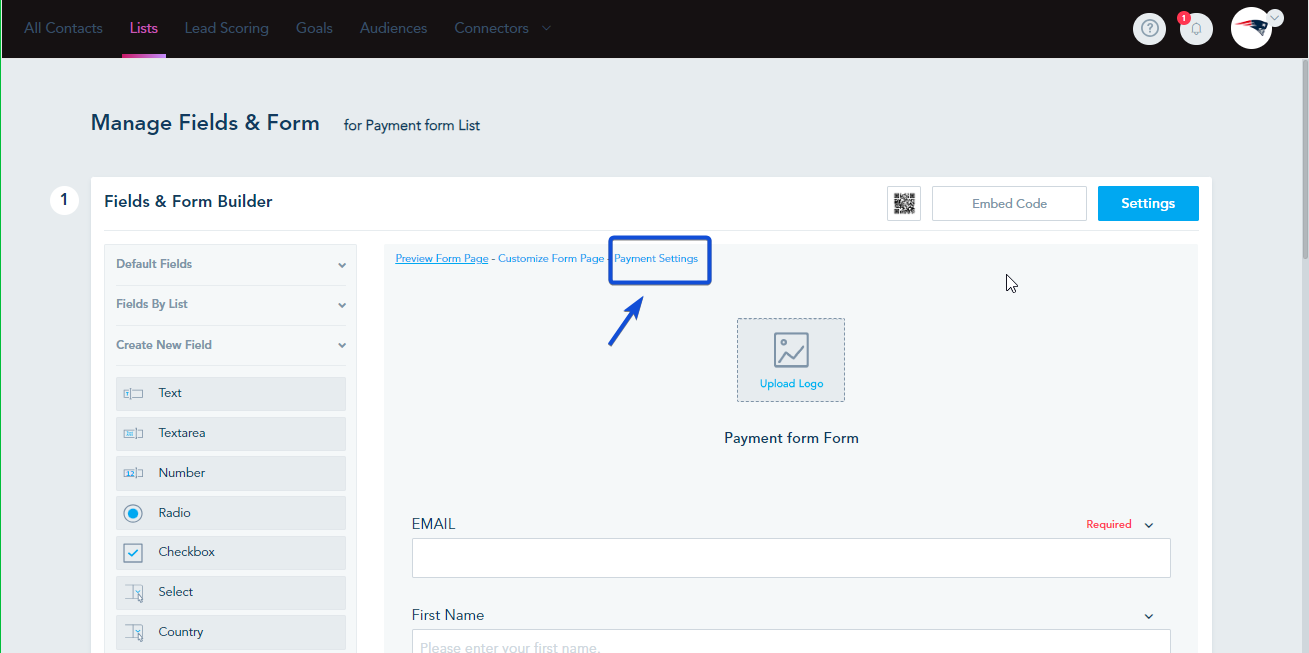
After creating a new list, navigate to the “Fields & Form” option located next to your designated list.

Adding the Payment Fields
In the Form builder, go to the “Create New Field” section, then select “Payment.” Click on “Products” to add the Payment Product field.
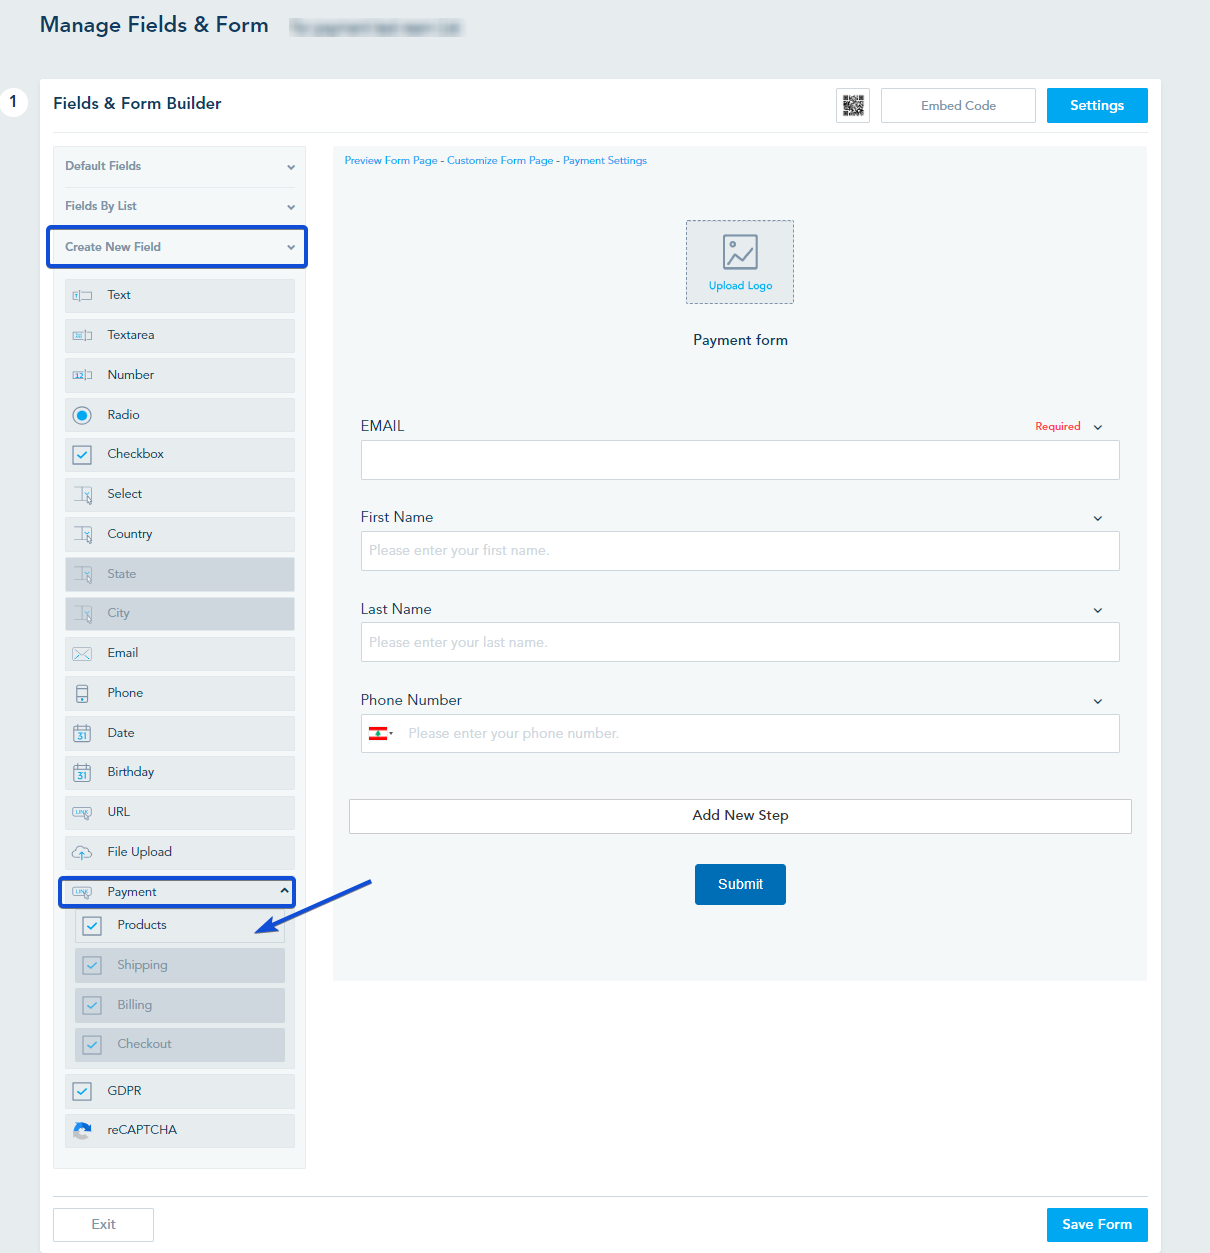
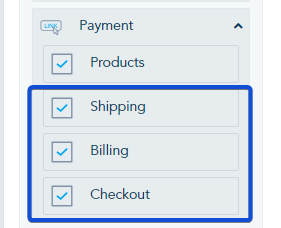
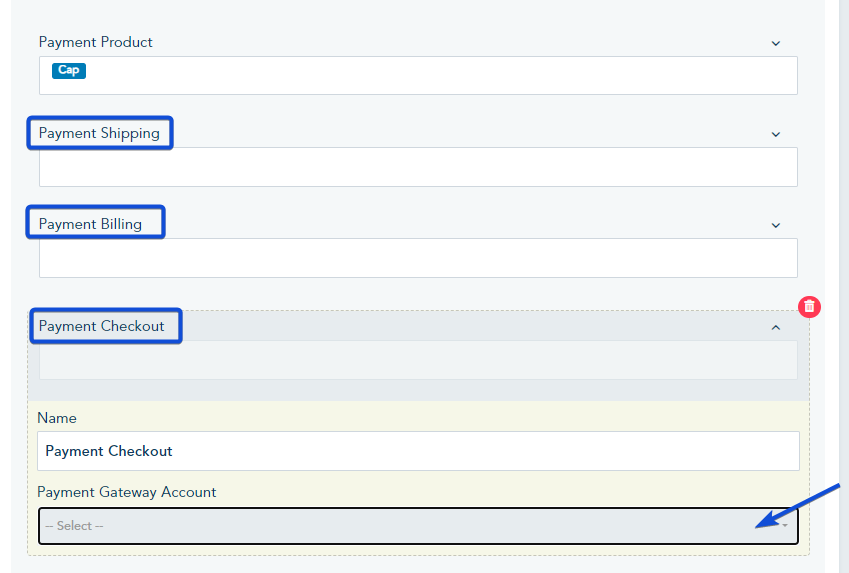
Once you’ve added the “Payment Product” field, you will be able to add the 3 other fields: Payment Shipping, Payment Billing, and Payment Checkout.
Setting up the Payment Fields
Payment Product:
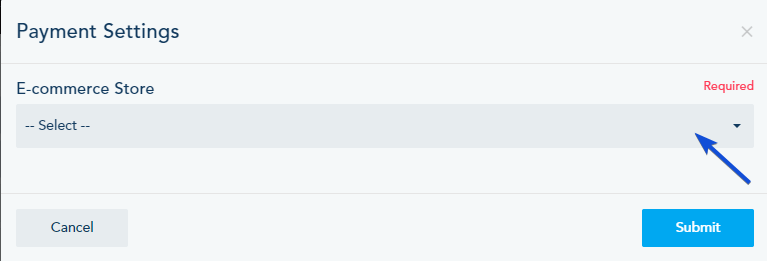
After adding the “Payment Product” field, you’ll be prompted to select your e-commerce store or product feed.
Next, you can start by clicking on Add Product to choose a product from your store or to Add New Product to create a new product in your product feed.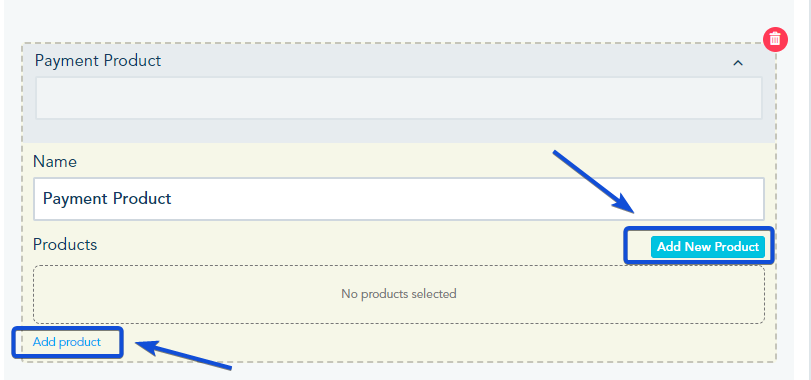
Note: Adding new product is only available when you have selected your product feed.
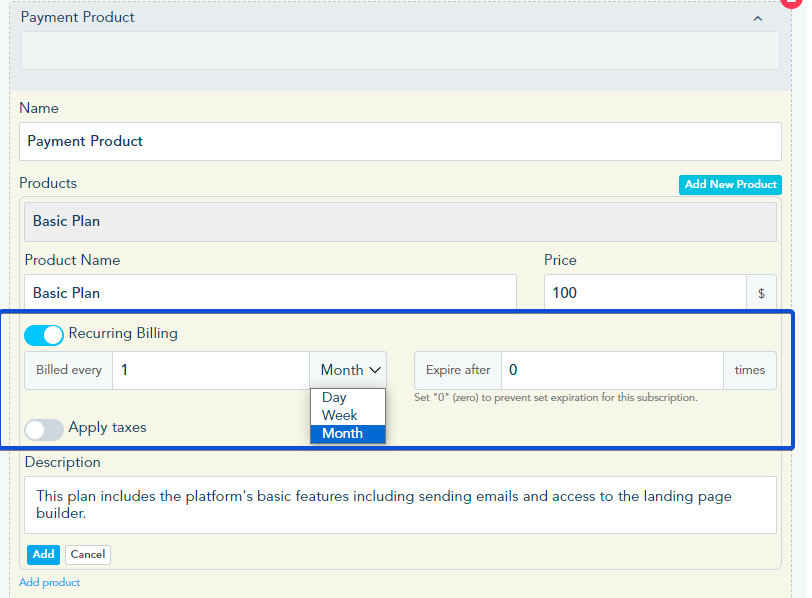
- For subscription-based products, you can opt for ‘Recurring Billing.’ This allows you to specify billing intervals (monthly, weekly, or daily) and set a limit on billing cycles.
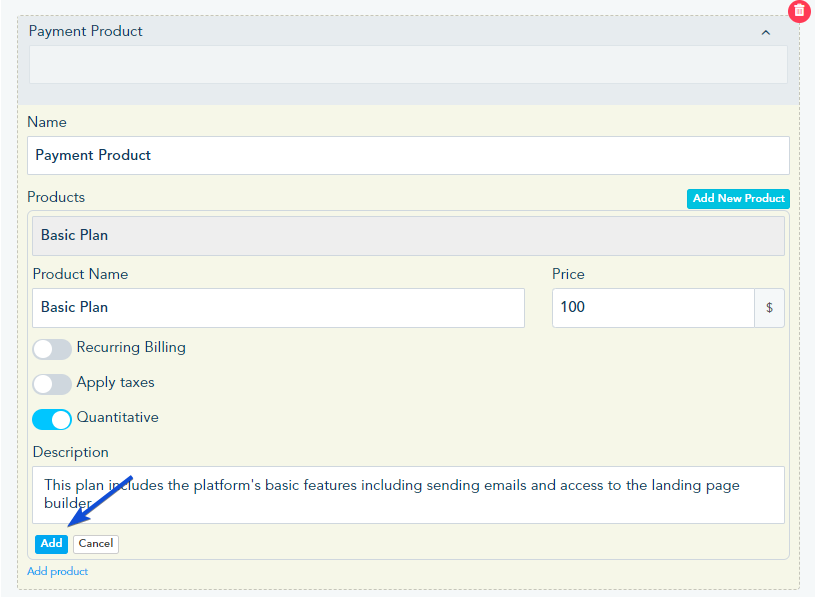
- Alternatively, you can set it as ‘Quantitative,’ allowing users to choose a quantity.
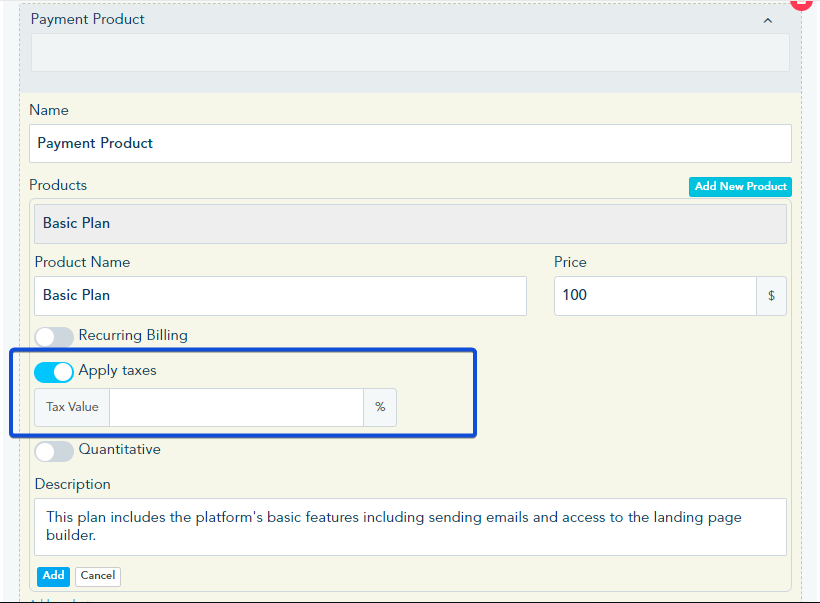
- If necessary, activate ‘Apply Taxes’ and specify the tax percentage for automatic tax calculations.
Finally, click on Add to save your product.
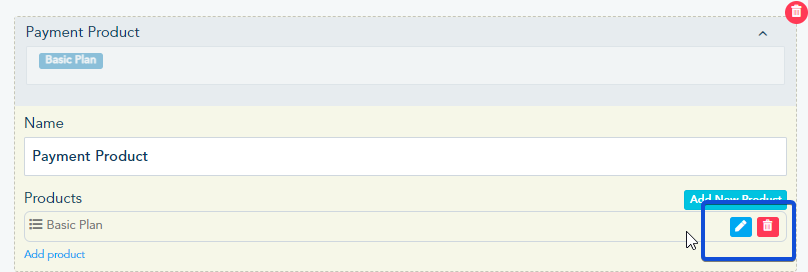
You can always edit/delete the product or add a new product to your form.
Note:
- You can select a different store by going to Payment Settings.

Payment Shipping: When adding this field, the user will have the opportunity to provide their shipping address, including country, state, city and Zip Code.
Payment Billing: When adding this field, the user will have the opportunity to provide their billing address, including country, state, city and Zip Code..
Payment Checkout: Within “Checkout,” users can see the total amount, and select their payment method. You need to select your Payment Gateway Account.
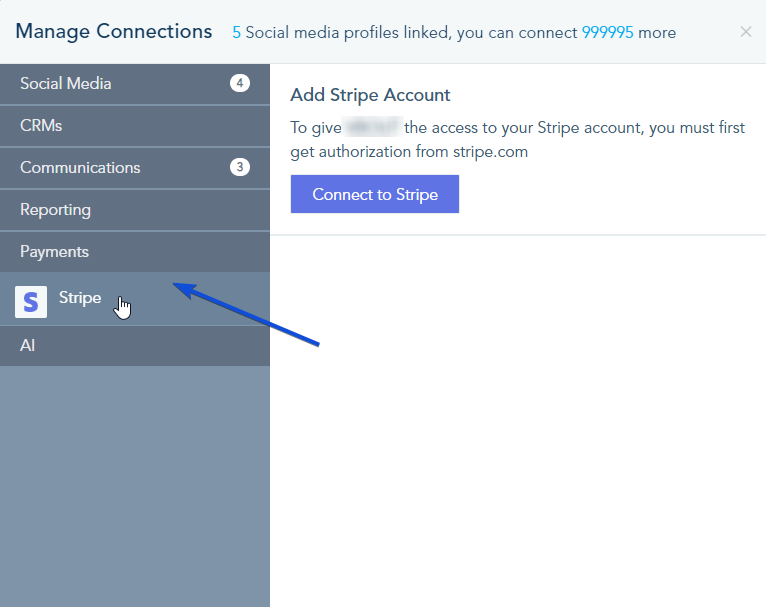
Please note that you need to connect your payment gateway first, by going to the Connection Center -> Payments and connect your Stripe account.
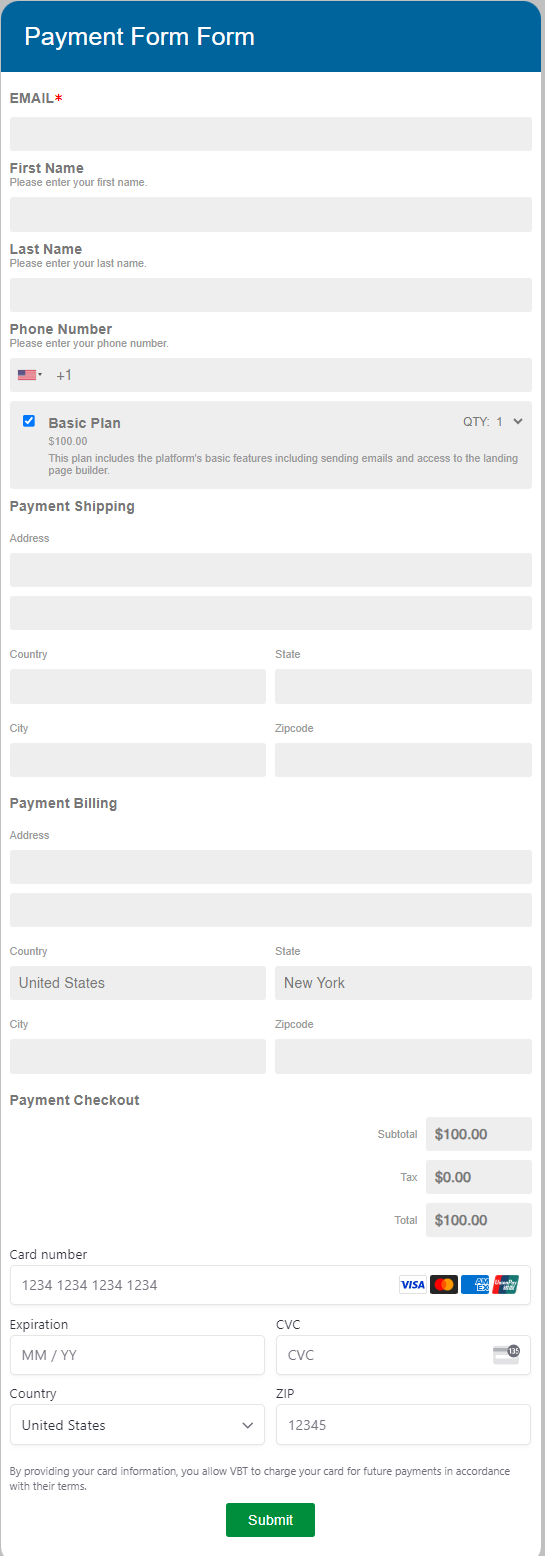
Once done, save your form.
Finally, your form will look as shown below:
Using Payment field
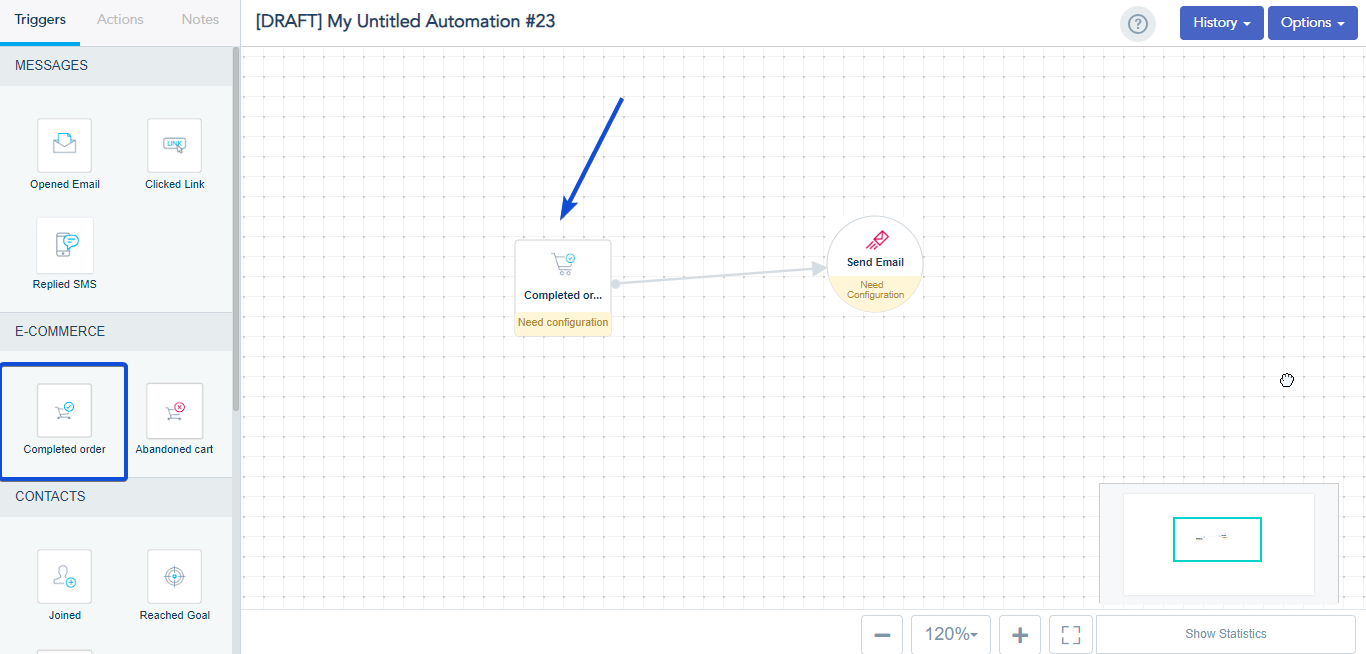
- Once a contact completes a payment form, the payment will show in the lead profile as a completed order.

- You can trigger an automation, once a contact completes a payment using the Complete order trigger.