
In order to start your email drip setup, you need to prepare your email series first.
So start by creating your automated messages:
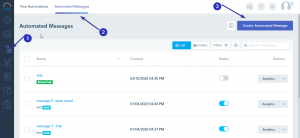
From the Automation tab -> Automated Messages – > Create Automated message.
Please check this for more information on how to create Automated messages.
Then, you can start building your Email drip workflow.
From the Automation tab -> Your Automations – > Create Automation.
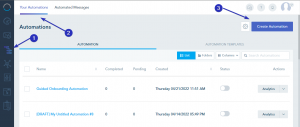
Your automation should start with a trigger, you can use the Joined List, meaning whenever a lead signs up to your list or fill a form, the lead will enter the email drip.
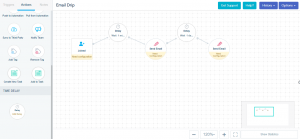
Example 1 for Email drip:
When someone signs up to the list, an email is sent after 1 minute. Email 2 will be sent after 1 day, and so on. You can add as many delays and “Send Email” action as you like.
In the Send Email action, you select the automated messages you have already created. And as for delay, you can modify the delay time based on your needs.
Example 2 for Email drip:
In this scenario, we will add a condition to check if the lead has opened the first email or not.
After someone signs up for the list, an email is sent after 1 minute.
Based on the condition, checking if the lead has opened the email after 1 day or not, you can create two different email sequences as shown below.
Please note that we need always to set a delay before the condition.
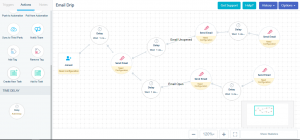
To add a condition, you need to click on the setting icon on the arrow joining the 2 items and specify the condition.

In that way, you can create your own customized workflow for an email drip.