To set up a landing page domain using cloudflare, follow these steps:
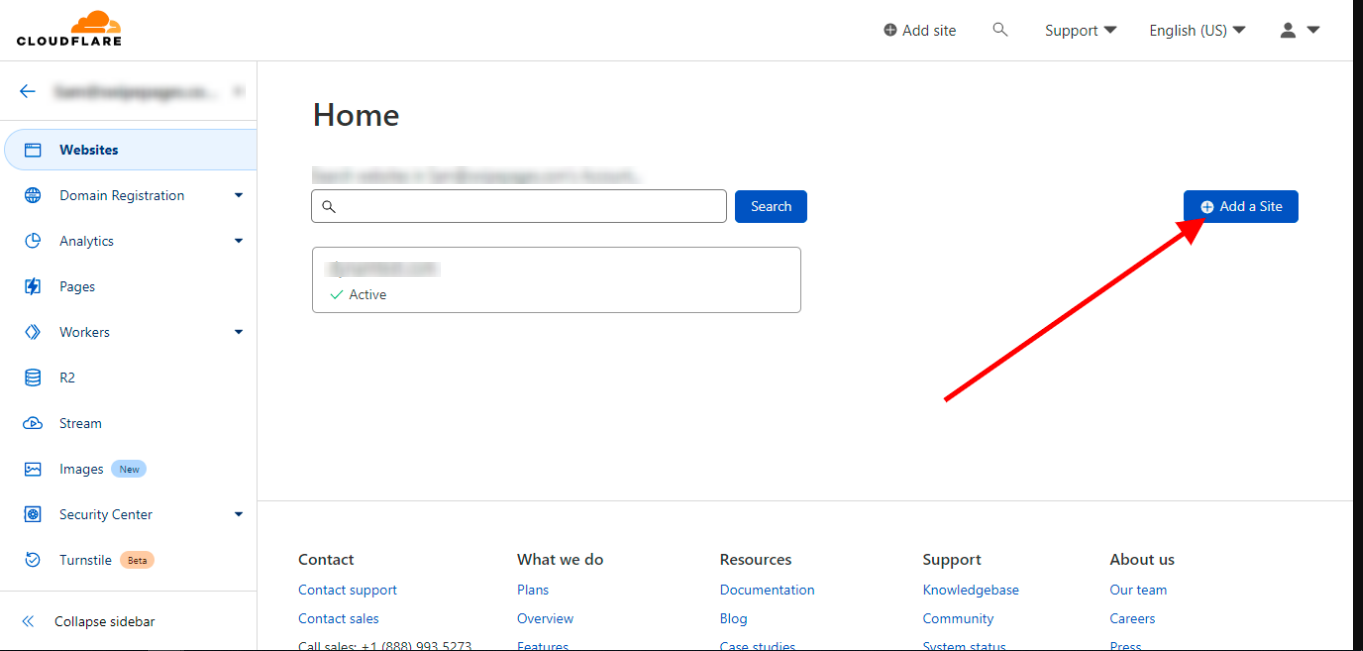
Step 1: Add Your Domain to Cloudflare
- Create or log in to your Cloudflare account.
- Click on the Add a Site button.
- Enter your domain name (only the root domain, e.g., domain.com, without www, http, or trailing slashes).
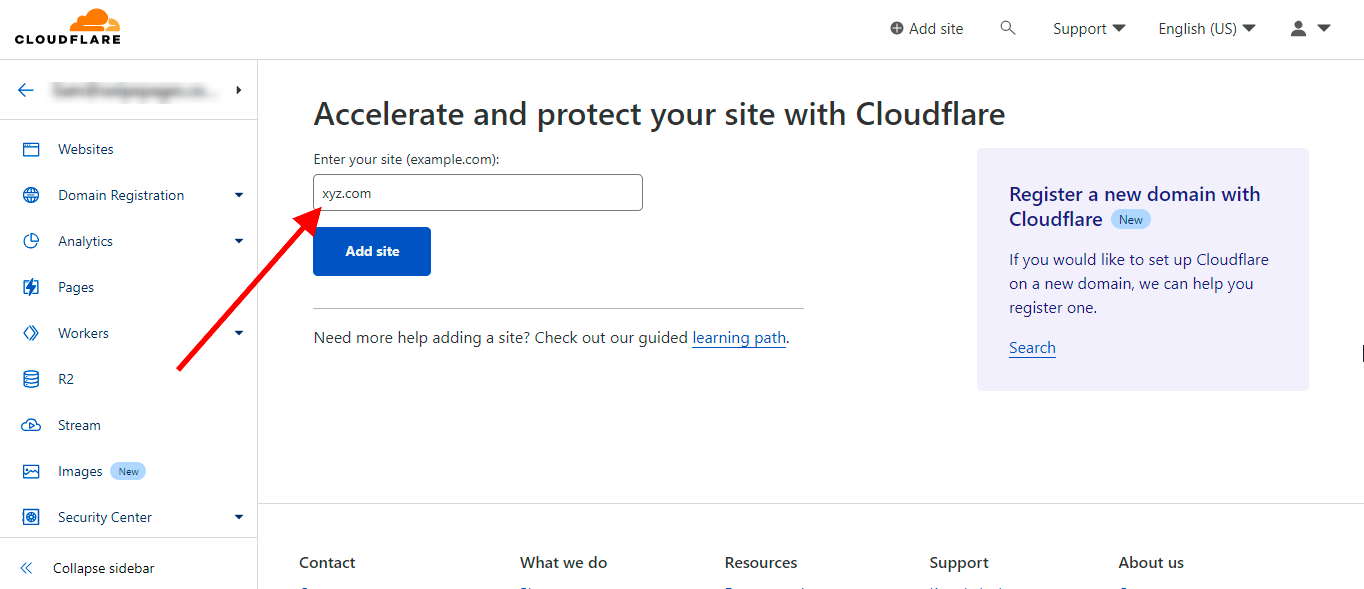
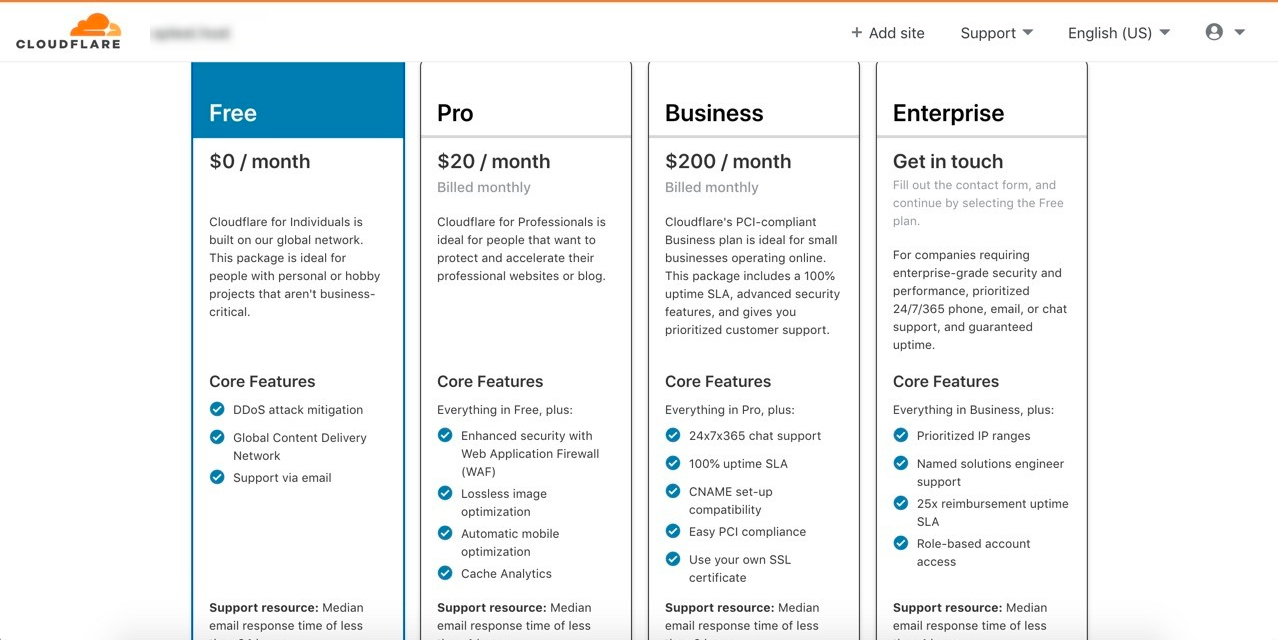
- Choose the Free Plan and click Continue.
- Cloudflare will scan and display your DNS records. Do not make any changes. Simply click Continue.
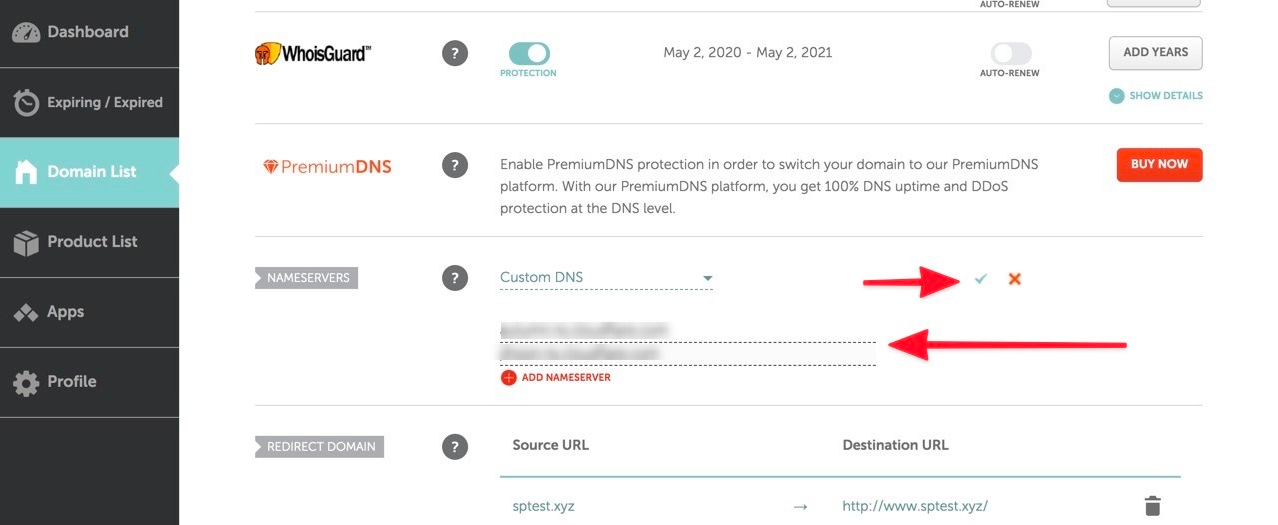
Step 2: Update Domain Nameservers
- Log in to your domain registrar (e.g., GoDaddy, Namecheap).
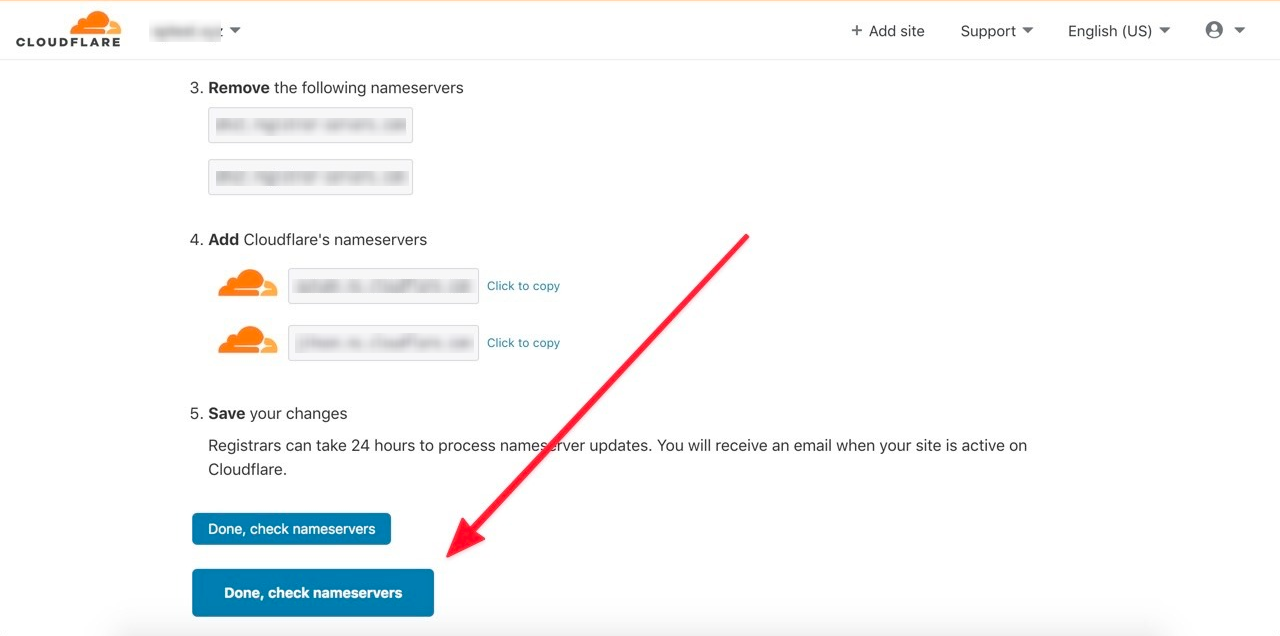
- Replace your existing nameservers with the ones provided by Cloudflare.
- Save the changes.
Note: DNS updates can take up to 24 hours to propagate, but changes often reflect within a few hours.
After waiting a few hours, go back to Cloudflare and click Done, Check Nameservers.
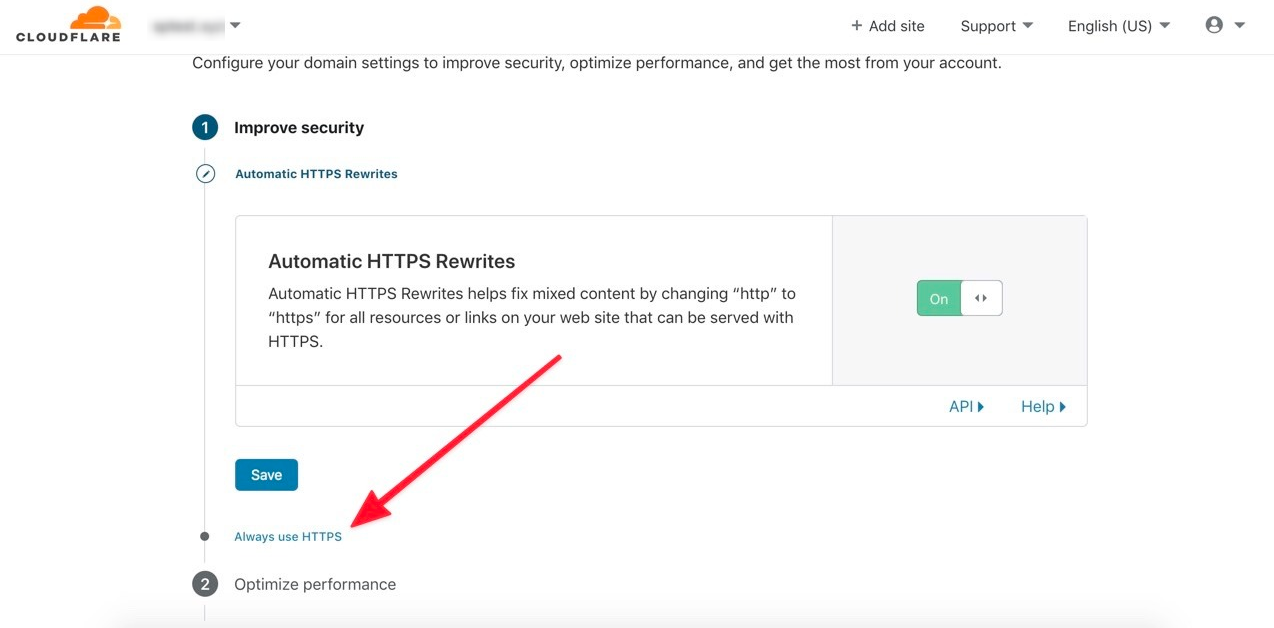
Step 3: Configure Cloudflare Settings
- Turn ON Automatic HTTPS Rewrites and Always Force the HTTPS option
- Click Finish to complete the setup.
Step 4: Add the whitelabel domain in the platform.
- Add your main domain to Landing page Domains section in settings. i.e: add www.mysite.com or mysite.com to your settings: Go to Settings -> Landing Page Domains, click on Add a Custom domain.
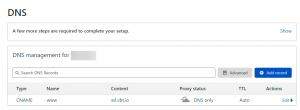
Step 5: Add CNAME Record in Cloudflare
- Go back to Cloudflare and open the DNS settings for your domain.
- Click Add Record.
- Select CNAME as the record type.
- Add the CNAME record fields as follows:
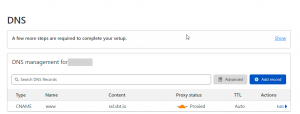
- Click on the orange cloud and turn it grey:
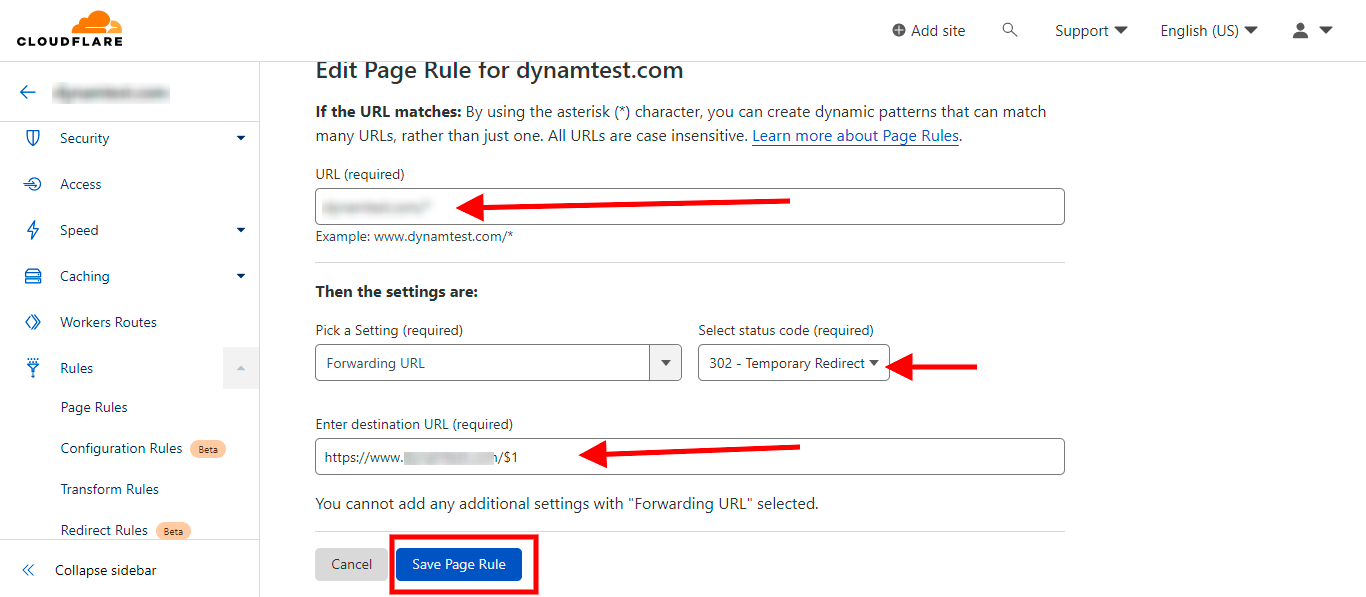
Step 6: Set Up Page Rule for Root Domain Redirect
- In Cloudflare, navigate to the Rules section and select Page Rules.
- Click on Create Page Rule.
- For the URL pattern, enter: yourdomain.com/* (This matches all pages on your domain.)
- In the settings: Choose Forwarding URL, Select either 301 (Permanent Redirect) or 302 (Temporary Redirect).
- In the destination URL field, enter: https://www.yourdomain.com/$1
- Click Save Page Rule.