Marketing campaigns such as Facebook sponsored Ad or event registration often require few assets working together to be able to capture and nurture the lead. Assets such as landing pages, email templates, automation drips, and forms are essential for the success of these campaigns. With Campaign Groups, you can organize these assets into groups, then easily copy them when you are running similar campaigns for yourself or your clients…
Campaign Groups can be used on the platform by following these simple steps:
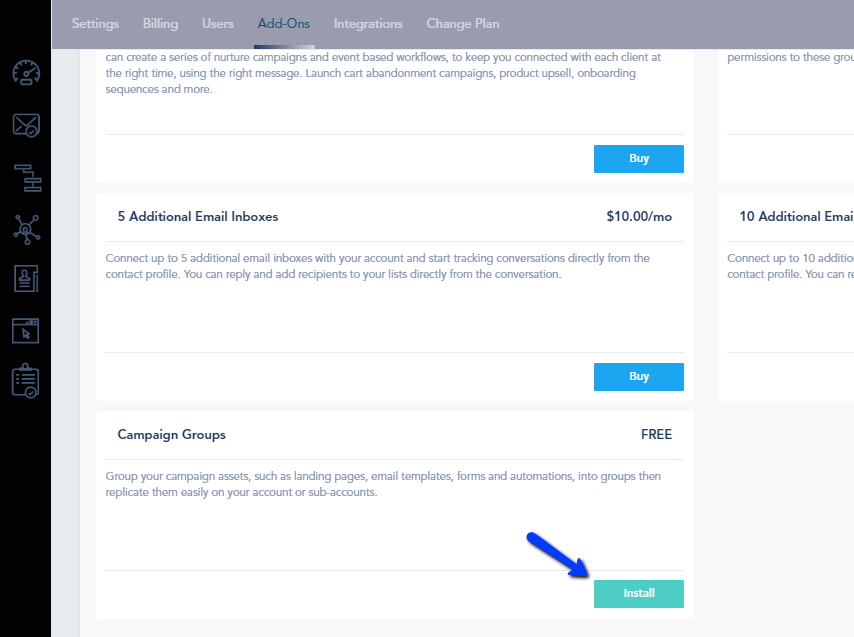
Step 1: Install the Add-on
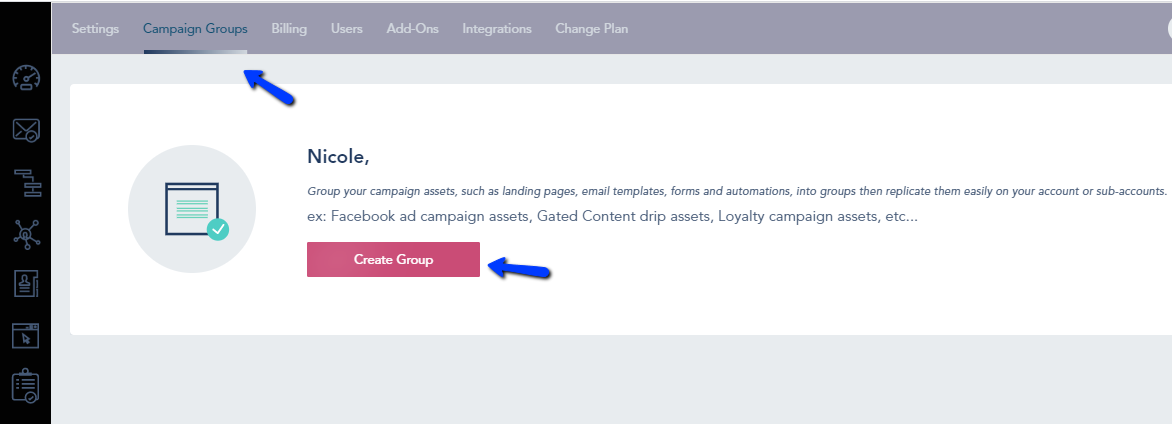
Step 2: Create Group
Step 3: Attach Assets
Step 4: Attach More Assets if needed or duplicate or copy to a subaccount
Step 5: Attach assets in an opposite way
Step 6: Copy to Account
Step 1: Install the Add-on:
Go to Add-ons and Install the Campaign Group Add-ons:
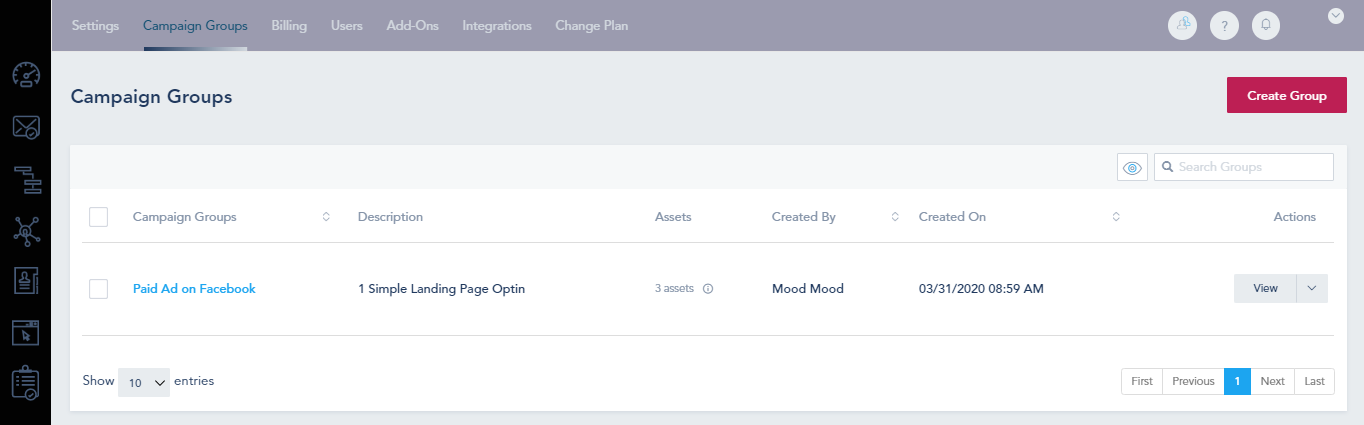
Step 2: Create Group
After installing the add-on, refresh your page and you will see the Campaign Groups here, click on Create Group:
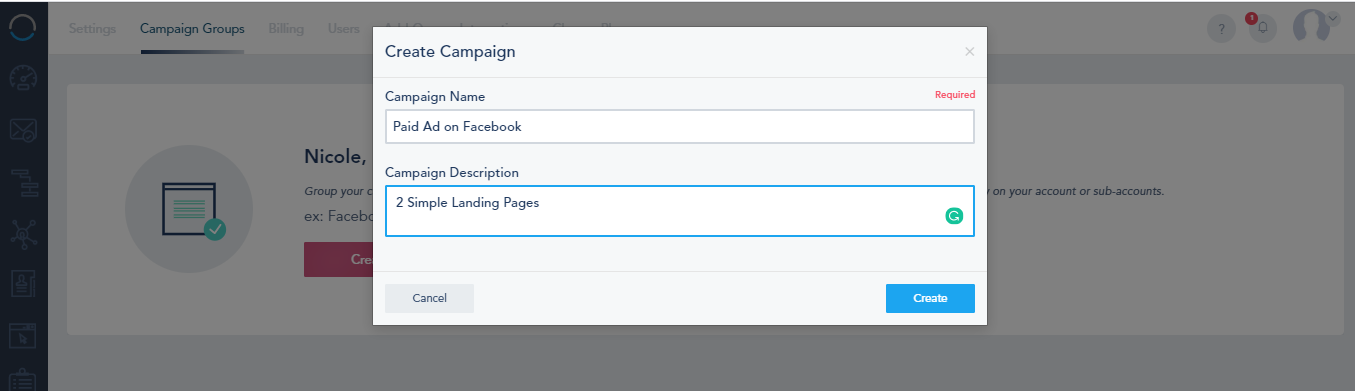
Give your Campaign Group a Name and a description (for your own reference):
Step 3: Attach Assets
After creating the campaign group, you will choose the Assets that you’d like to attach from the following:
Landing Pages, Email Campaigns, Automations, Popups, Lists, Goals, Email Templates, Automated Messages, Dashboards.
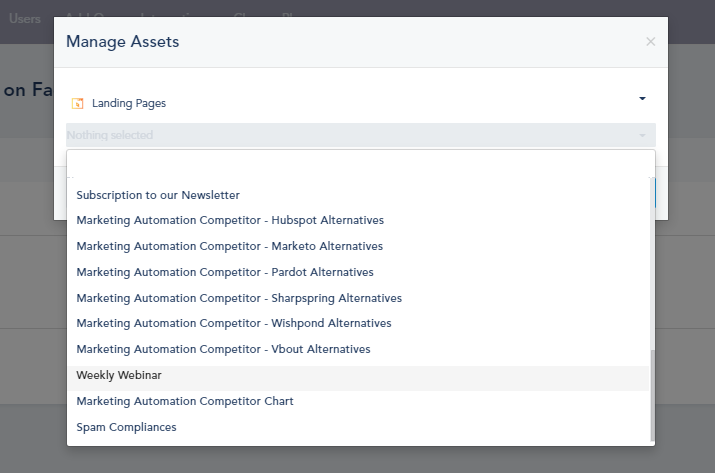
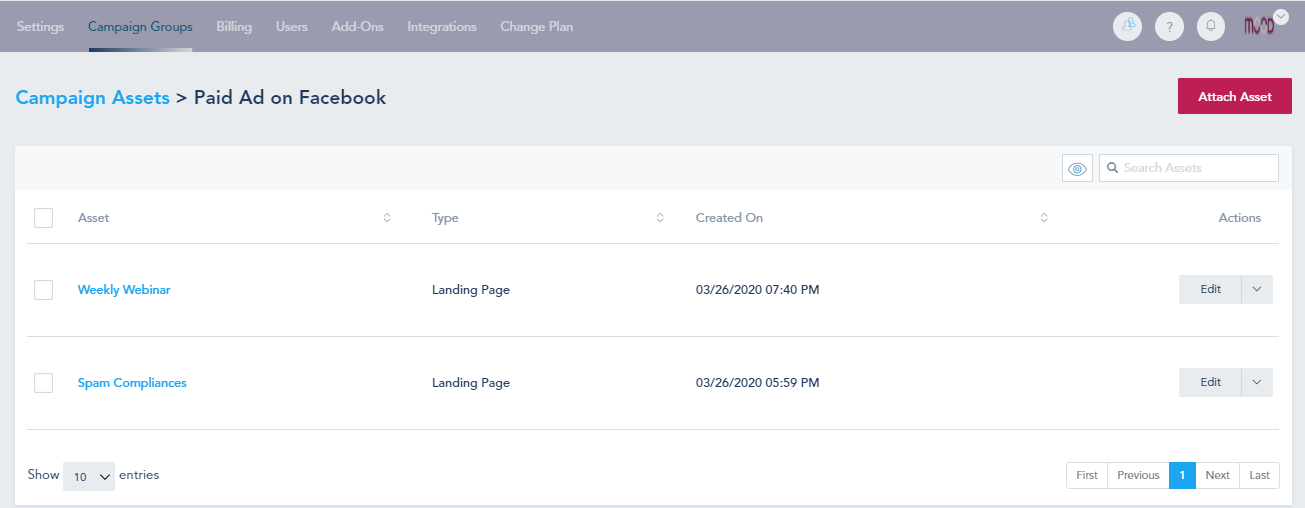
You will see the assets that you chose here:
Step 4: Attach More Assets if needed:
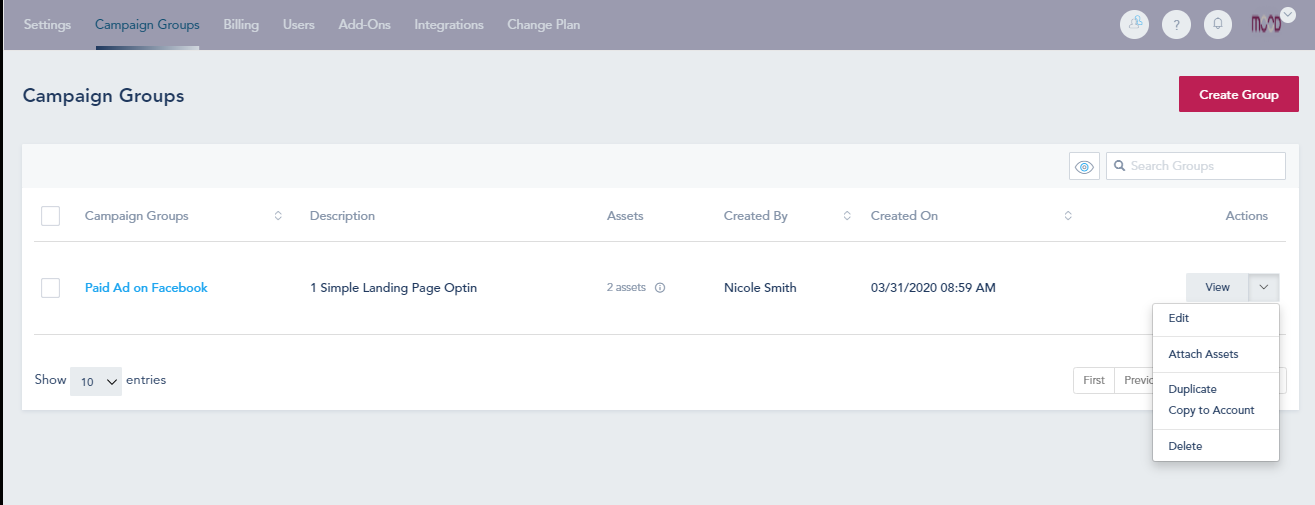
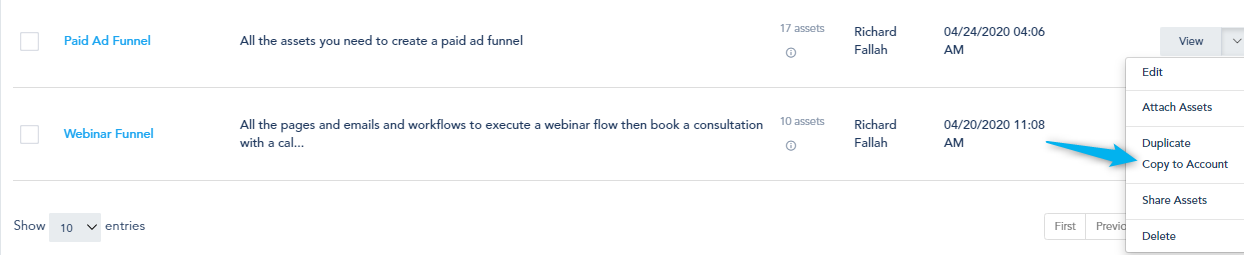
Once you finish, go back to Campaign Groups. You can choose from the dropdown menu to attach more assets, duplicate the campaign group or copy to account if you’re an agency:
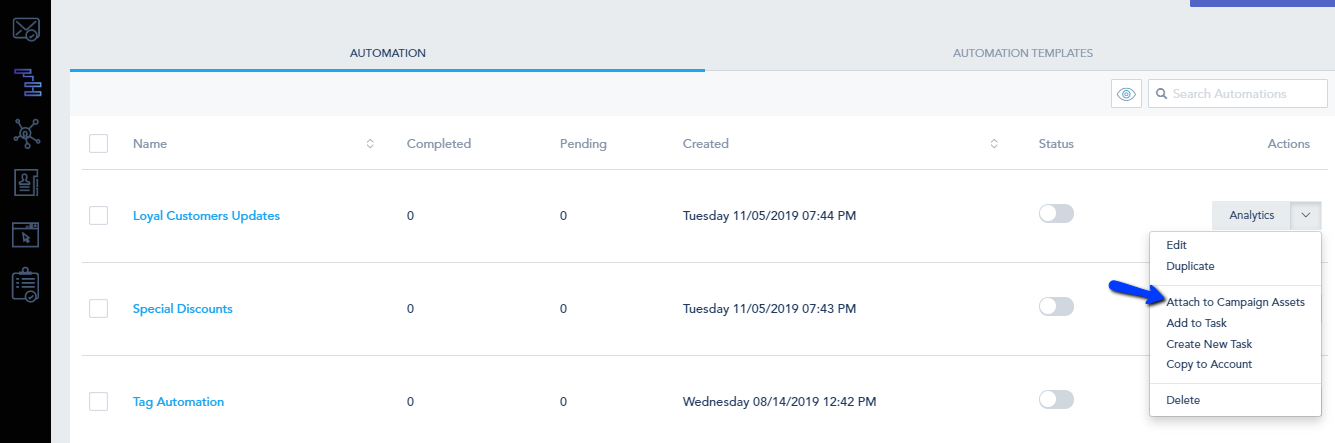
Step 5: Attach assets in an opposite way
You can attach from an automation, list, landing page… an asset to the campaign assets
Choose the campaign group:

You will notice that the asset has been added:
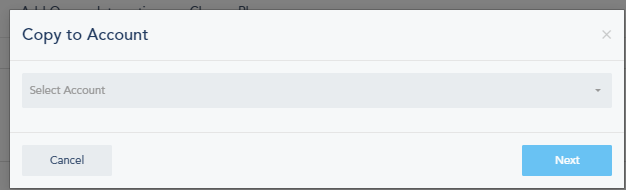
Step 6: Copy to Account
Once you had created the campaign group, choose Copy to Account:
And choose the sub-account that you want to copy the assets to: