Custom SMTP allows you to use your own SMTP while sending from the platform, using your own IP pools.
In the following documentation, the following is covered:
- Configuring Custom SMTP
- Custom SMTP and Agency accounts
- How Custom SMTP is applied within your account
Configuring Custom SMTP
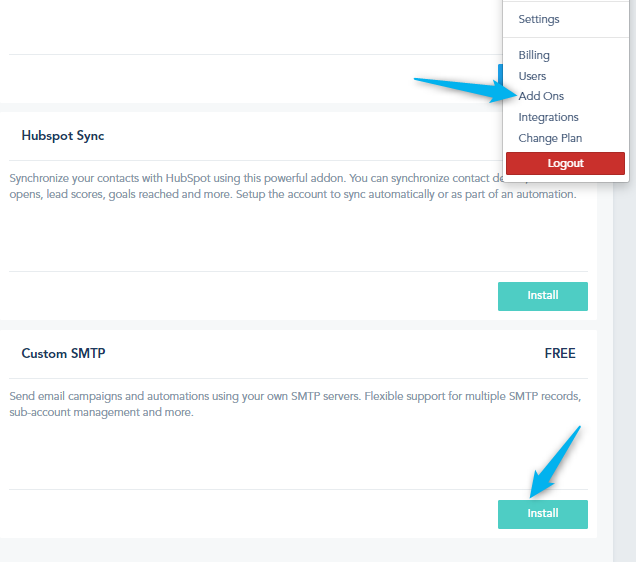
Custom SMTP is an Add-on that you must install or have it as part of your plan:
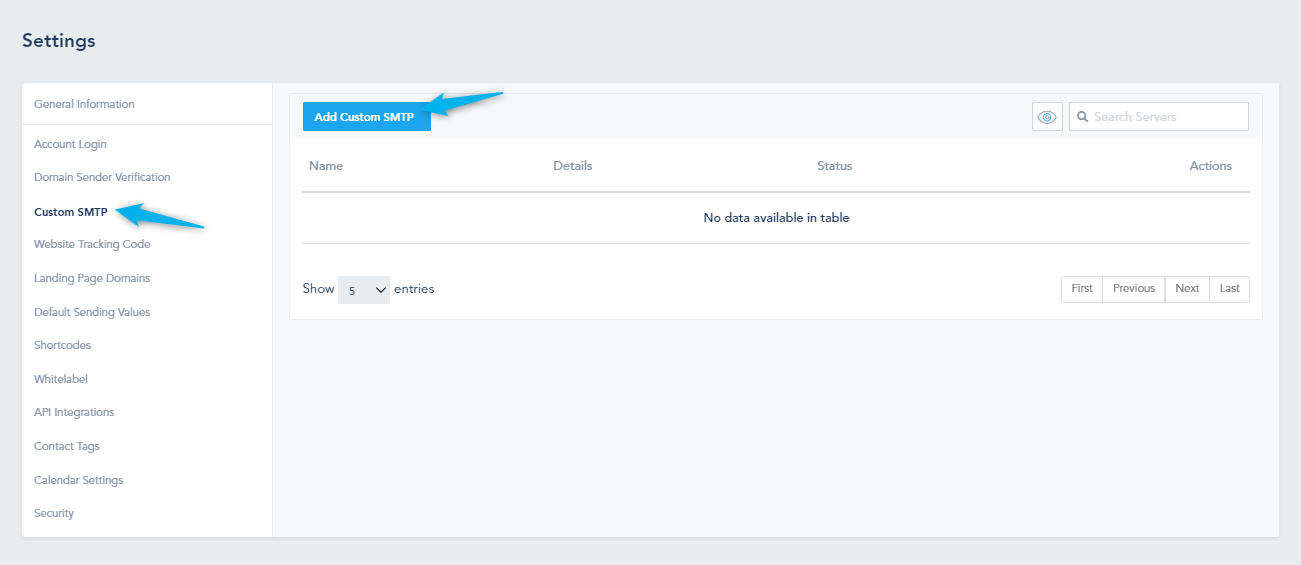
Once installed, you can access the Custom SMTP under Settings to configure it:
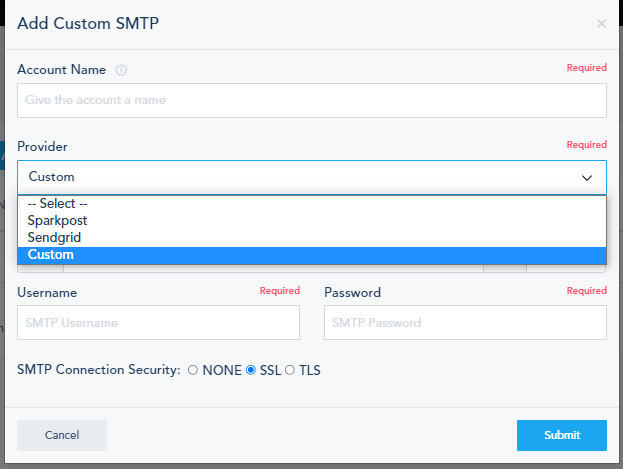
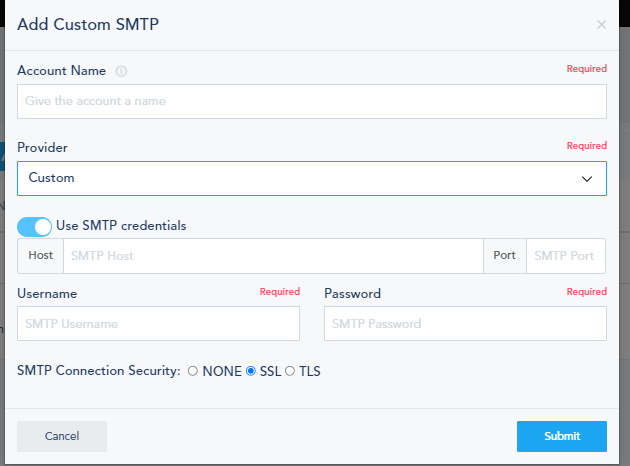
Click on Add Custom SMTP, you will have 3 choices:
- Sparkpost
- Sendgrid
- Custom
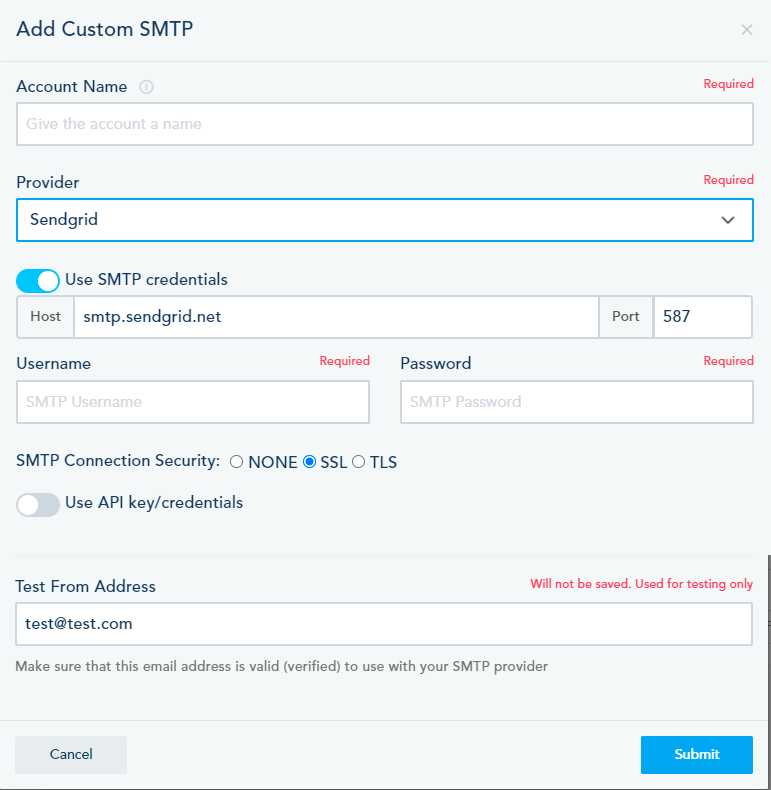
For Sparkpost or Sendgrid, you are able to either use the SMTP credentials or the API key/credentials:
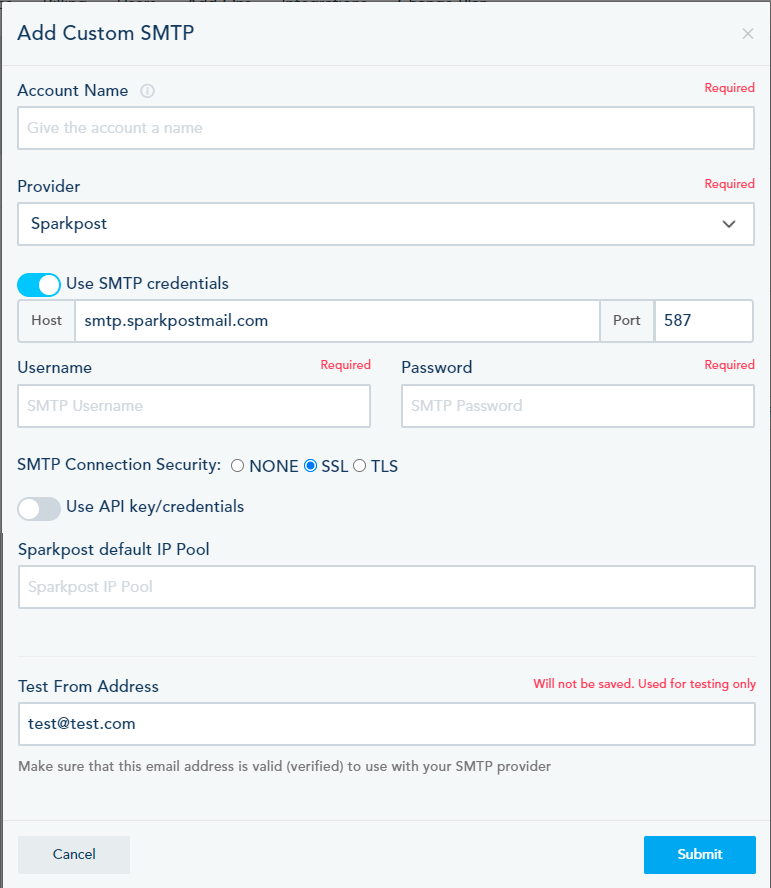
The difference between Sparkpost and Sendgrid is that on Sparkpost you can choose the default IP pool.
Usually, the provider tries to send from the API key, if they weren’t able to, they will revert to the SMTP, that’s why some users may want to add both API credentials and SMTP credentials, however, you can choose to add only one of the two.
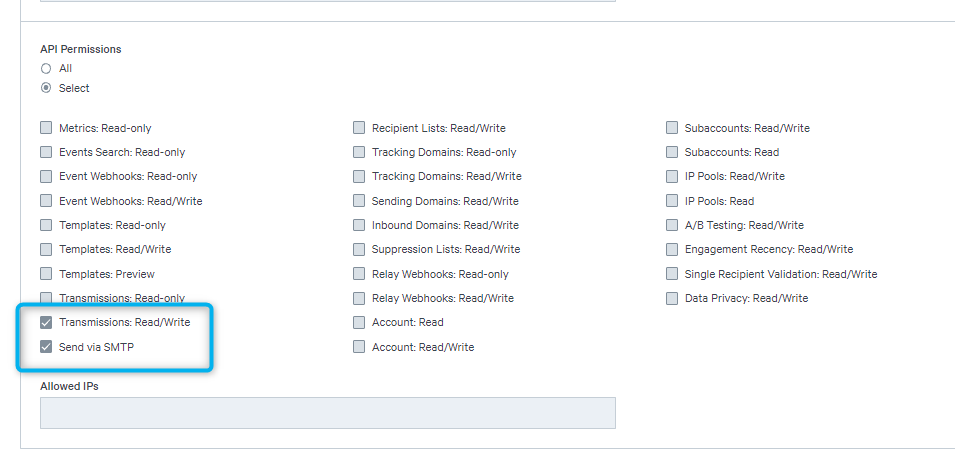
Note that when you want to use API credentials, these 2 are essential to be chosen, otherwise, the custom SMTP won’t connect:
For Custom SMTP, you are only able to add the SMTP credentials:
After filling the SMTP credentials or API key, you will have to add the email address:
NOTE: Make sure that the email address is valid (verified) to use with your SMTP provider, otherwise you won’t be able to add the Custom SMTP and will face an error:
This email address will be used for testing only

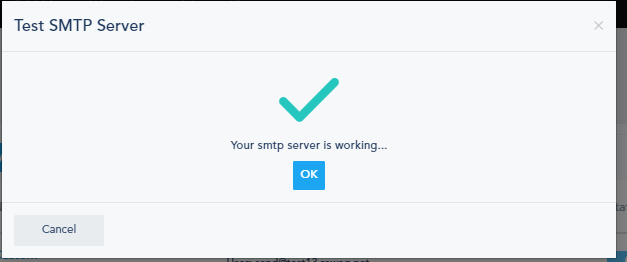
Once you have successfully connected your Custom SMTP, you will be prompt with a pop-up to test it:

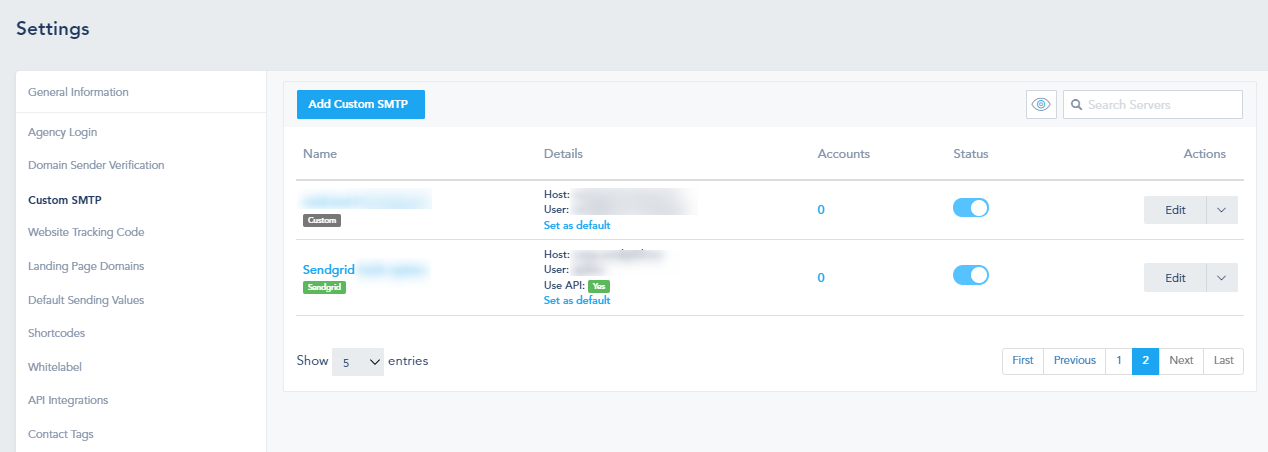
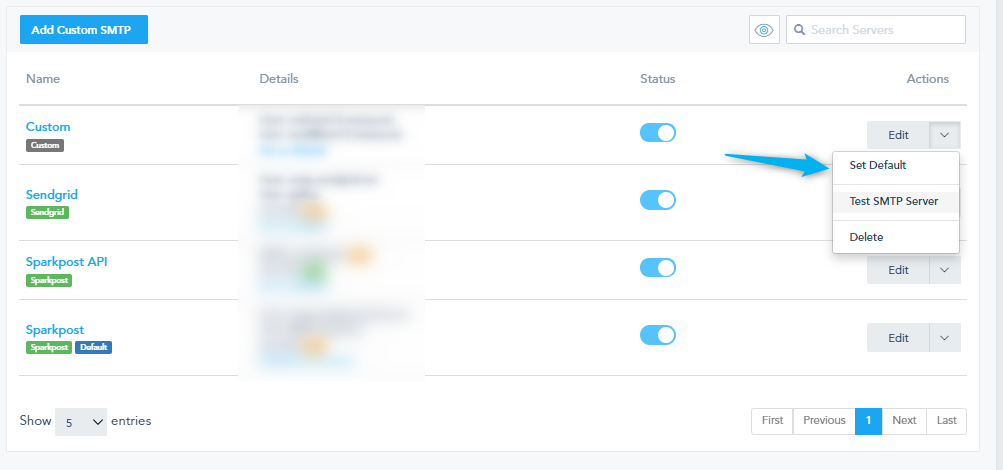
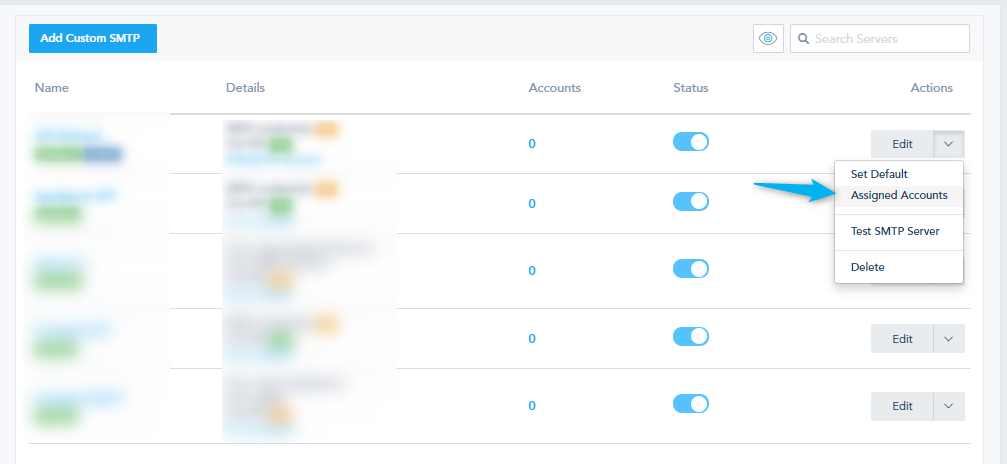
Here, you will view all of your connected Custom SMTP:
You can choose a default SMTP:
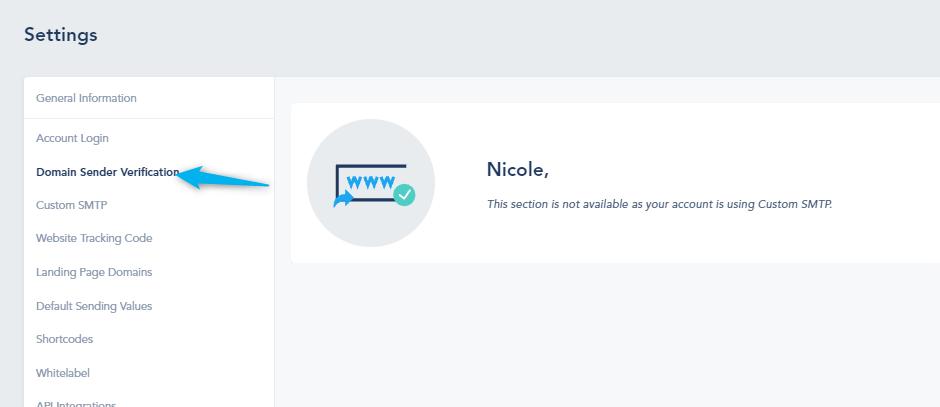
If you set up a Custom SMTP as default, you won’t have any domains under Domain Sender Verification:
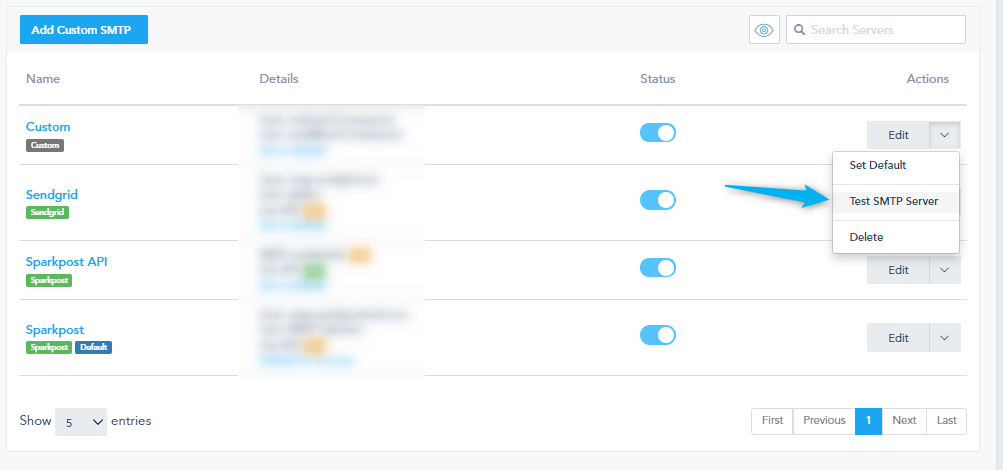
If you want to test the SMTP, click on the drop-down and choose Test SMTP Server:
Finally, if you want to add more than one sending domain with Custom SMTP, you need to add the Custom SMTP for each domain.
Custom SMTP and Agency accounts
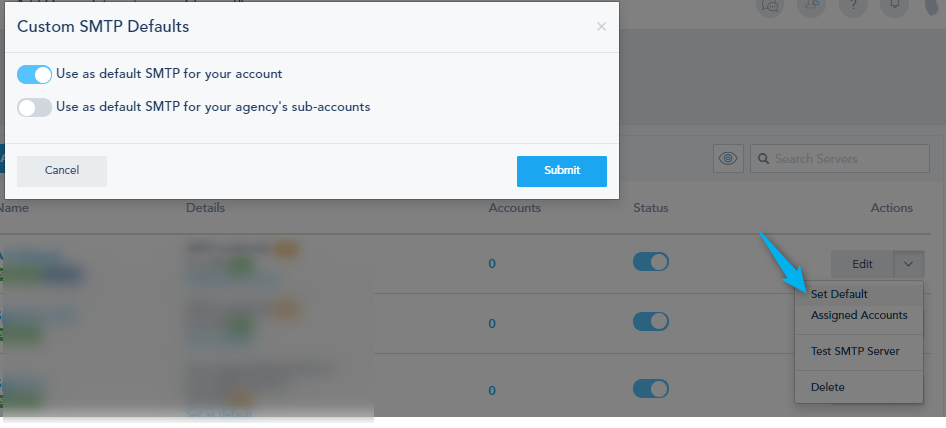
If you have an agency account and are using the Custom SMTP, you will have 2 choices for the default SMTP:
You can use the SMTP as a default for your account and/or use it as default for your sub-accounts.
Of course you can use a different SMTP as default for your own account while using another one for your sub-accounts. Moreover, if you have an SMTP set up as default for your sub-accounts, you can set up another one for other sub-accounts.
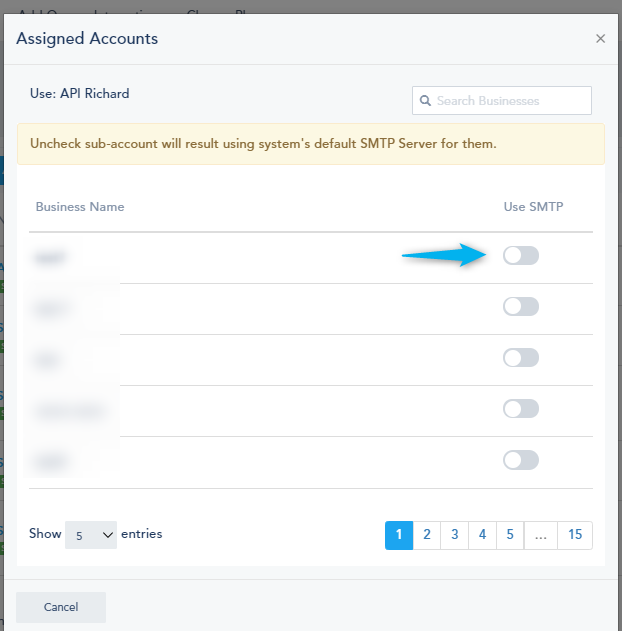
To assign accounts for a custom SMTP, click on Assigned Accounts, or you can click on the number in blue under Accounts:
You will see all your accounts and choose which ones to assign to the Custom SMTP:
How Custom SMTP is applied within your account?
Custom SMTP will be applied in every area that requires emails.
It will be used in email campaigns:
If you don’t use a verified sending email and send the campaign, it will be paused with an error:
If you send from within the lead profile, or send a draft email from an unverified sending domain, it will show you that it was sent but nothing will be received.
Automated messages as well won’t be sent if you don’t use a verified sending domain.
The social reminders will also be sent from the Test email address.

